background image

56

//


Aquaris M10 / M10 4G


Complete User Manual - English

        Apps

Apps

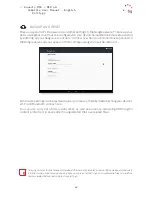
Tap the  

 icon on the 

Home screen

 to access the list of apps. The preinstalled apps, as well 

as those you have downloaded, are found here in alphabetical order. The first six on the list are 

those that you have recently used. To disable this feature go to 

Settings > Google > Search and 

Now > App suggestions. 

The apps are arranged vertically. A search bar has also been included to help find apps faster. 
When using this method to look for an app, you are also presented with the option to access the 

Play Store.

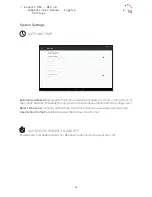
Applications from Unknown Source

To download apps from an alternative store or from a website, you must first configure the 

system to accept the installation of apps from unknown sources.
In the 

Settings > Security

 menu, enable 

Unknown sources

 and accept the warning. Only install 

this type of app when it comes from a trustworthy source.

Summary of Contents for M10

Page 1: ...Complete User Manual M10 M104G ...

Page 2: ...wn in this manual may differ slightly from those of the final product It is also possible that some of the information in this manual does not correspond exactly to the operation of your device due to firmware updates To obtain the latest version please go to bq com BQ shall not be held liable for any issues relating to performance or incompatibility resulting from modification of the registry set...

Page 3: ...these translations Mundo Reader shall not be responsible for the accuracy of said translations and reserves the right to request their removal from the public domain if it sees fit Trademarks The BQ logo is a registered trademark of Mundo Reader S L The Android and Google SearchTM logos are registered trademarks of Google Inc Wi Fi is a registered trademark of the Wi Fi Alliance Bluetooth is a reg...

Page 4: ...esktop Features 16 Adjusting Screen Rotation 16 Buttons and Icons 17 Screen Lock 18 Home Screen 21 Status Bar 22 Notification Bar 24 Keyboard 24 Lock Screen 25 Settings 25 WI FI AND NETWORK SETTINGS 25 Wi Fi 26 Bluetooth 27 Data Usage 28 More 29 DEVICE SETTINGS 29 Screen 30 Sounds and Notifications 32 Apps 35 Storage and USB 36 Battery 37 Memory 37 Users 38 PERSONAL SETTINGS 38 Location 39 Securit...

Page 5: ...ay Store 57 Internet Browser 58 Hangouts 58 Calendar 58 Maps and GPS Navigation 58 Dolby ATMOS 59 Email 60 News and Weather Genie Widget 60 BQ Plus 60 Voice Recorder 60 Contacts 63 Calculator 63 Clock 64 FM Radio 65 Useful Advice 65 Optimising Battery Life 65 OTA Updates 66 Voice Search 67 Text Selection 68 Appendices 68 Appendix A Technical Specifications 68 Appendix B Cleaning and Safety 71 Appe...

Page 6: ...efore using your BQ device for the first time If any of the following items are missing contact the dealer from whom you acquired the device Aquaris M10 M10 4G USB type A to micro USB type B cable Mains adapter SIM key Documentation Quick Start Guide Warranty and important information BQ accessories For the Aquaris M10 4G model only ...

Page 7: ...may damage the device Do not attempt to remove the battery Removing it may invalidate the warranty Microphone Capacitive button Notification LED Micro SIM slot Back Menu Speaker Home Micro USB port Micro HDMI port Earphones jack Rear camera Front camera Light sensor Volume button Power button Screen lock MicroSD slot Speaker For the Aquaris M10 4G model only ...

Page 8: ...move the battery cover The SIM key is found in the device s box With the device switched off insert it into the ejector hole and extract the tray Place the micro SIM card on the tray Ensure correct positioning by aligning the notch on the card with that on the tray see image Insert the tray and micro SIM into the slot Your Aquaris M10 4G only accepts micro SIM cards For the Aquaris M10 4G model on...

Page 9: ... Aquaris M10 M10 4G press and hold the power button for a few seconds It is located on the right side of the device To switch it off press and hold the power button for two seconds A menu will appear with various options Select Power off A brief press on the power button will switch off the screen but not the device ...

Page 10: ...to the slot making sure the metal pins enter first and that they face toward the back of the device Push the card in until you hear a slight click which indicates that it has been inserted correctly If it is not inserted correctly the device may not recognise it and its contents will not be accessible To remove the microSD card follow the steps in the previous section in reverse order while taking...

Page 11: ...ro USB port on your tablet B Using a laptop or desktop computer 1 Connect the USB cable to a compatible USB port on your computer 2 Plug the other end of the cable into the micro USB port on your tablet The battery in your Aquaris M10 M10 4G is non removable Removal by anyone other than our Technical Support staff may damage the device and invalidate the warranty It is recommended the battery be c...

Page 12: ...MIDI which allows the connection of musical instruments or other devices with MIDI inputs such as keyboards There are a number of ways to transfer files The following steps explain how to do this via a USB connection 1 Connect your Aquaris M10 M10 4G to a computer using the supplied micro USB to USB cable Insert the micro USB connector into the device s micro USB port and the generic USB connector...

Page 13: ... Aquaris M10 M10 4G a setup wizard will help you configure the basic settings for your device such as Language SIM cards Wi Fi networks Add your account Protect your tablet BQ Plus For the Aquaris M10 4G model only After adding your Google account you have the option to add another account to the Gmail application ...

Page 14: ...fferent movements can be made over these points which are linked to different functions Touch Touch the screen briefly to select an icon open an app activate a text entry box etc Touch and hold Touch the screen and hold for approximately 2 seconds to bring up an options menu Drag To move an icon press and hold down drag it to the desired position and then release Getting Started ...

Page 15: ... screens Slide your finger up or down to scroll through a website list or menu Pinch Place two fingers on the screen at the same time separate them to zoom in and bring them together to zoom out Double tap Tap the screen twice in quick succession to zoom in Repeat the action to zoom out You can also use this to activate deactivate the screen Getting Started ...

Page 16: ...s To facilitate navigating through your device s screens the nav bar is displayed by default While using an app you can return to the previous screen by pressing the Back button Go to the Home screen at any time by pressing the Home button You can also press and hold it to access the Google Now application Accesstherecentscreenslistbypressing Menu Ifyoupressandholdit apop upwindow will appear offe...

Page 17: ...will displaytheconfigured unlockoption To change the unlock option press the Apps menu button go to Settings Security Screen lock andchoosefromthefollowingoptions None Swipe Pattern PINand Password Formore information on each of these options go to Settings Security Your Aquaris M10 M10 4G includes a feature that enables you to lock the tablet by double tapping the top part of the screen where the...

Page 18: ...ttery power The notifications and quick settings have now been integrated into one screen Swipe downward to view it On the first swipe the notifications appear on the second swipe the quick settings appear 2 Google Search Tap the search bar to enter the text you want to search for on the internet Voice searches can also be performed 3 Apps menu Here you can access all the apps installed on your de...

Page 19: ...the image you want to use as a background for the Home Screen then tap Set wallpaper to confirm If the selected image is too large it will need to be cropped Widgets select the widgets you want to have on the Home Screen They are distributed vertically and in alphabetical order to make them easier to find Widgets belonging to the same app are positioned horizontally for more clarity Long pressing ...

Page 20: ... to Settings Google Search and Now Now Cards and activate Show all cards Moving and Deleting Icons on the Home Screen To move an element on the Home screen press and hold to detach it from the background drag it to the desired position and release To delete an element drag it to the cross at the top of the screen When the icon turns red release it to delete To uninstall an app drag it to the icon ...

Page 21: ...hen tap the Unnamed folder option You can remove icons from the folder by opening it and dragging them out Status Bar The Status bar contains important information about the device It is always visible at the top of the screen Battery almost empty Battery charging Battery fully charged Wi Fi enabled and connected to a network Sound off and vibrate on Do Not Disturb mode enabled Aeroplane mode Data...

Page 22: ...ettings have now been integrated into one screen To receive notifications adjust the settings of each downloaded app and or add various accounts in Settings Accounts Add an account Slide the panel upward to reveal the Home screen When you slide the bar down with two fingers a list of options appears providing quick and easy access to many settings Choose which options to display or hide using the ...

Page 23: ...tspot settings Brightness select from automatic or manual brightness adjustment and set the desired level Led enables or disables the notification LED Invert colours inverts the colour values Screenshot takes a picture of the screen via the pull down menu Screen record records real time video of what is being shown on the screen Sound record provides access to the app for making audio recordings L...

Page 24: ...lete Lock Screen Google Voice search can be accessed from the lock screen by swiping from the lower left corner Swiping from the lower right corner provides access to the Camera app More information about keyboard settings and text input languages is available via Settings Personal Language input 1 2 3 4 5 6 The keyboard options may vary depending on which application is being used If a PIN or Pat...

Page 25: ...ork you want to connect to enter the password if necessary and press Connect If it connects successfully Connected will appear below the name of the network There is a time limit for entering the Wi Fi password after which the Wi Fi will be disabled We recommend activating the Show password option before entering the password so that it can be written quickly and correctly When Wi Fi is enabled th...

Page 26: ...er via Menu WPS PIN and pressing the WPS PIN physical button on the router BLUETOOTH Enable Bluetooth by going to Settings Bluetooth and moving the selector to the right To rename your tablet show received files or access the advanced settings press the icon To connect your tablet to other devices go to Settings Wireless and networks Bluetooth and select the name that corresponds to your device As...

Page 27: ...bile data The Aquaris M10 4G also allows a limit to be set on mobile data usage If you set a limit the data connection will be disabled once this has been reached Tap the icon to access advanced settings Network restrictions can be accessed here The following options are available specifically to the M10 4G Restrict background data Show Wi Fi and Mobile network settings where data roaming can be e...

Page 28: ...oint allowing the connection to be shared with one or more devices To share a connection via USB connect your BQ to a computer using the micro USB cable and enable the USB Tethering option If you want to share it via Bluetooth then enable the Bluetooth Tethering option To share your tablet s network with a computer Bluetooth must be enabled on both devices VPN this option lets you configure a virt...

Page 29: ...ion allows the tablet s display to be turned on or off with a double tap Castscreen yourtabletcansendanaudio videosignaltoaremotescreen asmartphone another tablet television etc via Wi Fi effectively mirroring its screen on both devices You can Enable cast screen by tapping the icon The tablet will then search for nearby wireless screens Note that for this to work the remote screen must be compati...

Page 30: ...ere you can also enable or disable system sounds and vibrations such as Dial pad tones Screen lock sounds Touch sounds and Vibrate on touch The Do not disturb mode is also found here It allows certain notifications to be set as priority as well as the creation of automatic rules Thanks to these time and event rules you can choose under which circumstances a given do not disturb mode is to be activ...

Page 31: ...ction lets you configure how your tablet displays notifications Firstly throughtheWhendeviceislockedoption youcandecidewhichnotificationsareshown Choose between Show all notifications and Do not show notifications Set the colour and the blink speed via the notification LED option By clicking on the coloured circle you can customise these parameters for pre set notifications low battery and even in...

Page 32: ... the cache and app data can be cleared the amount of Data usage by the app via Wi Fi in the case of the M10 its Permissions settings for Notifications Open by default where it can be set as the default app for certain operations its Battery usage during the current charge cycle and its Memory usage For greater control over your privacy the device comes with a Permissions manager that allows modifi...

Page 33: ...ions By default preinstalled apps do not have all their permissions enabled If when opening one of these apps for the first time it requires a permission it will request that you allow or refuse it You can also select from among your installed apps which of these you want to be the default for assist and voice input and the browser Do this via Settings Applications then tap on the icon and select ...

Page 34: ... app will never be shown Treat as priority notifications from this app will be heard when the Priority only option of the Do not disturb mode is enabled Allow peeking allows the app to show some notifications on the current screen This option is enabled by default Disabling it forces notifications from the app to display only in the notification bar These settings can also be accessed by long pres...

Page 35: ...ettings Storage and USB SD card or USB drive Settings Eject This menu includes a native file manager for performing basic tasks making a third party file manager unnecessary Access it via Settings Storage and USB Explore This file manager allows content to be opened deleted and copied to other folders To delete a file select more if required long press it and tap the icon To copy a file tap and se...

Page 36: ...ount of network accesses and automatic syncing done by apps This feature is enabled by default To disable it go to Settings Battery Battery optimisation and select the apps that are not to be optimised Tapping on an application or service shows its estimated battery usage in mAh Additionally tapping on the battery graph shows a new bar that indicates how much time the device s battery was drained ...

Page 37: ...nt of memory used as a percentage and the amount of free memory available on your device Tapping on Memory used by apps will show the average memory use for each app or Android service USERS If you want to share this device with others you can create additional users You can also access this option by pulling down the notification bar and double tapping the icon Each user has their own space and c...

Page 38: ...e Mode section you can choose from High accuracy determines your location using GPS Wi Fi and mobile data networks Battery saving determines your location using only Wi Fi and the mobile network Device only determines your location using GPS only The Recent location requests section presents a list of apps that have requested access to your device s location and the amount of battery they used The...

Page 39: ...tial storage section allows credentials to be managed Trusted credentials can be viewed cleared or installed from a microSD card Screen pinning can be enabled in the Advanced section This keeps the current screen in view until it is unpinned ACCOUNTS Here you can choose which email accounts POP IMAP or Exchange you want to sync with your BQ To add a new account tap on Add account Select an Exchang...

Page 40: ...n a radius of 30 metres and the Set up nearby device serves to transfer a device s configuration to another downloading the Google account data via Wi Fi and sending it by Bluetooth to the new device You can also enable and disable Google Now on tap This new feature allows you to perform a search via Google Now based on the content of the current screen For example it might identify data concernin...

Page 41: ...he middle one LANGUAGE AND INPUT The system language automatic spelling checker and personal dictionary can be set up in this section You can also configure the keyboard text input methods voice typing and pointer speed The advanced settings for each entry method allow various options to be selected such as vibrate and sound on keypress Settings ...

Page 42: ...their corresponding data will be restored All network settings can be restored quickly and easily thereby reestablishing your device s Wi Fi and Bluetooth connections You can also carry out a factory data reset as well as erase any remaining DRM digital content protection licences after having deleted their associated files Carrying out a factory data reset will erase all the data on the tablet s ...

Page 43: ...tion information or the mobile network Disabling this option will activate manual date and time configuration Select time zone manually set the time zone that the network provides automatically Use 24 hour format enables disables the 24 hour time format SCHEDULED POWER ON AND OFF Enables you to schedule when your device will automatically power on or off ...

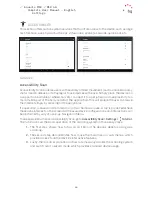
Page 44: ... browse the internet simply by pressing on the peripheral Its operation is based on the interaction of two Cartesian axes A tap is produced where these axes intersect on the screen All the usual device configurations and interactions can be performed by way of a pop up Navigation Menu To see basic instructions on Accessibility Scan go to Accessibility Scan Settings Tutorial The tutorial shows the ...

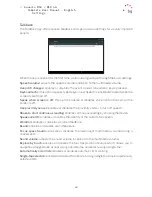
Page 45: ...ximity sensor enables or disables the proximity sensor to turn off speech Shake to start continuous reading enables continuous reading by shaking the device Speak caller ID enables or disables the identity of the caller to be spoken Vibration enables or disables vibration feedback Sound enables or disables sound feedback Focus speech audio enables or disables the lowering of multimedia volume duri...

Page 46: ...o zoom out Slide two or more fingers to pan around the screen Pinch two or more fingers together or spread them apart to adjust the zoom level Temporarily magnify what s under your finger by triple tapping and holding Drag your finger around to explore different parts of the screen Zoom does not affect the keyboard or the navigation bar Large text enables disables enlarged app and system fonts tha...

Page 47: ...n experimental feature It exchanges colour values that is black text on a white screen will change to white text on a black screen Colour correction enables the device to compensate for colour blindness PRINTING Android 6 comes with wireless printing functionality as standard The tablet can synchronise with a web connected printer check compatibility with the printer manufacturer allowing your doc...

Page 48: ...he menu includes Take bug report Stay awake Process stats USB debugging Allow mock locations Force GPU rendering Show CPU usage Limit background processes The Developer options menu is hidden in Android by default To enable it go to Settings About tablet and tap the last option Build number repeatedly until a message informs you that the developer options have been correctly enabled These options ...

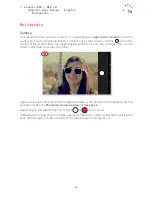
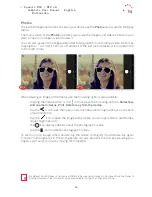
Page 49: ...en Each tap toggles between the front and rear cameras Both can be used for still shots and video recording Lightly swipe up or down to cycle through the modes or tap directly on the desired one The available modes are Panorama Camera Video or Time Lapse Depending on the selected option tap the or icon to shoot To zoom when taking photos or video use a pinch gesture on the preview before taking th...

Page 50: ...light It allows switching between automatic and manual modes the latter having values that range from 100 to 1600 Aw Choose from five types of light settings The default setting is Auto Take photographs in black and white High Dynamic Range is a photography mode that increases a photograph s dynamic range without loss of detail by taking three shots with different exposures and superimposing them ...

Page 51: ...bles disables the autofocus during video recording Enables disables audio recording Displays a grid to facilitate framing the video Panoramic Mode When shooting in this mode arrows will guide your panning The tablet can be positioned vertically or horizontally Try to keep the device as straight as possible to obtain an optimal result Grey dashed arrows that blink during shooting serve as guides An...

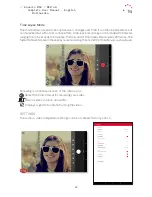
Page 52: ...ith intervals ranging from 0 5 seconds to 5 minutes Each second of time lapse video requires 30 frames The fasterthateventsmoveinthesceneyouarerecording theshorterthetimeintervalyoushoulduse Following is a brief explanation of the menu icons Select the time interval for recording your video Record videos in black and white Displays a grid to facilitate framing the video SETTINGS The camera video a...

Page 53: ...ke picture or Volume Take picture is the default value ZSL Enable or disable zero shutter lag mode Video camera settings Image stabiliser reduces vibration while recording Volume keys assigns a function to the volume keys Choose from Zoom Take picture Record video or Volume Take picture is the default value General settings Beep during countdown enables or disables sound during countdown If the tw...

Page 54: ... the following options Slideshow Add an album Set as Print Delete copy from the device Tap the icon to see the apps and social networks through which you can share a multimedia file Tap the icon to open the image editor where you can apply filters add frames adjust brightness etc The icon displays details about the photograph or video Tap the icon to delete a photograph or video To zoom in on an i...

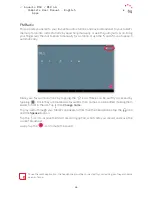
Page 55: ... the track currently being played To open the playback options panel tap or slide upward the bar located near the bottom of the screen This panel offers options such as continuous playback the icon on the left that restarts the entire playlist once it has finished repeat the last song pause skip and random From here you can also rate the song by using the and icons More options can be found by tap...

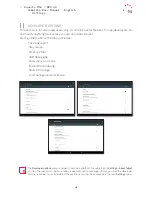
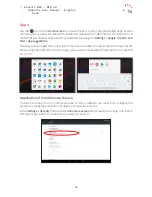
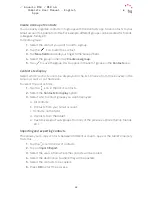
Page 56: ...p suggestions The apps are arranged vertically A search bar has also been included to help find apps faster When using this method to look for an app you are also presented with the option to access the Play Store Applications from Unknown Source To download apps from an alternative store or from a website you must first configure the system to accept the installation of apps from unknown sources ...

Page 57: ...e in the top right corner beside its name The following icons are found in the top left corner under the tabs Go back or forward move backward to previously visited pages or move forward through these Reload page refreshes the content of the current page Tap the Menu icon to access the following options New tab adds another tab This allows simultaneous browsing of different websites New incognito ...

Page 58: ...rom your current position whether travelling on foot or by car This app features a service which locates affiliated companies and establishments Please note that this information including the maps is not preloaded onto your device which means an internet connection will be required whenever navigation is used Dolby ATMOS To access the Dolby app and adjust your device s audio go to Apps menu Dolby...

Page 59: ...thin Gmail found in the Apps menu you can access your inbox and adjust settings such as how emails are displayed how they are read or replied to and how notifications are received Furthermore several different accounts can be grouped together allowing simultaneous reception of email from all these Any account is compatible with the Gmail app Sending an email 1 Open the Email app and tap the Compos...

Page 60: ...ation is available on the coverage and terms at bq com bq plus Sound Recorder Another tool that comes with your BQ tablet is the Sound recorder Use it to record audio tracks with ease To start recording tap the icon located at the bottom of the screen The counter above displays the duration of the recording Tap the Stop button to end recording The recordings are saved in Settings Storage and USB E...

Page 61: ...ng fields to edit it or on More fields to add new data 5 Tap to save the changes Using a contact From the Contacts app you can contact any previously added person Just tap on the name of the contact you wish to communicate with and their details will appear You can also tap on the photograph to bring up a quick menu From here you can Send an email Tap on the desired email address Other options tap...

Page 62: ...ts are to be displayed in the list Choose from those saved in the Gmail account or on the device To select the contact lists 1 Tap the icon in the list of contacts 2 Select the Contacts to display option 3 Select which contact groups you want displayed a All contacts b Contacts from your Gmail account c Contacts on the SIM d Contacts from the tablet e Customise select sub groups from any of the pr...

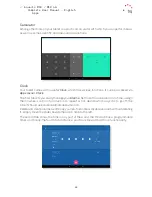
Page 63: ...ou easily manage your Alarms Set more than one alarm at a time assign them names confirm if an alarm is to repeat or not decide which days it is to go off the tone it should use and enable disable vibration Delete and create alarms as often as you like To enable or disable an alarm without deleting it simply move the slider beside the alarm time to the left The second tab shows the time in any par...

Page 64: ...favourite stations by tapping the icon These can be swiftly accessed by tapping Once they are marked as favourites their names can be edited making them easier to find in the list Tap then Change name To play audio through your tablet s speakers rather than the headphones tap the icon and the Speaker option Tap the icon to access the Start recording option which lets you record and save the curren...

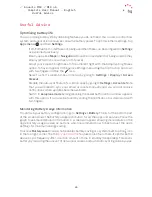
Page 65: ...counts Note that you will need to sync your email accounts manually and you will not receive notifications when updates become available Switch to Aeroplane mode by long pressing the power button until a window appears with this option It can also be found by sliding the notification bar downward with two fingers Monitoring Battery Usage Information To optimise your battery configuration go to Set...

Page 66: ...ill guide you through the entire installation process To check for an update package manually go to Settings About tablet System updates Update A message will appear informing you that the system is checking for updates If one is available the installation process will occur as described above Voice Search On the Home screen there is a widget containing a microphone icon Tapping it will launch the...

Page 67: ...ion the options for selecting text now appear beside the selected text These options are described textually rather than with icons making them easier to recognise A Share option has also been added Selected text can also be instantly translated To do this first download the Google Translate app Useful Advice ...

Page 68: ...g on the device Do not apply any cleaning sprays or liquids directly onto the screen or casing Screen use a clean soft lint free cloth to remove dust and dirt from the screen To remove fingerprints and stains use a cloth with a mild cleanser Casing Use a soft cloth slightly dampened with a mild cleaning solution Rinse the cloth in clean water wring it out thoroughly and wipe the casing to remove a...

Page 69: ... Switch off the device upon boarding an aeroplane The electronic components of a motor vehicle may malfunction as a result of radio frequency interference from the device Avoid placing the device near the abdominal and genital area especially in the case of children adolescents and pregnant women Prolonged exposure to high levels of sound pressure can cause permanent damage to hearing It is recomm...

Page 70: ...luetooth and WLAN may be prohibited on aeroplanes and in other places where radio transmissions are not permitted In the aforementioned places ask permission before enabling Bluetooth or WLAN even in Aeroplane mode Although the device is designed to operate within a temperature range of 20 ºC to 55 ºC we do not recommend using it at temperatures below 10 ºC or above 38 ºC Outside of this range the...

Page 71: ...ody This device requires an adequate network connection in order to send data files or messages Sometimes the transmission of data files or messages may be delayed until an adequate connection becomes available Until the transmission has completed be sure to heed the aforementioned separation distance Appendix D Disposing of this Product Correctly Electrical and electronic waste Applicable within ...

Page 72: ...Firmware version BQ Aquaris M10 1 0 0 20151103 0254 BQ Aquaris M10 4G 1 0 0_20161115 1045 ...

Page 73: ......

Reviews: