background image

6


US 1-866-877-6637 | 


CAN 1-866-766-3426 | www.aquascapeinc.com

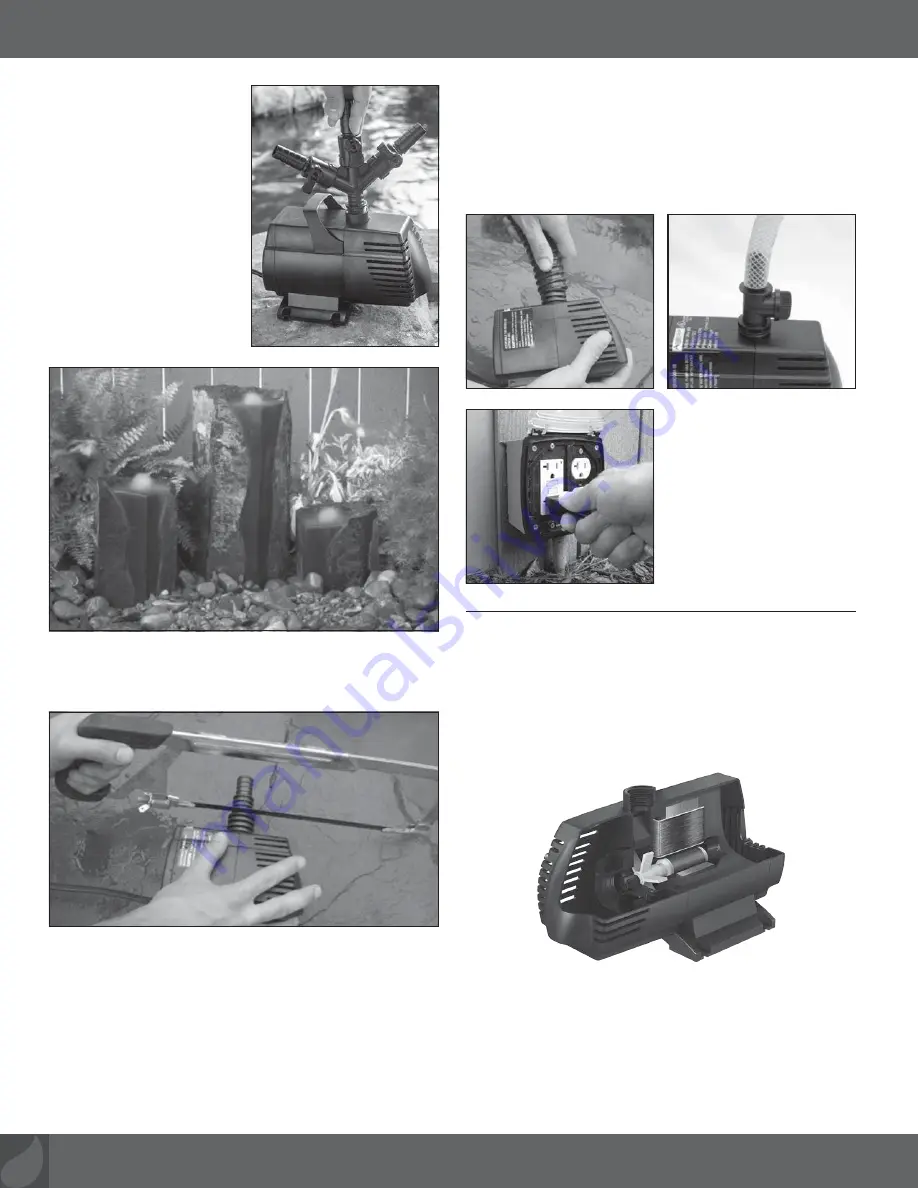
•  The convenient 3-Way 

Diverter Fitting provides 
you with the ability to 
connect and adjust the 
flow rates to as many as 
three different pumping 
locations. Simply adjust 
the valve on the 3-Way 
Diverter Fitting to dial in 
the desired water flow. 
If you are not using all 
three valves, close off the 
unused valve to maximize 
the amount of water flow 
to the remaining valves.

•  If using a diameter pipe larger than the smallest section  

of the Multi Hose Adapter, trim off the smaller sections  
to avoid any flow restriction.

•  Attach tubing to the fitting. If tubing is loose on fitting  

use a hose clamp (not included) to secure tubing onto  
the fitting.

•  In some instances the tubing/hose may be tight and 

difficult to use with hose fitting barbs. If this is the case 
we recommend heating the hose with the use of a hair 
dryer or simply dipping the hose for a few seconds in very 
hot water. Lubrication can also be used; we recommend 
silicone grease or olive oil. We recommend putting the 

•  Connect the pump to an 

outlet that is protected by 
a ground fault interrupter. 
Once the pump is running 
and water is circulating 
through the filter(s) or 
waterfalls, check for 
any fitting or waterfall 
leaks where the external 
connections are made.

Operation and Maintenance

•  

Filter Screens –

 Do not remove the pump cover-

inlet screen or filter sponge while operating the pump. 
Operating the pump without the front cover or filter sponge 
can allow large debris to enter the pump causing the 
pump to fail, thus voiding the warranty.

•  

Filter Screen Cleaning –

 We recommend inspecting 

your pump on a regular basis to make sure it is functioning 
properly. Always disconnect the power before performing 
maintenance on the pump. If you notice the water flow rate 
is diminished, it may be due to the pump’s filter screen or 
sponge becoming clogged with debris. In many cases the 
clogged screen can be cleaned by reaching in to the pump 
and removing, by hand, any debris from the filter screen. If 

fitting on the filter before attaching the tubing/hose. Once 
the fitting is in place, attach the tubing/hose onto the fitting 
with a twisting motion pushing it into place.

•  Connect the other end of the pump tubing to the pond 

filter, such as a biological filter, waterfall spillway or 
pressurized filter or to a decorative fountain or spitter.

91054 - 91005, 91006, 91007, 91008, 91009, 91010 Ultra Pump Instructions D7.indd   6

10/3/14   3:12 PM

Summary of Contents for Signature series 400

Page 1: ...mp For Models 400 Item 91005 550 Item 91006 800 Item 91007 1100 Item 91008 1500 Item 91009 2000 Item 91010 Available in flow rates from 400 to 2000 GPH I N S T R U C T I O N S M A I N T E N A N C E Ul...

Page 2: ...efective No liability for loss or damage of any nature or kind whether arising out of or from the use of the product whether defective or not defective is assumed by Aquascape Inc or its affiliates Co...

Page 3: ...r 8 1 1 Multi Hose Adapter 9 Barb Valve 1 Front Cover 2 Filter Sponge 3 Water Chamber Assembly 5 Impeller Assembly 5 Rubber Feet 6 Main Housing 7 Back Cover 8 x 1 1 Multi Hose Adapter 9 3 way Valve 10...

Page 4: ...o lift pump Installation Always operate the pump fully submerged Failure to do so will overheat the pump and cause it to fail thus voiding the warranty DO NOT OPERATE DRY Use only in fully assembled s...

Page 5: ...ative fountain container To maximize pond circulation locate the pump as far away as possible from the location of the water entering back into the water feature Pond with external filter Decorative F...

Page 6: ...tected by a ground fault interrupter Once the pump is running and water is circulating through the filter s or waterfalls check for any fitting or waterfall leaks where the external connections are ma...

Page 7: ...ler Kits are available through your local Aquascape dealer 1a Note the orientation of parts in the photo below The replacement impeller kits include all parts shown Make sure to remove all of the orig...

Page 8: ...rotor assembly and internal pump body Make sure nothing is blocking or wrapped around the impeller Make sure the pump is receiving the correct voltage Pump Not Working The ground fault circuit interru...

Page 9: ...no 91005 550 article no 91006 800 article no 91007 1100 article no 91008 1500 article no 91009 2000 article no 91010 Disponible en d bits de 1514 7570 L h Ultra MC 400 550 800 1100 Ultra MC 1500 2000...

Page 10: ...uts dans les mat riaux et les d fauts de fabrication seulement Le remplacement de l unit d fectueuse par une unit de rechange appropri e sera la seule obligation Les unit s devront tre v rifi es afin...

Page 11: ...usqu 86 36 cm Jusqu 55 88 cm Jusqu 218 44 cm UltraMC 2000 91046 Jusqu 91 44 cm Jusqu 60 96 cm Jusqu 243 84 cm Cloche d eau Jet moussant Fontaine marguerite Trousse de t tes de fontaines Mod le de pomp...

Page 12: ...son utilisation sinon elle pourrait surchauffer entra nant ainsi sa d faillance et annulant de ce fait la garantie NE FAITES PAS FONCTIONNER LA POMPE SEC Utilisez seulement lorsque la pompe est enti r...

Page 13: ...lan d eau ou une fontaine d corative La pompe UltraMC est con ue pour tre submerg e directement dans le plan d eau ou le r servoir de la fontaine d corative Pour maximiser la circulation d eau dans le...

Page 14: ...filtration de la pompe Dans de nombreux cas la cage de filtration bouch e peut tre nettoy e en plongeant la main dans la pompe et en retirant manuellement les d bris de la cage de filtration S il y a...

Page 15: ...ontre au del des indicateurs et en tirant pour le d loger Ceci exposera l assemblage de la turbine pour une meilleure inspection Enlevez soigneusement la turbine de la pompe tout en prenant garde de n...

Page 16: ...uvercle du r servoir inspectez et nettoyez l assemblage du rotor de turbine et la partie interne de la pompe Assurez vous que rien ne bloque ou n est envelopp autour de la turbine Assurez vous que la...

Reviews: