9
STARZTRUCK AUTOMATIC POOL CLEANER SERVICE TIPS
FLAP REPLACEMENT
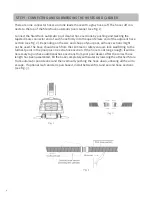
A. Remove the front and rear flaps from your StarzTruck automatic pool cleaner by inserting a small screwdriver
between the flap and the lower body near the pivot point of the flaps (see Fig. 13).
. You will notice that your replacement flaps look similar but are marked “Front” and “Rear” on the flap. It is
absolutely necessary to install the proper flap in the front and rear of the unit because the springs in the flaps
are different. Failure to do so will result in unsatisfactory performance of the StarzTruck automatic pool cleaner.
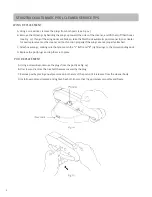
When installing the front flap, be sure that the extended leg of the spring is inserted into the notch on the front
of the lower body. Secure the flap by first placing one of the corner tabs into its coresponding hole and then
carefully pushing the other edge in to secure the final tab in place. You will feel and hear a snap when the
flap falls in place. Fold the flap in toward the bottom of the StarzTruck automatic pool cleaner. You will feel
some resistance at this point (that is normal). As the flap snaps into its normal position, you will feel the spring
action and notice that the front flap is now in its normal operating position.
When installing the rear flap, the extended leg of the spring must fit against one of the flat surfaces of the cam
Cam
Notch
Summary of Contents for StarzTruck
Page 1: ...INSTALLATION MANUAL...
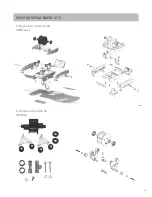
Page 19: ...17 A Frame and Turbine Kit HWN119 Propulsion Conversion Kit HWN160xx PROSTAR REPLACEMENT KITS...
Page 20: ......
Page 21: ......
Page 22: ...Rev 06 18 P N FCTM...


