background image

COMPONENTS 

Spa Basin  

 
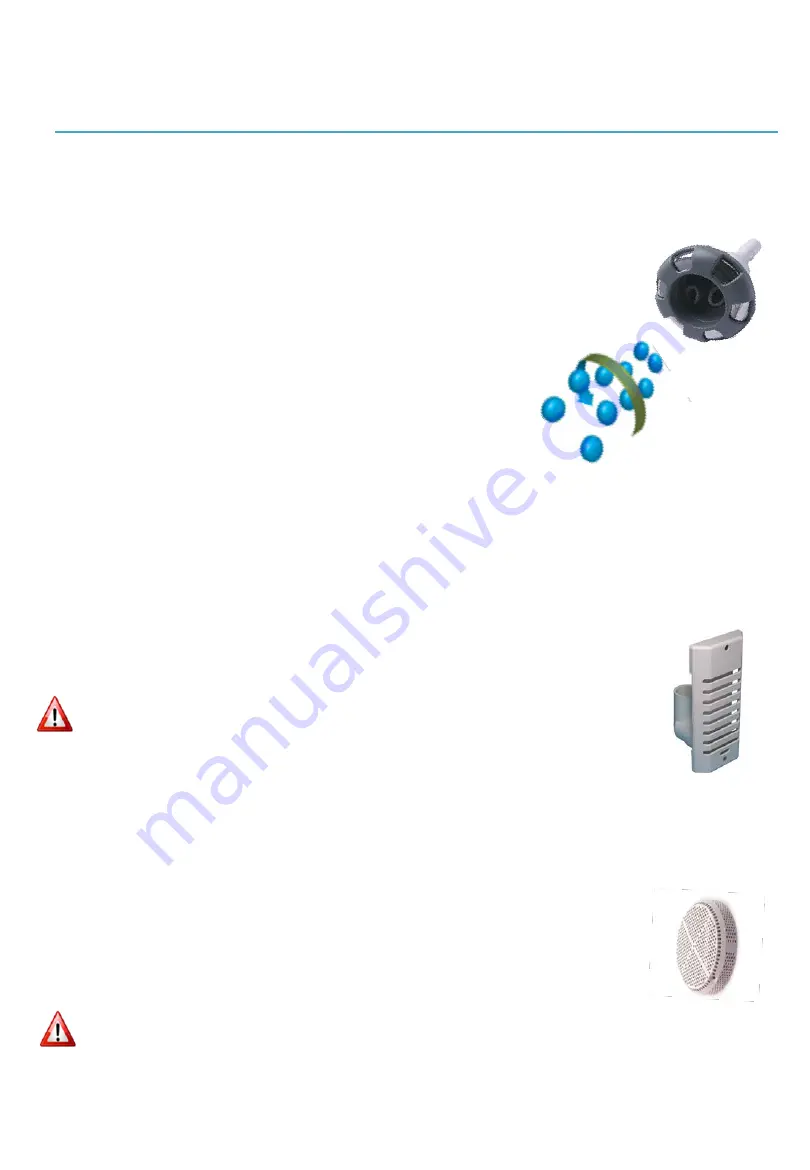
JETS 


The flow of each jet can be controlled by turning it to the left (less 
powerful/closed) or to the right (more powerful/open). The jets can also 
be removed. 
 
To do so, grab then turn the entire jet to the left; when completely left, 
continue to apply tension to the left to disengage the screw mechanism to 
which the jet is fitted to remain in place. 


JET MAINTENANCE 


We recommend cleaning the jets quarterly: remove the jets then place 
them in a container filled with water containing a small amount of dish 
soap. Roll the rotating nozzles in the soapy water solution and rinse 
thoroughly. 


SKIMMER 


The skimmer is placed on the top of the spa wall. It is used to suck up 
surface water and dirt to send them to the filtration system in the technical 
unit.  
 
    
     Never stand directly in front of or leave any object obstructing its face.  
       

Ensure that the water level is always at least half of the skimmer plastic 
plate (ideally between the top half and top 2/3).  


BOTTOM DRAINS 

 
The drain(s) are placed on the bottom of the spa wall (calf height). 
It is used to suck ground water and dirt to send them to the filtration 
system in the technical block.  
   
 
      Never stand directly in front of or leave any object obstructing its face.  
        

Be sure to regularly clean the face(s) of the drain(s) so as not to reduce 
the flow of water entering it.  


Skimmer 

Jet 

Bottom drain 

Note that some components may be optional. 

Summary of Contents for NATURE LAGON

Page 1: ...Owner s Manual NATURE SPAS URBAN SPAS V180323...

Page 2: ...ction 2 4 Safety instructions 3 5 Components Spa basin 4 6 Components Technical module 6 7 Components Pump 7 8 Components Electronic 8 9 Components Filtration 9 10 Accessories 10 11 Water treatment 12...

Page 3: ...ated this little booklet to help make the use and maintenance of your purchase enjoyable Keep this reference guide handy in case you need it for future reference We also invite you to contact your dea...

Page 4: ...e spa 7 Do not allow children to walk on the hard cover even if it is properly locked 8 Do not use the spa unless all suction guards are in place in order to prevent accidental suctioning of the body...

Page 5: ...cloth Never use harsh or abrasive products NEVER EMPTY THE SPA WITHOUT FIRST BEING SURE THAT THERE IS NO WATER UNDER THE SPA BASIN SERIES MODEL DIMENSIONS NATURE OASIS 8 x 10 x 34 NATURE MIRAGE 8 x 10...

Page 6: ...roughly SKIMMER The skimmer is placed on the top of the spa wall It is used to suck up surface water and dirt to send them to the filtration system in the technical unit Never stand directly in front...

Page 7: ...t be installed in a dry weather protected area such as a shed or housing designed for this purpose The housing is made of wood and can stay outdoors It is recommended to put a protective coating on it...

Page 8: ...first start of the season This important operation is intended to prime the pump during start up Carry out the steps recommended during the winter preparation process if you do not wish to use your s...

Page 9: ...so inside this housing that the main power supply wire connected to the house must be connected see the Appendix to this effect and the chapter on the electrical connection included in the spa install...

Page 10: ...garden hose to dislodge most of the dirt found there More thorough cleaning should be done once a month or two months depending on the use of the spa To do this you need a cartridge cleaning solution...

Page 11: ...l Styrofoam absorbs water more or less quickly It is normal that it becomes heavy It will then be a sign that they must be taken out and dried or simply changed Regularly open the vinyl cover zippers...

Page 12: ...y red or blue near the waterfall The waterfall mechanisms must NEVER be left operating in the winter due to the risk of frost Refer to the chapter on closing procedures to find out how to proceed with...

Page 13: ...there is a distance greater than 25 between your spa and the technical module INFO http www geckoalliance com ns conso Products ProductInfo 31 in touch COVER All covers become heavy because all styro...

Page 14: ...part 1 necessarily doubled by its BROMINE ACTIVATOR part 2 is a simple effective and highly recommended method Note Since the spa skimmer does not provide access to a basket and its lid is directly in...

Page 15: ...ions are usually identified by red and blue ribbons 1 or 2 connections for each colour of ribbon depending on the number of pumps included in the system Equip yourself with a Shop Vac dry wet vacuum V...

Page 16: ...trainer Vacuum the remaining water Close the cover of the strainer and store the baskets and plugs dry Filter Remove the cover of the filtration system and the cartridge Clean and store the cartridge...

Reviews: