© 2016 Araknis Networks
®
11
Araknis Networks Wireless Access Point
Product Manual
Mounting the Access Point
6 - Mounting the Access Point
6.1 - Table Top/Shelf
The access point comes with rubber feet installed for placement on flat surfaces. The mounting bracket
is not required for this application.
6.2 - Junction Box Mounting
The mounting bracket is compatible with most common junction box and plaster ring dimensions,
including common ceiling box sizes:
• Single/Double Gang
• 4” Square Box
• 3” Octagonal Box
• 4” Octagonal Box
6.2.1 - Instructions
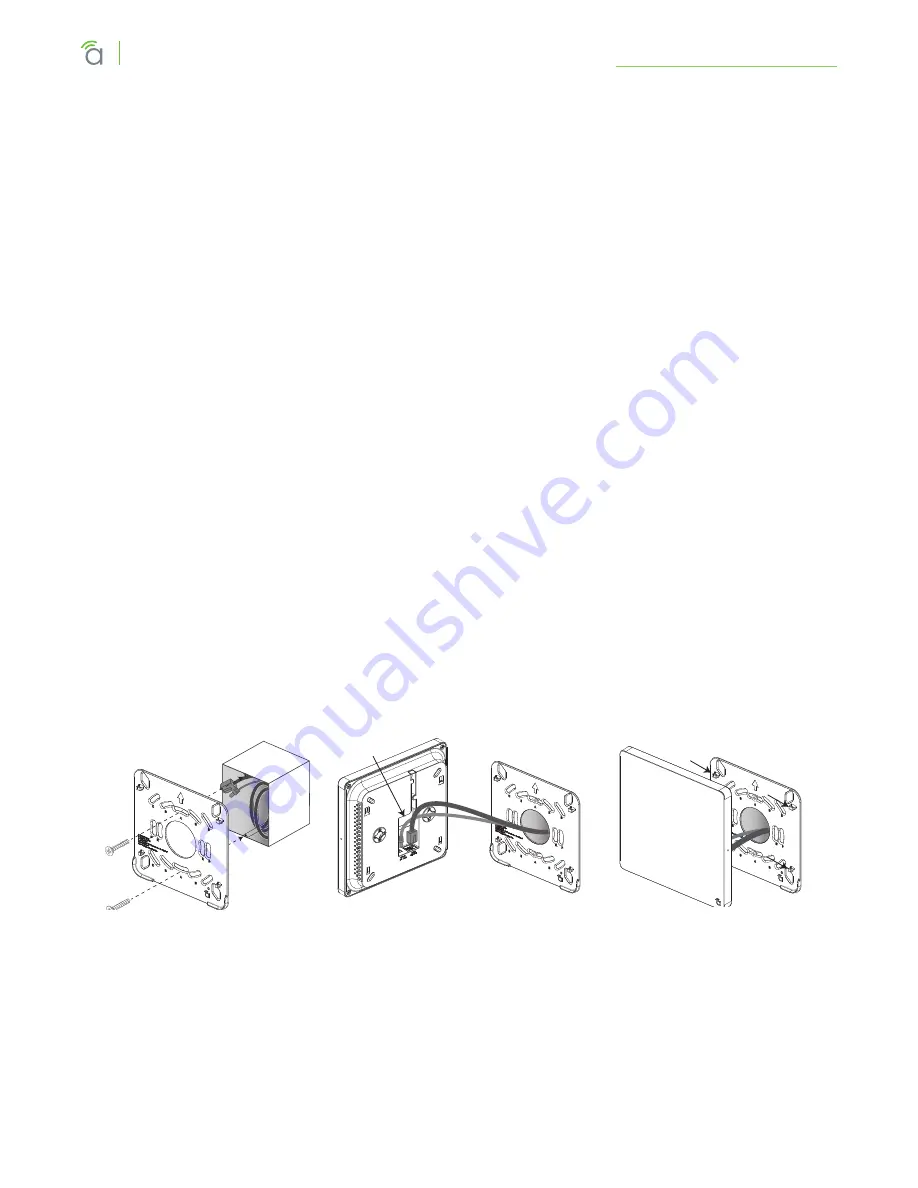
1. Place the mounting bracket over the junction box and attach it loosely with 2 screws. (two 6-32
x 1” screws are included) Use the hole pattern on the bracket that best matches the box pattern.
See Figure 6A, below.
2. Level or align the bracket with nearby objects for uniformity and tighten the screws enough to
secure it. Avoid over-tightening and warping the bracket.
3. Connect the wiring to the access point and push any extra wiring back into the opening. See
4. Snap the access point onto the bracket. See Figure 6C, below.
Figure 6.
Junction Box Mounting
Figure 6A
Figure 6B
Figure 6C


