© 2016 Araknis Networks
®
12
Araknis Networks Wireless Access Point
Product Manual
Mounting the Access Point
6.3 - Wall or Ceiling Drywall Mounting Instructions
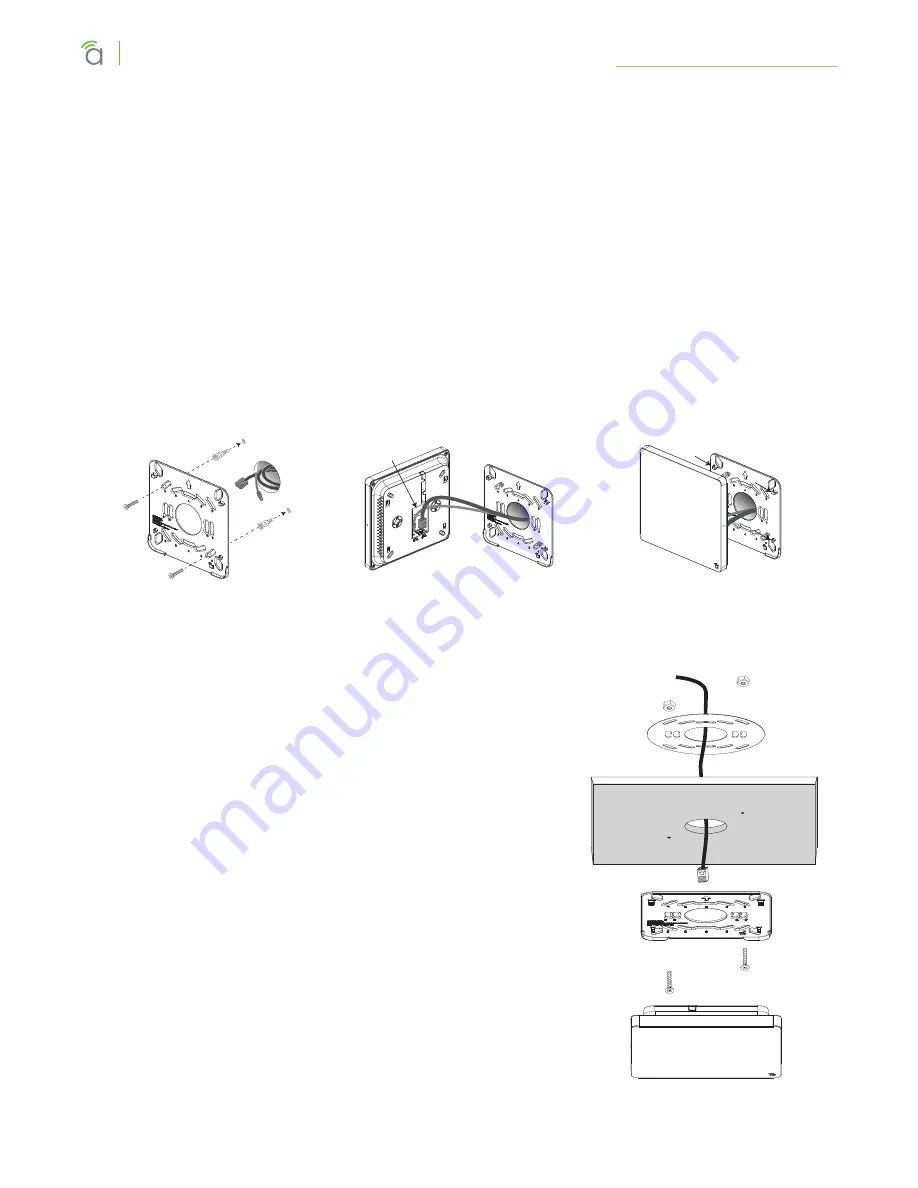
1. Place the bracket over the desired mounting location with the arrow on the bracket pointing up
for wall mounting. See Figure 7A, below.
2. Mark the “C” or “D” slots on the mounting surface, then remove the bracket and thread one of
the included drywall anchors into the center of each mark using a Phillips screwdriver.
3. Level or align the bracket with nearby objects and fasten it to the anchors using the two included
anchor screws. Tighten the screws enough to secure the bracket. Avoid over-tightening and
warping the bracket.
4. Connect the wiring to the access point and push any extra wiring back into the opening. See
Figure 7B, below.
5. Snap the access point onto the bracket. See Figure 7C, below.
Figure 7.
Drywall Mounting
Figure 7A
Figure 7B
Figure 7C
6.4 - Ceiling Tile Mounting Instructions
1. Place the bracket over the desired mounting location and
align it with nearby objects for uniformity.
2. Mark the “C” or “D” slots on the ceiling tile (and the center
hole if needed for wiring).
3. Cut the opening with a keyhole saw. Use a drill to make
clean holes for the mounting screws.
4. Place the ceiling backing plate and nuts on top of the tile as
shown and fasten the mounting bracket to the tile using the
included screws.
5. Connect the wiring to the access point and push any extra
wiring back into the opening.
6. Snap the access point onto the bracket.
Figure 8.
Ceiling Tile Mounting


