FastSCAN
45
10
Calibration
The Wand is fully calibrated before it leaves the factory. However, for optimum per-
formance you may need to check the calibration from time to time. This process is
quick and convenient.
You should check the Wand calibration if:
•
the Wand has been knocked or dropped
•
you notice the visual quality of the scans has deteriorated
•
you have not used the
FastSCAN
TM
Wand for some time
•
you are about to commence a particularly difficult or demanding scan.
The
Calibration Correction
option in the
Scanner
menu allows you to correct the
calibration of the Wand. A user correction is not equivalent to a full factory calibration
and it may not be possible to restore the scanner to its original condition if it has been
badly misaligned. To ensure that your
FastSCAN
TM
Wand stays in calibration, always
handle it with care.
Windows 2000/XP Note
Under Windows 2000 or XP, you will need Power User or higher privileges
if you are going to perform a Calibration Correction.
10.1
Overview
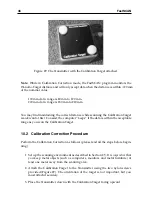
To collect the data required for a Calibration Correction you must scan the Calibra-
tion Target with eight separate sweeps. Make the
first four sweeps with a Wand-to-
Target distance of
100
mm
and the
last four sweeps with a Wand-to-Target distance
of
200
mm
. Make each sweep (in the group of four)
at a 90-degree rotation
to the
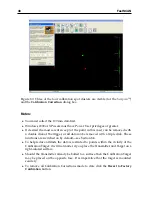
previous sweep, as shown in Figure 28.
Figure 28: Scanning the Calibration Target at four different angles.


