background image

www.araxfoto.com

 - medium format cameras, lenses, accessories , services 

4. OPERATIONS INSTRUCTIONS 


4.1. Lens installation on the camera and its removal  
 

While superposing the indexes on the lens’ bayonet and the camera’s body install the lens on the body and turn it in the direction 

recommended in the camera’s operation manual, securing it in the usual fashion. 

To remove the lens take the bayonet’s knurled ring, press the camera’s latch and turn the lens up to the stop. Then remove it from 

the camera. 


4.2 Focusing 

 
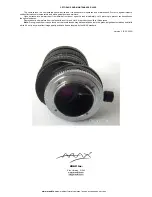
It is preferable to perform focusing at maximum aperture by rotating the focusing ring 1, on which focusing scale (distance) 2 is 

marked. If focusing is required after shifting the optical block, then the microprisms or camera viewfinder wedges’ surface dim out. In 
this case it is necessary to control image sharpness according to the screen’s matte area. 


During optical block shifting, decrease the aperture as far as possible, because unequal amounts of the light falls on the edges and 

center of the field. It is recommended to use the aperture values from 16 to 22. 


4.3. Aperture operation 

 
Manual aperture operation is provided for in the lens. Select the value by rotation of the ring 4, first pulling it aside along the optical 

axis towards the camera. In the released condition rotate the ring 4 from set up value to the value 2,8. Before exposure do not forget to 
rotate the ring 4 until the selected value of the aperture appears. 


4.4. Lens shifting 
 

While rotating handle 5, the lens is moving in parallel to the image surface.  Furthermore, it can be rotated by 360

о

 with settled 

interval every 30


о

 (the lens can operate even in the positions between these intervals). Due to the fact that the camera’s image is 

rectangular, the limit degree of lens shift will be changing at every rotation. The maximal shift is possible at the settled position of the 
lens along the image’s short side. To prevent vignetting, watch closely the digits of scale 7, pointing out the optimal value of the optical 
block shifting. Control this shift on the scale 6. Its colored markings should correspond to the digits color on the scale 7. 


Summary of Contents for PCS Arsat H(K) 2.8/35

Page 1: ...ality and increase contrast range by enhancing integral transmission and decreasing the dispersion The camera lens operates in the temperature range from minus 15 to 45 С Figure 1 2 TECHNICAL SPECIFICATIONS Image ratio mm 24х36 Focal distance mm 35 Aperture ratio 1 2 8 Design 11 elements 8 groups Angle of view o Without shifting optical block 67 o 20 o Having shifting optical block 80 о Short focu...

Page 2: ...f the light falls on the edges and center of the field It is recommended to use the aperture values from 16 to 22 4 3 Aperture operation Manual aperture operation is provided for in the lens Select the value by rotation of the ring 4 first pulling it aside along the optical axis towards the camera In the released condition rotate the ring 4 from set up value to the value 2 8 Before exposure do not...

Page 3: ...s situated at right angles to the ground Then in order to achieve the intended composition the optical block of the lens shall be shifted vertically upwards due to this the distortion is eliminated See Figure 5 Fig 5 Sometimes instead of image correction with the intention of creating special effects the occasion arises to create even more exaggerated distortions In this case you would incline the...

Page 4: ...single panoramic photograph Fig 7 which corresponds to a negative with an image format of 6х9 сm and normal perspective Fig 7 4 8 Obstruction elimination Obstructions like trees or telegraph poles located relatively closely to the camera and appearing at the image edge can be eliminated by means of lens shifting and rotating the camera For instance the obstruction pole is located at the image edge...

Page 5: ...oom from outside frost do not open the lens immediately Let it warm up to prevent condensation on the optical surfaces Remove dust and moisture from the lens with a soft brush cloth or a product specific to this purpose Note During inspection it can be found out that some lenses may have small bubbles in the glass insignificant scratches and fluffs which do not in any way affect image quality and ...

Reviews: