216
Options List
PTP Configuration
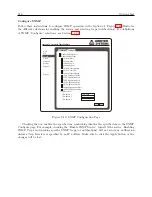
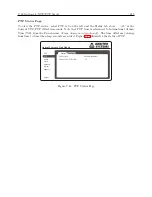
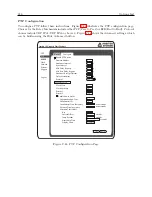
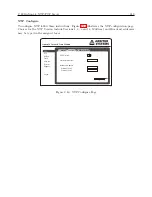
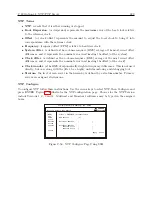
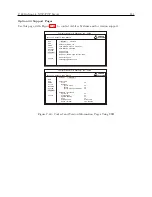
To configure PTP follow these instructions. Figure C.44 illustrates the PTP configuration page.
Choices for the Delay Mechanism include either P2P (Peer to Peer) or E2E (End to End). Protocol
choices include UDP IPv4, UDP IPv6 or Layer 2. Figure C.44 shows the Advanced settings, which
can be hidden using the Hide Advanced button.
NTP
PTP
Clock
Network
Support
Logout
System
Status
Configure
Option 34 Network Time Module
SNMP
Enable PTP Service
Domain Number
Announce Interval
Sync Interval
Min Delay Request
Min Peer Delay Request
Announce Receipt Timeout
Delay Mechanism
Protocol
0
2
2
2
2
3
PTP
UDP IPv4
6
20
10
128
Apply
Reset
Clock Class
Clock Accuracy
Priority 1
Priority 2
Enable Power Profile
Hide Advanced...
Organization Sub Type
Grandmaster ID
Grandmaster Time Inaccuracy
Network Time Inaccuracy
Alternate Time Offset
Key
Current Offset
Jump Seconds
Next Jump Time
Display Name
2
10
40
40
5
2
2
2
PowerPro2
nano seconds
nano seconds
seconds
seconds
seconds
Figure C.44: PTP Configuration Page
Summary of Contents for 1088A
Page 4: ...iv ...
Page 6: ...vi ...
Page 18: ...xviii LIST OF FIGURES ...
Page 23: ...1 4 Attaching Rack Mount Ears to 1088A B Series Clocks 3 Figure 1 2 Attaching Rack Mount Ears ...
Page 24: ...4 Unpacking the Clock ...
Page 32: ...12 Front and Rear Panels ...
Page 38: ...18 Connecting Inlet Power Input and Output Signals ...
Page 46: ...26 GPS Antenna and Cable Information ...
Page 48: ...28 Setting Internal Jumpers Figure 5 1 Model 1088B Main Board ...
Page 76: ...56 The Setup Menus ...
Page 112: ...92 Serial Communication and Command Set ...
Page 127: ...B 4 Physical Dimensions 107 Figure B 1 Suggested Mounting of the AS0094500 Surge Arrester ...
Page 128: ...108 Using Surge Arresters ...
Page 145: ...C 5 Option 04 Parallel BCD Output 125 Figure C 4 Option 04 Output Jumper Settings ...
Page 146: ...126 Options List Figure C 5 Option 04 Board Layout and Jumper Locations ...
Page 166: ...146 Options List Figure C 12 Option 17 Board Layout and Jumper Locations ...
Page 187: ...C 16 Option 20A Four Fiber Optic Outputs 167 Figure C 22 Option 20A Jumper Locations ...
Page 194: ...174 Options List Figure C 24 Option 23 Internal Jumper Setup ...
Page 196: ...176 Options List Figure C 25 Option 27 Jumper Locations ...
Page 214: ...194 Options List Figure C 28 Option 29 Connector Signal Locations ...
Page 270: ...250 Options List ...


