


104
RS-232C Command Set
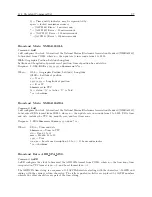
Set Backlight: OFF
Command:
L0
L0 disables the backlight operation.
Response:
C
Set Backlight: ON
Command:
L1
L1 selects the continuous backlight operation.
Response:
C
Set Backlight: AUTO
Command:
L2
L2 enables the automatic backlight operation. It keeps the backlight active for 30 seconds after any key is
pressed.
Response:
C
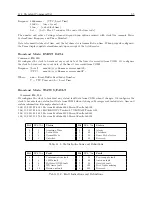
11.2.8
IRIG-B Data Output Commands
IRIG Data IEEE C37.118.1
Command:
In
In activates (n=1) or deactivates (n=0) the IEEE C37.118.1, which uses IRIG-B control bits for additional
information. Information includes the two-digit year, local offset, time quality and notification of pending
non-sequence events such as leap seconds and daylight saving time changeovers.
Response:
C
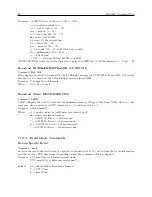
IRIG Data: Local, UTC
Command:
IL, IU
IL configures all IRIG time data outputs to local time code reference. IU configures all IRIG time data
outputs to UTC time code reference.
Response:
C
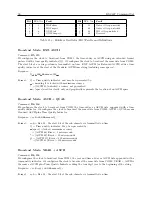
Return Elevation
Command:
LH
LH returns the current antenna elevation referenced to the WGS-84 datum.
Response: nnnnn.nn
C
(from -1000.00 to +18000.00 meters WGS-84)
Format:
n = -1000.00 to +18000.00 meters.
Return Latitude
Command:
LA
LA returns the current antenna latitude.
Response: Ndd:mm:ss.sss
C
Format:
N = North (S for South), dd = degrees, mm = minutes, ss.sss = seconds
Summary of Contents for 1201B
Page 4: ...iv ...
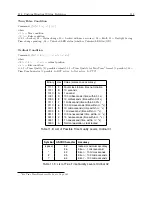
Page 153: ...B 7 Four Fiber Optic Outputs 135 Figure B 4 Jumper Locations ...


