Use and Maintenance Manual
Page 19
90°
NO
NO
OK
Fig. 8
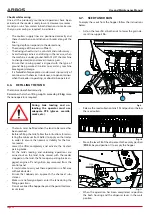
To couple the tractor to the machine, the operator must
move the tractor with the reverse gear until it reaches the
connections on the machine with the back lifters
(Fig. 6).
•
Engage the parking brake of the tractor, switch the en-
gine off, remove the ignition key and step down.
•
Insert the pivots and the relative pins/split pins.
•
Connect the third point (tightener) of the machine to the
tractor, lift the machine until the power take-offs of the
machine and tractor are at the same height, and adjust
the tightener, bringing the machine into a horizontal po-
sition.
•
Block the tractor lifters, in order to stop the machine
swinging sideways, as this would compromise the sta-
bility of the unit.
6.2. HYDRAULIC CONNECTIONS
When the hydraulic pipes are be-
ing connected to the hydraulic
system of the tractor, make sure
that the hydraulic system of the
operating machine and tractor are
not pressurised.
•
The hydraulic connections between the tractor and the
machine must be identifiable by colour so as to elimi-
nate the risk of incorrect connections. If the tubes are in-
correctly attached there could be a risk of accident.
•
During transport by road, the hydraulic connections be-
tween the tractor and the machine must be disconnect-
ed and fixed in the appropriate support.
The quick-fit connections of the hydraulic system can be
identified by the coloured plug as follows:
•
BLUE (2 pipes)
: side folding tabs, to be connected to the
dual-effect distributor.
•
GREEN:
lifting of rear carriage and towbar, to be con-
nected to a single-effect distributor with floating func-
tion.
•
YELLOW:
fan delivery, to be connected to a priority dis-
tributor with flow control, suitable for hydraulic motor
actuation (continuous flow approx. 22 litres) and heat
exchanger.
•
FLAT-FACE FEMALE CONNECTION:
fan return and oth-
er circuits, with max. resistance of 4bar.
•
RED (if row markers are present):
hydraulic row mark-
er, to be connected to the dual-effect distributor.
6.3. ELECTRICAL CONNECTIONS
For the connection, select a point of the electrical installation
that guarantees a power capacity of at least
5A
.
Make sure that the cross section of the main cables and any
connecting plugs are adequate and protected by fuses to en-
sure correct operation.
6.4. STARTING-UP THE MACHINE
Before using the machine, familiarise yourself with the con-
trols and operating abilities.
Before starting work, make sure that there are no people or
animals in the working area.
Before starting the job, check that ALL the protections of the
machine are integral and in perfect working order.
6.5. SOWING
Once the seeder is correctly coupled to the tractor, you can
prepare it for sowing.
Preliminary operations
•
Check that all transmission drive lines are connected cor-
rectly.
•
Load the seed tanks, ensuring that no foreign objects
enter the tanks.
•
Free the row tracer arms (if present).
Adjustment
To obtain correct seed density per hectare (Kg/Ha), the distri-
bution organs must be properly adjusted, namely:
•
Feeler adjustment.
•
Seed dispenser roller adjustment.
•
Slide gates adjustment
•
Variator setting.
Setting up
•
Perform a TEST to check the amount of seed to be dis-
tributed.
•
Turn the drive wheel to send part of the seed from the
hopper to the dispensers and from these to the individ-
ual coulters.
•
Make sure all the coulters dispensed seeds.
Summary of Contents for MEK-X250
Page 2: ......
Page 4: ...Use and Maintenance Manual...
Page 38: ...Use and Maintenance Manual Page 38...


