11
10
To set the time, press the button, and then + or - button, until the required time
is shown on the screen. After the setting, the correct time (hour, minute) and the button
will show on the screen. When the button is pressed the time displaced will be seen.
When the set time is reached, disappears and the alarm will ring again. To stop the
alarm, press the button.
Notice:
After pressing the related button, setting is supposed to be done in 5 seconds.
In case of blackout, the set process as well as the real time (hour, minute) will disappear.
After the power is on again, three
“
0
”
and
“
AUTO
”
shows on the screen, the oven will
automatically reset.
3-keys timer procedure baking mode
(only available on certain models)
Adjust the clock after switch on:
Once it connected with electrical power, the display will show
“
12:00
”
with the square
symbol above
“
”
;
Press the
“
+
”
or
“
-
”
button will increase or decrease the number until it reaches the
right time; after 5 seconds it will start automatically or you can press the function
button to make it work.
Automatic setting (set the time of full automatic starting and ending)
1. Press the function button repeatedly until the square symbol above the
“
”
flashes,
and press
“
+
”
or
“
-
”
button to set the time frame baking for;
2. Press the function button repeatedly until the square symbol above the
“
”
flashes,
and press
“
+
”
or
“
-
”
button to set the time to switch off;
3. Adjusting the constant temperature button and choosing button to set temperature and
baking method.
After these setting, the symbols above the
“
”
and
“
”
will flash, it indicates
the baking procedure of oven has been set.
For example: if the food is required to bake for 45 minutes, and it is supposed to stop
at 14:00.
Press the function button repeatedly until the square symbol above
“
”
flashes, and
set the time of baking to 45 minutes;
Press the function button repeatedly until the square symbol above
“
”
flashed, and
set the end time of baking at 14:00.
After these setting, the proper clock (hour, minute) and the square symbol will show
on the display, it indicates the setting of baking procedure has been remembered
automatically.
When the clock shows at 13:15 (between 14 -15min), the oven will switch on automatically.
During the baking time frame, the square symbol will keep flashing.
When the clock shows14:00, baking will switch off automatically. The alarm will ring,
the square symbol will flash, To stop the ringing press any button.
Semi-automatic setting (set the time of automatic starting and ending)
A. setting the time frame of baking (10 hours longest)
Press the function button repeatedly until the square symbol above
“
”
, and set the
time frame of baking;
Switch on the oven immediately, the square symbol above
“
”
begins to flash. When the
baking is done the square symbol above
“
”
will flash, and alarm ring, To stop the
ringing press any button.
B. setting the end time off baking (23hours and 59minutes longest)
Press the function button repeatedly until the square symbol above
“
”
flashes, and
set the end time of baking;
Switch on the oven immediately, the square symbol above
“
”
begins to flash. When
it reaches the time set, baking procedure will switch off automatically. The square symbol
above
“
”
flashes, the alarm will ring, the square symbol will flash. To stop the
ringing press any button.
The set baking procedure could be seen by pressing any function button repeatedly at
any time, only if the time frame of baking is at
“
0
”
position. By adjusting the end
time of baking to the current time, the set baking procedure can be cancelled.
Timer
The longest time frame can be set is 23 hours and 59 minutes. For setting time, press
the function button repeatedly until the square symbol above
“
”
flashes, and press
“
+
”
or
“
-
”
button until the time supposed shows on the display. After setting, the
proper time (hour, minute) and the square symbol above the
“
”
begins to flash. In
addition, the time countdown begins to work. When it reaches the set time, the square
symbol above the
“
”
flashes, and the alarm will ring, the square symbol will flash,
To stop the ringing press any button.
Notice:
press the relevant button, the setting must be carried out in 5 seconds; if
electricity failure suddenly, all the set procedure and the proper clock time (hour,
minute) will disappear.
After electrical power is on again,
“
12:00
”
and the square symbol above
“
”
will
show on the display, you need to set it again .
The oven light
Set knob
“
B
”
to the symbol to turn it on .It lights the oven and stays on when any
of the electrical heating elements in the oven come on.
Cooling ventilation
In order to cool down the exterior of the appliance, this model is equipped with a cooling
fan, which comes on automatically when the oven is hot.
When the fan is on, a normal flow of air can be heard exiting between the oven door and
the control panel.
Note: When cooking is done, the fan stays on until the oven cools down sufficiently.
How to Keep Your Oven in Shape
Before cleaning your oven, or performing maintenance, disconnect it from the power supply.
To extend the life of your oven, it must be cleaned frequently, keeping in mind that:
·
the enameled or stainless steel parts should be washed with lukewarm water without
using any abrasive powders or corrosive substances which could ruin them ;Stainless steel
could get stained .If these stains are difficult to remove, use special products available
on the market. After cleaning, it is advisable to rinse thoroughly and dry.
·
the inside of the oven should preferably be cleaned immediately after use ,when it
is still warm ,with hot water and soap ;The soap should be rinsed away and the interior
dried thoroughly. Avoid using abrasive detergents (for example cleaning powders, etc)
and abrasive sponges for dishes or acids (such as lime scale –remover, etc
…
) as these
could damage the enamel .If the grease spots and dirt are particularly tough to remove,
use a special product for oven cleaning, following the instructions provided on the packet.
Never use a steam cleaner for cleaning inside of oven.
·
if you use your oven for an extended period of time ,condensation may form .Dry it
using a soft cloth.
·
there is a rubber seal surrounding the oven opening which guarantees its perfect
functioning .Check the condition of this seal on a regular basis .If necessary, clean
it and avoid using abrasive products or objects to do so. Should it become damaged, please
contacts you’re nearest After-sales Service Center .We recommend you avoid using the
oven until it has been repaired.
·
never line the oven bottom with aluminum foil ,as the consequent accumulation of heat
could compromise the cooking and even damage the enamel .
·
clean the glass door using non-abrasive products or sponges and dry it with a soft
cloth .
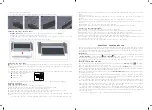
How to Remove the Oven doors
For a more thorough clean, you can remove the oven door. Choose the remove and assemble
method. Proceed as follows:
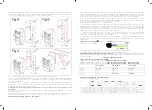
Oven door structures 1 remove and assemble procedure:
·
Open the door to the full extent(fig.1);
·
Open the lever
A
completely on the left and right hinges(fig.2);
·
Hold the door as shown in fig.3
·
Gently close the door(fig.3)until left and right hinge levers
A
are hooked to part
B
of the door(fig.4).
·
withdraw the hinge hooks from their location following arrow C(fig.4);

