background image


22 / EN 

If you want to cancel the alarm:

If you want to cancel the alarm:

If you want to cancel the alarm:

If you want to cancel the alarm:    
1.  To reset the alarm time, press Program key (1) 

to activate the alarm time symbol (4). 

2.  Press and hold the ''''–

–'''' (5) key until "00:00"

"00:00"

"00:00"

"00:00" is 

displayed. 

Alarm time will be displayed. If the alarm 
time and cooking time are set concurrently, 
shortest time will be displayed. 

Changing alarm tone

Changing alarm tone

Changing alarm tone

Changing alarm tone    
1.  Press Setting key (11) to activate the Alarm 

Tone symbol (8). 

2.  Adjust the desired tone using 

łH

łH

łH

łH

 /

łłłłÓ

Ó

Ó

Ó

 (5/6) 

keys. 

»

 Selected alarm tone will appear as 

"b-01"

"b-

02"

 or 

"b-03"

 on the display. 

Cooking times table

Cooking times table

Cooking times table

Cooking times table    


The values indicated in the table below are 
data indicative. They may vary according to 
the type of food as well as your preferences 
of cooking. 

Baki

Baki

Baki

Baking and roasting

ng and roasting

ng and roasting

ng and roasting    


Level 1 is the bottom

bottom

bottom

bottom level in the oven. 

Dish

Dish

Dish

Dish    

Cooking level number

Cooking level number

Cooking level number

Cooking level number    


Rack position

Rack position

Rack position

Rack position    

Temperature (°C)

Temperature (°C)

Temperature (°C)

Temperature (°C)    

Cooking time 

Cooking time 

Cooking time 

Cooking time 

(approx. in min.)

(approx. in min.)

(approx. in min.)

(approx. in min.)    

Cakes in tray* 

One level 


175 

30 ... 35 

Cakes in mould* 

One level 


180 

40 ... 50 

Cakes in cooking 
paper* 

One level 


175 

25 ... 30 


2 levels 


1 - 3 

175 

30 ... 40 


3 levels 


1 - 3 - 5 

180 

45 ... 55 

Sponge cake* 

One level 


200 

5 ... 10 


2 levels 


1 - 3 

175 

20 ... 30 

Cookies* 

One level 


175 

25 ... 30 


2 levels 


1 - 3 

175 

30 ... 35 


3 levels 


1 - 3 - 5 

175 

30 ... 40 

Dough pastry* 

One level 


200 

30 ... 40 


2 levels 


1 - 3 

200 

45 ... 55 

Rich pastry* 

One level 


200 

25 ... 35 


2 levels 


1 - 3 

200 

35 ... 40 


3 levels 


1 - 3 - 5 

190 

40 ... 50 

Leaven* 

One level 


200 

35 ... 45 

Lasagna* 

One level 


2 - 3 

200 

30 ... 40 

Pizza* 

One level 


200 ... 220 

15 ... 20 

Beef steak (whole) 
/ Roast 

One level 


25 min. 250/max, 

then 180 ... 190 

100 ... 120 

Leg of Lamb 
(casserole) 

One level 


25 min. 250/max, 

then 190 

70 ... 90 

Roasted chicken 

One level 


15 min. 250/max, 

then 180 ... 190 

65 ... 70 


One level 


15 min. 250/max, 

then 180 ... 190 

55 ... 65 

Turkey (5.5 kg) 

One level 


25 min. 250/max, 

then 180 ... 190 

150 ... 210 


One level 


25 min. 250/max, 

then 180 ... 190 

150 ... 210 

Fish 

One level 


200 

20 ... 30 


One level 


200 

20 ... 30 

When cooking with 2 trays at the same time, place the deeper tray on the upper rack and the other one on the lower rack.  

**** It is suggested to perform preheating for all foods. 

Summary of Contents for 9541 HDG

Page 1: ...285300077 Oven Oven Oven Oven 9541 HDG 9541 HDG 9541 HDG 9541 HDG 9541 H 9541 H 9541 H 9541 HI II IDG DG DG DG ...

Page 2: ...r Manual will help you use the product in a fast and safe way The User Manual will help you use the product in a fast and safe way Read the User Manual before installing and operating the product You must strictly observe the safety instructions Keep this User Manual within easy reach for future reference Also read other documents supplied with the product Remember that this User Manual may also b...

Page 3: ...gy 14 Initial use 14 Time setting 14 First cleaning of the appliance 15 Initial heating 15 5 5 5 5 How to use the hob How to use the hob How to use the hob How to use the hob 16 16 16 16 General information about cooking 16 Using the hobs 16 6 6 6 6 How to operate the oven How to operate the oven How to operate the oven How to operate the oven 18 18 18 18 General information on baking roasting and...

Page 4: ... 6 Bottom drawer 7 Handle 8 Front door 9 Lamp 10 Fan motor behind steel plate 11 Shelf positions 12 Grill heating element 1 Thermostat lamp 2 Function knob 3 Normal burner Rear left 4 Wok burner Front left 5 Digital timer 6 Auxiliary burner Front right 7 Normal burner Rear right 8 Thermostat knob ...

Page 5: ...ultifunction oven Multifunction oven Multifunction oven Energy efficiency class A Inner lamp 15 25 W Grill power consumption 2 2 kW Basics Information on the energy label of electrical ovens is given in accordance with the EN 50304 standard Those values are determined under standard load with bottom top heater or fan assisted heating if any functions Technical specifications may be changed without...

Page 6: ...e wire shelf and tray onto the Placing the wire shelf and tray onto the Placing the wire shelf and tray onto the Placing the wire shelf and tray onto the telescopic racks properly telescopic racks properly telescopic racks properly telescopic racks properly Telescopic racks allow you to install and remove the trays and wire shelf easily When using the tray and wire shelf with telescopic racks make...

Page 7: ...areful when using alcoholic drinks in your dishes Alcohol evaporates at high temperatures and may cause fire since it can ignite when it comes into contact with hot surfaces Do not heat closed tins and glass jars in the oven The pressure that would build up in the tin jar may cause it to burst Do not place any flammable materials close to the product as the sides may become hot during use Do not p...

Page 8: ...ames should be blue and burn evenly Good combustion is required in gas appliances In case of incomplete combustion carbon monoxide CO might develop Carbon monoxide is a colourless odourless and very toxic gas which has a lethal effect even in very small doses Request information about gas emergency telephone numbers and safety measures in case of gas smell from you local gas provider What to do Wh...

Page 9: ...tc by hanging them on the oven door handles This product should also not be used for room heating purposes The manufacturer shall not be liable for any damage caused by improper use or handling errors The oven can be used for defrosting baking roasting and grilling food Service life of your product is 10 years Manufacturer shall provide the required spare parts for the product to perform as define...

Page 10: ...are maintained under the appliance we recommend that this appliance is mounted on a solid base and that the feet do not sink into any carpet or soft flooring The kitchen floor must be able to carry the weight of the appliance plus the additional weight of cookware and bakeware and food It can be used with cabinets on either side but in order to have a minimum distance of 400mm above hotplate level...

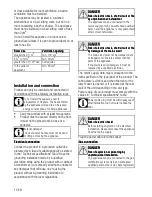
Page 11: ... shock short circuit or fire Risk of electric shock short circuit or fire by unprofessional installation by unprofessional installation by unprofessional installation by unprofessional installation The appliance may be connected to the mains supply only by an authorized qualified person and the appliance is only guaranteed after correct installation DANGER DANGER DANGER DANGER Risk of electric sho...

Page 12: ...e feet of oven Vibrations during use may cause cooking vessels to move This dangerous situation can be avoided if the product is level and balanced For your own safety please ensure the product is level by adjusting the four feet at the bottom by turning left or right and align level with the work top Final check Final check Final check Final check 1 Open gas supply 2 Open gas supply 3 Check gas i...

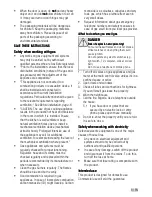
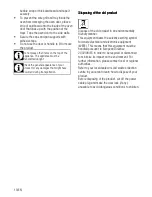
Page 13: ...portation Disposing of the old product Disposing of the old product Disposing of the old product Disposing of the old product Dispose of the old product in an environmentally friendly manner This equipment bears the selective sorting symbol for waste electrical and electronic equipment WEEE This means that this equipment must be handled pursuant to European Directive 2002 96 EC in order to be recy...

Page 14: ...be used Always select the correct pot size for your dishes Larger pots require more energy Initial use Time setting Time setting Time setting Time setting Before using the oven the clock time must be set If the clock time is not set the main oven will not work While making any adjustment related symbols on the clock will flash Press or 5 6 keys to set the time after the oven in energized for the f...

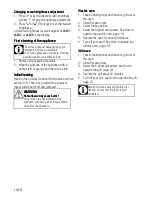
Page 15: ...es and then switch it off Thus any production residues or layers will be burnt off and removed WARNING WARNING WARNING WARNING Hot surfaces may cause burns Hot surfaces may cause burns Hot surfaces may cause burns Hot surfaces may cause burns Do not touch the hot surfaces of the appliance Use oven gloves Keep children away from the appliance Electric oven Electric oven Electric oven Electric oven ...

Page 16: ...be used to keep foods either Use flat bottomed saucepans or vessels only Put appropriate amount of food in saucepans and pans Thus you will not have to make any unnecessary cleaning by preventing the dishes from overflowing Do not put covers of saucepans or pans on cooking zones Place the saucepans in a manner so that they are centered on the cooking zone When you want to move the saucepan onto an...

Page 17: ...r 15 seconds DANGER DANGER DANGER DANGER Risk of deflagration incase of u Risk of deflagration incase of u Risk of deflagration incase of u Risk of deflagration incase of unburned nburned nburned nburned gas gas gas gas Do not press the knob for longer than 15 seconds if there was no ignition Wait for one minute and then repeat the ignition process Wok burner Wok burner Wok burner Wok burner Wok b...

Page 18: ... the meat is cut Fish should be placed on the middle or lower rack in a heat resistant plate Tips for grilling Tips for grilling Tips for grilling Tips for grilling When meat fish and poultry are grilled they quickly get brown have a nice crust and do not get dry Flat pieces meat skewers and sausages are particularly suited for grilling as are vegetables with high water content such as tomatoes an...

Page 19: ...bottom top heating Fan supported bottom top heating Fan supported bottom top heating Top heating bottom heating plus fan in the rear wall are in operation Hot air is evenly distributed throughout the oven rapidly by means of the fan Cook with one tray only Operating with fan Operating with fan Operating with fan Operating with fan The oven is not heated Only the fan in the rear wall is in operatio...

Page 20: ...f you want to set the end of cooking time to a If you want to set the end of cooking time to a later time later time later time later time After setting the cooking time on the clock you can set the end of cooking time to a later time 1 To adjust the cooking time press Program key 1 and activate the Cooking Time symbol EOF EOF EOF EOF 2 Adjust the cooking time with Minus 5 and Plus 6 keys Cooking ...

Page 21: ...e the keylock OFF OFF OFF OFF will be displayed once the keylock is deactivated Using the clock as an alarm Using the clock as an alarm Using the clock as an alarm Using the clock as an alarm You can use the clock of the product for any warning or reminder apart from the cooking programme The alarm clock has no influence on the functions of the oven It is only used as a warning For example this is...

Page 22: ...level number Rack position Rack position Rack position Rack position Temperature C Temperature C Temperature C Temperature C Cooking time Cooking time Cooking time Cooking time approx in min approx in min approx in min approx in min Cakes in tray One level 4 175 30 35 Cakes in mould One level 2 180 40 50 Cakes in cooking paper One level 3 175 25 30 2 levels 1 3 175 30 40 3 levels 1 3 5 180 45 55 S...

Page 23: ...ting to cook Discoloration and scratches may occur on round tray in time since it is made of high quality stainless steel This is quite normal and does not have any harm against health Dish Dish Dish Dish Cooking level number Cooking level number Cooking level number Cooking level number Rack positi Rack positi Rack positi Rack position on on on Temperature C Temperature C Temperature C Temperatur...

Page 24: ...oor in order to obtain the best grill performance Do not use the upper level for grilling Fire danger due to food which is Fire danger due to food which is Fire danger due to food which is Fire danger due to food which is unsuitable for grilling unsuitable for grilling unsuitable for grilling unsuitable for grilling Only use food for grilling which is suitable for intensive grilling heat Do not pl...

Page 25: ...t use solid metal scrapers or abrasive cleaning materials to clean the glass cover Glass surface can get damaged The surface may get damaged by some detergents or cleaning materials Do not use aggressive detergents cleaning powder cream or any sharp objects Do not use steam cleaners for cleaning If a round tray is supplied with the product If a round tray is supplied with the product If a round tr...

Page 26: ...urface of the walls is self cleaning by absorbing and converting spitting fat steam and carbon dioxide Clean oven door Clean oven door Clean oven door Clean oven door To clean the oven door use warm water with washing liquid a soft cloth or sponge to clean the product and wipe it with a dry cloth Don t use any harsh abrasive cleaners or sharp metal scrapers for cleaning the oven door They could sc...

Page 27: ...resist up to 300 C See Technical specifications page 5 for details Oven lamps can be obtained from Authorised Service Agents Position of lamp might vary from the figure If your oven is equipped with a round lamp If your oven is equipped with a round lamp If your oven is equipped with a round lamp If your oven is equipped with a round lamp 1 Disconnect the product from mains 2 Turn the glass cover ...

Page 28: ...with a timer the timer is not adjusted In products with microwave oven timer controls only microwave oven Adjust the timer Power is cut Check if there is power Check the fuses in the fuse box If necessary replace or reset the fuses There is no gas There is no gas There is no gas There is no gas Main gas valve is closed Open gas valve Gas pipe is bent Install gas pipe properly There is no ignition ...

Reviews: