background image

29 / EN

Microwave Oven / User Manual


This appliance is a Group 2 

Class B ISM equipment. Group 2 

contains all ISM (Industrial, Sci-

entific and Medical) equipment 

in which radio-frequency energy 

is intentionally generated and/or 

used in the form of electromag-

netic radiation for the treatment 

of material, and spark erosion 

equipment. 


Class B equipment is suitable 

for use in domestic establish-

ments and establishments 

directly connected to a low vol-

tage power supply network.


Door or outer surface of the app-

liance may become hot when it 

is in use.

1.1.2 Product safety


Heating the beverages with 

microwave may cause them to 

boil by splashing around after 

they have been taken out of the 

oven; so be careful when you 

are holding the containers.


Do not roast anything in the 

oven. Hot oil may damage the 

components and materials of 

the oven, and it may even cause 

skin burns.


Pierce food with thick crust such 

as potatoes, zucchinis, apples 

and chestnuts.


Appliance must be placed so 

that the rear side is facing the 

wall.


Before moving the appliance, 

please secure the turntable to 

prevent damage to it. 


Eggs in their shell and whole 

hard-boiled eggs must not be 

heated in microwave ovens 

since they may explode, even 

after microwave heating has 

ended.


Never remove the parts at the 

rear and sides of the appliance, 

which protect the minimum 

distances between the cabinet 

walls and the appliance in order 

to allow for the required air cir-

culation.

 Important safety and environmental 

instructions

Summary of Contents for MD 2084 GMI

Page 1: ...MD 2084 GMI TR EN Mikrodalga Fırın Kullanma Kılavuzu ...

Page 2: ...başka birisine verirseniz kullanma kılavuzunu da birlikte verin Kullanma kılavuzunda belirtilen tüm bilgi ve uyarıları dikkate alarak talimatlara uyun Sembollerin anlamları Bu kullanma kılavuzunun çeşitli kısımlarında aşağıdaki semboller kullanılmıştır C Cihazın kullanımıyla ilgili önemli bilgiler ve fay dalı tavsiyeler A UYARI Can ve mal güvenliğiyle ilgili tehlikeli du rumlar konusunda uyarılar ...

Page 3: ...3 TR Mikrodalga Fırın Kullanım Kılavuzu İÇİNDEKİLER TÜRKÇE 04 23 ENGLISH 24 42 01M 8850481100 3017 01 ...

Page 4: ...ma sağla yan kapağın sökülmesini içeren herhangi bir servis ve onarım işlerini yetkili kişi servis dışında kişilerin yapması tehlikelidir Ürününüz sadece evde gıdaların hazırlanması ısıtılması ve buzla rının çözülmesi için kullanılmak üzere tasarlanmıştır ticari mak satla kullanılmamalıdır Kurallara aykırı kullanım yüzünden oluşan hasarlar için üretici mesul tutu lamaz Bu cihazı dış mekanlarda vey...

Page 5: ... ısınır Cihazın içindeki sıcak ele manlara dokunmamaya dikkat edilmelidir Fırınınız hiç bir canlıyı kurutmak için tasarlanmamıştır Fırını boşken çalıştırmayın Isıtılan yiyecekten kaba aktarılan ısı yüzünden pişirme kabı ısına bilir Kabı tutmak için fırın eldi venleri gerekebilir Mikrodalga fırınlarda kullanıma uygun olduklarından emin olmak için kaplar kontrol edilmelidir Fırını ocak veya diğer ıs...

Page 6: ...sla kullanmayın Bu cihazı uzatma kablosuyla kullanmayın Elleriniz nemli veya ıslakken ci haza veya cihazın fişine asla do kunmayın Cihazı elektrik fişine her zaman ulaşılabilecek şekilde yerleştirin Elektrik kablosunun hasar gör mesini önlemek için sıkışmasını kıvrılmasını veya keskin kenar lara sürtünmesini engelleyin Elektrik kablosunu sıcak yü zeylerden ve açık alevden uzak tutun Cihazın kullan...

Page 7: ...in içinde radyo frekans enerjisi kasıtlı olarak üretilen ve veya elektromanye tik ışıma biçiminde kullanılan tüm ISM endüstriyel bilimsel ve tıbbi cihazlar ve kıvılcım ile aşındırma cihazlarıdır Sınıf B cihazları evlerde ve in sanların yaşadığı binalara elekt rik sağlayan düşük gerilimli elektrik şebekesine doğrudan bağlı binalarda kullanılmak için uygundur Cihaz çalışırken kapak veya dış yüzey ıs...

Page 8: ...görmesini önlemek için lütfen döner tablayı sabitleyin Mikrodalga fırınınızı kabuklu veya kabuksuz çırpılmamış yu murtaları pişirmek veya tekrar ısıtmak için kullanmayın Cihazın arkasında ve yanlarında bulunan gerekli hava sirkülas yonunun sağlanması için kabin duvarları ile cihaz arasındaki min mesafenin korunmasını sağlayan parçaları asla çıkar mayın 1 2 Kullanım amacı Cihazı kullanım amacının d...

Page 9: ...timinde kulla nılmalıdır Ürünü ve şebeke kablosunu 8 yaşından küçük çocukların eri şemeyeceği yerde bulundurun Kullanım esnasında cihaz ve erişilebilir yüzeylerin sıcaklıkları yüksek olabilir Çocuklar uzak tutulmalıdır 1 4 AEEE Yönetmeliğine Uyum ve Atık Ürünün Elden Çıkarılması Bu ürün T C Çevre ve Şehircilik Bakanlığı tarafın dan yayımlanan Atık elektrikli ve Elektronik eşya ların Kontrolü Yönet...

Page 10: ...ş 1 Kontrol paneli 2 Döner tabla mili 3 Döner tabla desteği 4 Cam tepsi 5 Fırın camı 6 Kapak grubu 7 Kapı güvenlik kilidi sistemi 8 Izgara Rafı Sadece ızgara işlevinde kullanılır ve cam tablanın üzerine yerleştirilir 2 2 Teknik veriler Güç tüketimi 230 V 50 Hz 1270 W Mikrodalga Çıkış 800 W Nominal Giriş Gücü Izgara 1000 W Çalıştırma frekansı 2450 MHz Amper değeri 5 A Dış boyutlar Mikrodalga Fırın ...

Page 11: ...eketi asla kısıtlanmamalıdır Pişirme sırasında daima hem cam tepsi hem de döner tabla desteği kullanılmalıdır Tüm gıdalar ve gıda kapları pişirme için daima cam tepsinin üzerine yerleştirilmelidir Cam tepsi veya döner tabla desteği çatlarsa veya kırılırsa en yakın yetkili servis merkezine başvurun 2 Mikrodalga fırınınız Göbek alt kısım Cam tepsi Döner tabla mili Döner tabla desteği ...

Page 12: ...dir Fırının üzerinde en az 30 cm boşluk bı rakın fırın ve varsa yakınındaki duvarlar arasında en az 20 cm boşluk olmalıdır Fırının alt kısmındaki ayakları çıkarmayın Giriş veya çıkış deliklerinin tıkanması fırına zarar verebilir Fırını radyolardan ve televizyonlardan mümkün olduğunca uzak bir yere yerleştirin Mikrodalga fırının çalışması radyo veya televizyon yayınla rında parazitlenmeye neden ola...

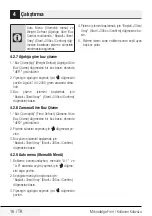
Page 13: ...Timer dü ğesine bastığınızda dakikayı gösteren rakamlar yanıp sönmeye başlar 4 Dakikayı gösteren rakamları ayarlamak için düğmesini çevirin girilen dakika değeri 0 59 arasında olmalıdır 5 Saat ayarını sonlandırmak için Saat Zamanlayıcı Clock Kitchen Timer düğmesi ne basın ekranda sembolü yanıp sönmeye başlar C Saat ayarlanmamışsa cihaza güç verildiğinde çalışmayacaktır C Saatin ayarlanması sırasın...

Page 14: ...seçmek için Mikrodalga Izgara Kombi Micro Grill Combi düğmesine birkaç kez basın ya da düğmesini çevirin ekranda sırasıyla P100 P80 P50 P30 P10 görüntülenir 3 Onaylamak için Başlat 30sn Onay Start 30Sec Confirm düğmesine basın 4 Pişirme süresini ayarlamak için düğmesini çevirin Saat ayarı 0 05 95 00 arasında olma lıdır 5 Pişirmeye başlamak için Başlat 30sn Onay Start 30Sec Confirm düğmesine basın ...

Page 15: ...ma 4 2 5 Kombi Modunda Pişirme 1 Mikrodalga Izgara Kombi Micro Grill Combi düğmesine bir kez basın ekranda P100 gö rüntülenir 2 Kombi modu gücünü seçmek için Mikrodalga Izgara Kombi Micro Grill Combi düğ mesine birkaç kez basın ya da düğ mesini çevirin ekranda sırasıyla C 1 55 mikrodalga 45 ızgara ve C 2 36 mikrodalga 64 ızgara görüntülenir 3 Onaylamak için Başlat 30sn Onay Start 30Sec Confirm düğ...

Page 16: ...tart 30Sec Confirm düğmesine basın 4 2 8 Zamana Göre Buz Çözme 1 Buz Çözme dk Time Defrost Zamana Göre Buz Çözme düğmesine bir kez basın ekranda dEF2 görüntülenir 2 Pişirme süresini seçmek için düğmesini çe virin 3 Buz çözme işlemini başlatmak için Başlat 30sn Onay Start 30Sec Confirm düğmesine basın 4 2 9 Auto menu Otomatik Menü 1 Bekleme konumundayken menüde A 1 ve A 8 arasında seçim yapmak için...

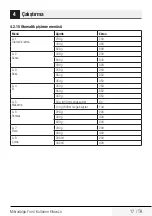
Page 17: ...tma 200 g 200 400 g 400 600 g 600 A 2 Sebze 200 g 200 300 g 300 400 g 400 A 3 Balık 250 g 250 350 g 350 450 g 450 A 4 Et 250 g 250 350 g 350 450 g 450 A 5 Makarna 50 g 450 ml soğuk suyla 50 100 g 800 ml soğuk suyla 100 A 6 Patates 200 g 200 400 g 400 600 g 600 A 7 Pizza 200 g 200 400 g 400 A 8 Çorba 200 ml 200 400 ml 400 ...

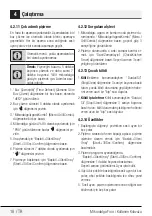
Page 18: ... İşlevi 1 Mikrodalga ızgara ve kombi modu pişirme du rumlarında Mikrodalga Izgara Kombi Micro Grill Combi düğmesine basın geçerli güç 3 saniyeliğine görüntülenir 2 Pişirme durumunda o anki zamanı kontrol et mek için Saat Zamanlayıcı Clock Kitchen Timer düğmesine basın Geçerli zaman 3 sani yeliğine görüntülenir 4 2 13 Çocuk kilidi 1 Kilit Bekleme konumundayken Durdur Sil Stop Clear düğmesine 3 sani...

Page 19: ...tünün önlenmesi için silindir halkası ve fırın zemini düzenli olarak temizlenmelidir Fırının alt yüzeyini yumuşak bir deterjanla silmeniz yeterlidir Silindir halkası hafif köpüklü suda veya bulaşık makinesinde yıkanabilir 5 Temizlik ve bakım Temizlik için silindir halkasını fırın iç boşluk ze mininden çıkarttığınızda geri takarken doğru konumda yerleştirdiğinizden emin olun 10 Fırınınızdaki kokula...

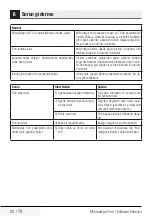
Page 20: ...r Ama bir kıs mı fırın kapağı gibi soğuk bir yerde birikebilir Bu durum normaldir İçinde gıda yokken fırın yanlışlıkla çalıştı İçinde gıda yokken cihazın çalıştırılması yasaktır Bu du rum çok tehlikelidir Sorun Olası Neden Çözüm Fırın çalışmıyor 1 Güç kablosu düzgün takılmamış Fişi çekin Ardından 10 saniye sonra fişi yeniden takın 2 Sigorta atmıştır veya devre kesi ci çalışmıştır Sigortayı değişti...

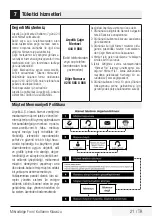
Page 21: ...ili hizmet talebiniz oldu ğunda yukarıdaki telefon numaraların dan Çağrı Merkezimize başvurunuz 4 Hizmet için gelen teknisyene teknisyen kimlik kartı nı sorunuz 5 İşiniz bittiğinde servis teknisyeninden Hizmet Fişi istemeyi unutmayınız ala cağınız Hizmet Fişi ilerde ürününüzde meydana gelebilecek herhangi bir so runda size yarar sağlayacaktır 6 Ürünün kullanım ömrü 10 yıldır Ürünün fonksiyonunu ye...

Page 22: ... kılavuzlarında yer alan hususlara aykırı kullanılmasından kaynaklanan hasar ve arızalar 6 Malın 6502 sayılı Tüketicinin Korunması Hakkındaki Kanununda tarif edilen şekli ile ticari veya mesleki amaçlarla kullanımı durumunda ortaya çıkan hasar ve arızalar Mala yetkisiz kişiler tarafından bakım onarım veya başka bir nedenle müdahale edilmesi durumunda mala verilmiş garanti sona erecektir Garanti uy...

Page 23: ...esi durumunda satıcı üretici ile ithalatçı müsteselsilen sorumludur 6 lgili mevzuatlarda belirlenen kullanım ömrü süresince malın azami tamir süresi 20 iş gününü geçemez Bu süre garanti süresi içerisinde mala ilişkin arızanın yetkili servis istasyonuna veya satıcıya bildirimi tarihinde garanti süresi dışında ise malın yetkili servis istasyonuna teslim tarihinden itibaren başlar Garanti kapsamı içe...

Page 24: ...uture use If you handover the product to someone else give the user manual as well Follow all warnings and information in the user manual Meanings of the symbols Following symbols are used in the various section of this user manual C Important information and useful hints about usage A Warnings for dangerous situations concerning the safety of life and pro perty Warning for hot surfaces This appli...

Page 25: ...h as Staffkitchenareasinshops offices and other working environments Farm houses By clients in hotels motels and other residential type environ ments Bed and Breakfast type environ ments Do not attempt to start the oven when its door is open otherwise you may be exposed to harmful microwave energy Safety locks should not be disabled or tam pered with Do not place any object bet ween the front side...

Page 26: ...erated with an external clock timer or separate remote control system Before using the appliance for the first time clean all parts Please see the details given in the Cleaning and Maintenance section Operate the appliance for its in tended purpose only as descri bed in this manual Do not use abrasive chemicals or steam on this appliance This oven is particularly intended for heating and cooking t...

Page 27: ...the appliance is in use 1 1 1 Electrical safety If the supply cord is damaged it must be replaced by the ma nufacturer or its service agent or a similarly qualified person in order to avoid a hazard Beko Microwave Ovens comply with the applicable safety stan dards therefore in case of any damage on the appliance or power cable it should be repa ired or replaced by the dealer service center or a sp...

Page 28: ...disconnect it from its power supply and never wrap its power cable around the appliance Do not immerse the appliance power cable or power plug in water or any other liquids Do not hold it under running water When heating food in plastic or paper containers keep an eye on the oven due to the possibi lity of ignition Remove the wire strings and or metal handles of paper or plas tic bags before placi...

Page 29: ...ound after they have been taken out of the oven so be careful when you are holding the containers Do not roast anything in the oven Hot oil may damage the components and materials of the oven and it may even cause skin burns Pierce food with thick crust such as potatoes zucchinis apples and chestnuts Appliance must be placed so that the rear side is facing the wall Before moving the appliance plea...

Page 30: ...hich in volves the removal of a cover which gives protection against exposure to microwave energy WARNING Liquids and other foods must not be heated in se aled containers since they are liable to explode The oven should be cleaned re gularly and any food deposits removed There should be min 30 cm free space above the top surface of the oven Do not use the appliance for anything other than its inte...

Page 31: ...ave been given so that the child is able to use the microwave oven in a safe way and understands the hazards of improper use 1 Important safety and environmental instructions Due to excessive heat that ari ses in grill and combination modes children should only be allowed to use these modes under supervision of an adult Keep the product and its power cable so that they are inacces sible by childre...
Page 32: ...uitable for recycling Do not dispose of the waste product with normal domestic and other wastes at the end of its service life Take it to the collection center for the recycling of elec trical and electronic equipment Please consult your local authorities to learn about these collec tion centers 1 5 Compliance with RoHS Directive The product you have purchased complies with EU RoHS Directive 2011 ...

Page 33: ...s tray 5 Oven window 6 Door group 7 Door safety interlock system 8 Grill Rack Only be used in grill function and be placed on the glass tray 2 2 Technical data Power consump tion 230 V 50 Hz 1270 W Microwave Output 800 W Rated Input Power Grill 1000 W Operating frequency 2450 MHz Ampere value 5 A External dimen sions Microwave Oven 258 2 mm H 439 5 mm W 356 mm D Internal dimensi ons of the oven 20...

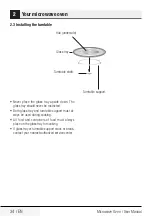
Page 34: ...ass tray should never be restricted Both glass tray and turntable support must al ways be used during cooking All food and containers of food must always place on the glass tray for cooking If glass tray or turntable support crack or break contact your nearest authorized service center 2 Your microwave oven Hub underside Glass tray Turntable shaft Turntable support ...

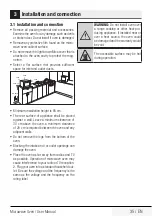
Page 35: ... be placed against a wall Leave a minimum clearance of 30 cm above the oven a minimum clearance of 20 cm is required between the oven and any adjacent walls Do not remove the legs from the bottom of the oven Blocking the intake and or outlet openings can damage the oven Place the oven as far away from radios and TV as possible Operation of microwave oven may cause interference to your radio or TV ...

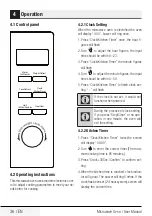
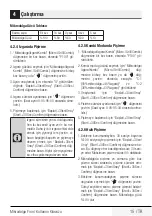
Page 36: ...chen Timer the minute figures will flash 4 Turn to adjust the minute figures the input time should be within 0 59 5 Press Clock Kitchen Timer to finish clock set ting will flash C If the clock is not set it would not function when powered C During the process of clock setting if you press Stop Clear or no ope ration in one minute the oven will exit the setting 4 2 2 Kitchen Timer 1 Press Clock Kit...

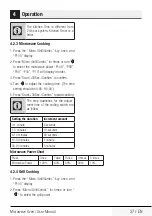
Page 37: ... time The time setting should be 0 05 95 00 5 Press Start 30Sec Confirm to start cooking C The step quantities for the adjust ment time of the coding switch are as follow Setting the duration Increment amount 0 1 minute 5 seconds 1 5 minutes 10 seconds 5 10 minutes 30 seconds 10 30 minutes 1 minute 30 95 minutes 5 minutes Microwave Power Chart Press Once Twice Thrice 4 times 5 times Microwave Powe...

Page 38: ...art 30Sec Confirm to confirm when the screen display G 4 Turn to adjust the grill time The time setting should be 0 05 95 00 5 Press Start 30Sec Confirm to start cooking C If half the grill time passes the oven sounds twice and this is normal In order to have a better effect of gril ling food you should turn the food over close the door and then press Start 30Sec Confirm to conti nue cooking If no...

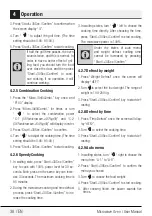
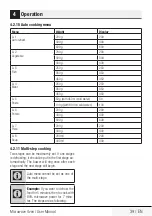
Page 39: ... 100 A 6 Potato 200 g 200 400 g 400 600 g 600 A 7 Pizza 200 g 200 400 g 400 A 8 Soup 200 ml 200 400 ml 400 4 2 11 Multi step cooking Two stages can be maximumly set If one stages is defrosting it should be put in the first stage au tomactically The buzzer will ring once after each stage and the next stage will begin C Auto menu cannot be set as one of the multi stage C Example If you want to defro...

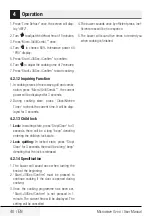
Page 40: ...It will be disp layed for 3 seconds 4 2 13 Child lock 1 Lock In waiting state press Stop Clear for 3 seconds there will be a long beep denoting entering the children lock state 2 Lock quitting In locked state press Stop Clear for 3 seconds there will be a long beep denoting that the lock is released 4 2 14 Specification 1 The buzzer will sound once when turning the knob at the beginning 2 Start 30...

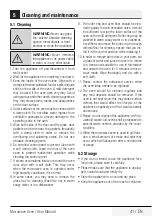
Page 41: ... remove the glass tray for cleaning Wash the tray in warm soapy water or in a dishwasher 5 Cleaning and maintenance 9 The roller ring and oven floor should be clea ned regularly to avoid excessive noise It would be sufficient to wipe the lower surface of the oven with a mild detergent Roller ring may be washed in warm soapy water or in a dishwas her When you remove the roller ring from oven intern...

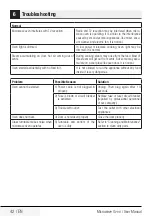
Page 42: ...ulate on a cool place like oven door It is normal Oven started accidentally with no food in it It is not allowed to run the appliance without any food inside It is very dangerous Problem Possible Reason Solution Oven cannot be started 1 Power cable is not plugged in properly Unplug Then plug again after 10 seconds 2 Fuse is blown or circuit breaker is activated Replace fuse or reset circuit breake...

Page 43: ......

Page 44: ......

Reviews: