


STEP 7
Put the frame and blade assembly (Items 3& 4) inside the chute, and slide the tensioner
pipes (Item 1) through the holes previously cut in the structure. Then slide the tensioners
(Item 2) onto the tensioner pipes. The bushing inside the tensioner hub should fit over
about 1” of the square section of the pipe. Next, level the cleaner in relation to the head
pulley. Verify the “Z” dimension by slipping the urethane installation rings onto the pipes.
Once the “Z” dimension has been verified, tack-weld the tensioners into place. Set the
cleaner blade against the belt and insert both tensioner pins into both outer hubs on the
tensioners. Ensure that the square section of the tensioner pipe is located within the
welding hub of both tensioners. Tighten the set screws on the mainframe and complete
welding on the tensioners (4 - 2 " (50.8 mm) welds on each tensioner is enough). Pull the
pins again to check if the cleaner rotates freely in the hubs. If it does not, realign the
tensioners until the cleaner rotates freely.
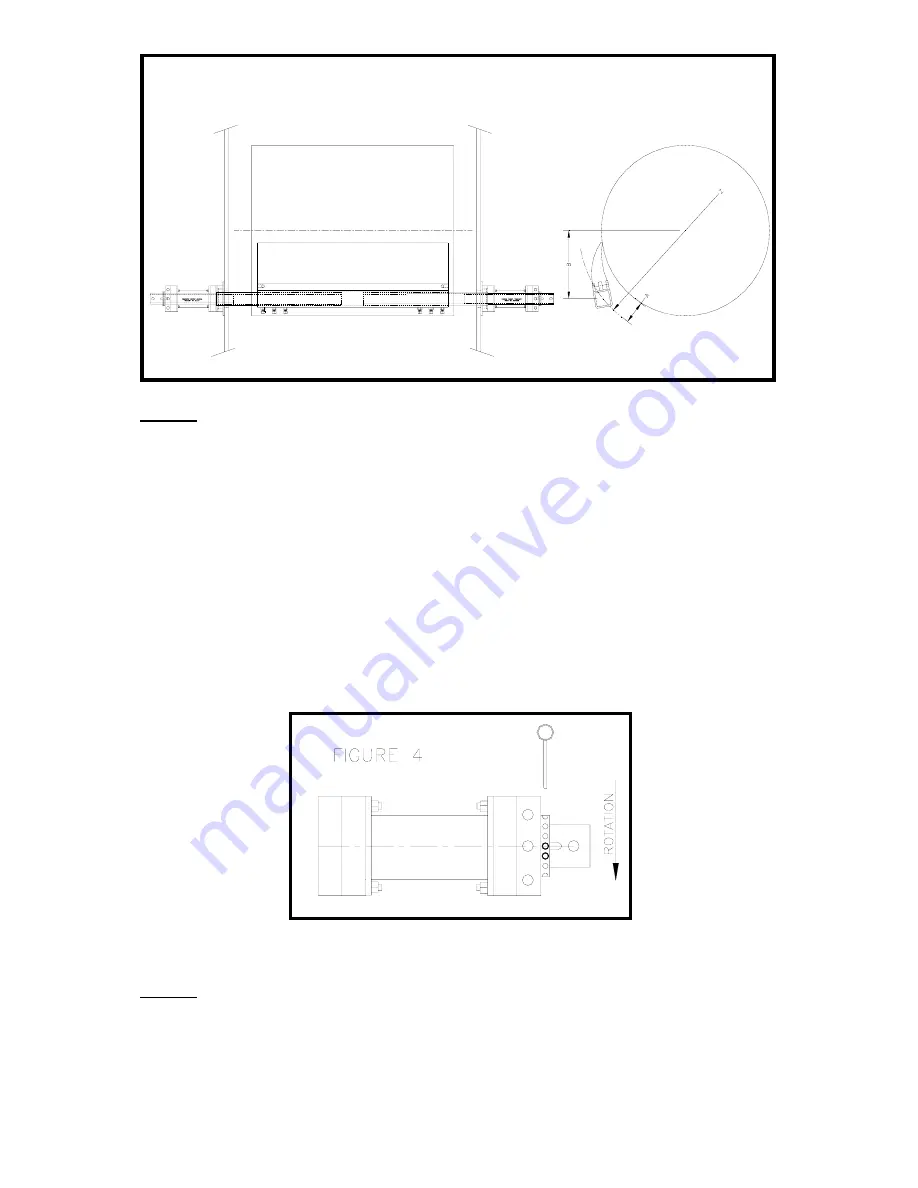
STEP 8
Finally, starting with one side pull the tensioner pin and rotate the tensioner away from the
head pulley, until the next hole shows (Figure 4) in the tensioner hub. Reinstall the pin.
Repeat this process for the other tensioner.
That's it!


