background image


29

Recording MP3 Music 

With the AV 300 series, you do not need a computer to create MP3 music files. It is capable of 

recording from the built-in microphone, an external dynamic microphone, an analog line source ( 

from a HiFi system, Boombox, CD Player, etc.), or from a digital SPDIF audio source. Before the 

actual recording begins, there is a pre-recording screen which will allow you to adjust your 

recording settings before the actual recording begins. 


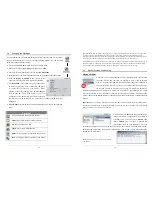
1. 

From the home screen, select 

AudioCorder then click on ENTER/GO 

!

.


2. 

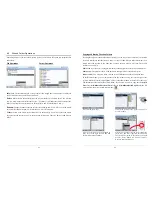
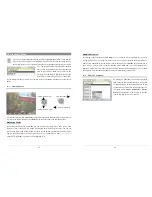
In the pre-recording screen, adjust the 

recording level* by nudging the joystick to the 
right or left. Click on the bottom function 
button to start recording. Attention, first time 
recording you should adjust your 

Settings


3. 

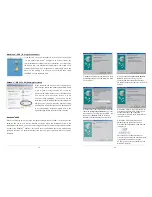
You can click on 

Settings

 to reveal the 

recording parameters screen as shown 
above. Be sure to set the correct 

Source

You will hear silence during recording and 
playback if the incorrect source is chosen. 


4. 

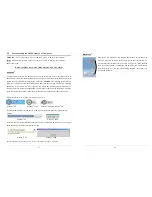
Once you have clicked on the 

Start

 button, 

you can pause the recording by clicking the 
same function button (now labelled 

Pause

), or 

stop the recording by clicking on the STOP 

"


button. 


* You should try some test recordings before deciding on which recording level gives the best sound quality. 
Don’t be tricked by the volume of the headphones which can be adjusted by moving the joystick up and down. 


30

Microphone 

The built-in microphone is located on the top of the AV300 unit next to the audio input jack. Make 

sure that you have selected 

Microphone

 as the input source in the pre-recording Settings screen.  

External Microphone  

If you would like to use your own external microphone, you can do so by choosing this setting. 

For best results, the external microphone should be a dynamic microphone with an impedance of 

300 ohms. Make sure that you have selected 

External Mic


as the input source in the pre-recording 

Settings screen. This method is preferable over the built-in microphone as the built-in one can pick 

up the noise of the internal hard drive. 

Analog Line-In 

You can record from any line-level audio source to the Line-in jack on the top side of the AV300. 

Use the included stereo cable (Red/Right and White/Left) to connect to your Hifi system, home 

CD player, etc. Do not connect the yellow connector to anything. To record from a source such as 

a portable CD player, you will need to buy a cable with mini-jack (3.5mm) male connectors on 

both sides. Be careful that the source audio is supplying a line level and not an amplified signal 

(usually turning down the volume on the player will work). An amplified signal will make for a 

terribly distorted recording. Make sure that you have selected 

Analog Line-In

 as the input source 

in the pre-recording Setup screen. You can also use a high quality pre-amplified microphone, such 

as the one Archos sells as an option. 

Digital Input (SPDIF) 

The digital input is for SPDIF enabled audio devices. The AV300 runs the wire based protocol 

(not optical). To record or play via the SPDIF digital audio connection, you will use the cable 

delivered with the Jukebox. Place it in the LINE-IN jack. The yellow RCA connector works as 

both the IN and the OUT. You will have to swap this from the SPDIF IN and OUT on your SPDIF 

enabled audio system as needed.  

Incremental Recording 

While recording, you will notice the center function button labeled 

Next

. This allows you to create 

incremental recordings. That is, the current recording stops and a new recording instantly begins. 

The next recording has an additional number appended to its name. Thus if you create multiple 

incremental recordings, you might, for example, have files names of REC0000_01, REC0000_02, 

etc. This is good for recording old cassettes and old vinyl records. You can click on the 

Next


button during the blank space between each song. That way, each song of the vinyl disk or audio 

cassette will be one single MP3 file. 

Summary of Contents for AV320 - Video Recorder - Digital AV

Page 1: ...Fi system 13 3 2 ID3 Tags 13 3 3 Changing the sound settings 14 3 4 Changing the PlayMode 15 3 5 Playlist Creation and Running 16 Playing a Playlist 16 Creating a Playlist 17 Saving a Playlist 17 3 6...

Page 2: ...rranties of merchantability and fitness for a particular purpose regarding the licensed materials ARCHOS s licensor s does not warrant guarantee or make any representations regarding the use or the re...

Page 3: ...ARCHOS 2003 All rights reserved This document may not in whole or part be copied photocopied reproduced translated or reduced to any electronic medium or machine readable form without prior consent i...

Page 4: ...age System Requirements PC Windows 98SE ME 2000 XP Pentium II 266MHz with 64MB ram Mac OS 9 2 or X 10 2 4 iMac G3 or higher DivX is a trademark of DivXNetworks Inc Depending on usage stop start writin...

Page 5: ...save battery power the lighting of the screen consumes a lot of the battery power It is factory set to 30 seconds That is if there are no buttons pressed the screen will shut off in order to save batt...

Page 6: ...ostatic phenomena for example you can actuate a hardware reset by holding down on the STOP ESC button for 10 seconds In normal operation the STOP ESC button will shut down the AV300 after being held d...

Page 7: ...folder the name of the current folder and then the name of the file As of the writing of this manual there are two versions of ID3 tags that are firmly established standards ID3 version 1 and ID3 ver...

Page 8: ...ime the AV300 will play the next song in the directory Scan Mode Each track in the directory is played for 15 seconds This allows a quick sample of each song If you want to play the whole song click o...

Page 9: ...t will not delete the actual song itself from your hard drive just from the current Playlist 18 3 6 Adding songs to a Playlist while listening to Music This can only be done if you have entered your m...

Page 10: ...s a hierarchical system which includes folders and subfolders Because you will be putting hundreds of files on your AV300 it is STRONGLY ADVISED that keep a neat and orderly file structure Otherwise y...

Page 11: ...the file structure to another caution there is a limit of 1000 files per folder maximum You simply move the joystick to the right and a second browser window will open The double browser can be used i...

Page 12: ...procedure also since disconnecting incorrectly can lead to data loss or computer AV300 freeze up The AV300 is not compatible with Windows NT Windows 95 or Windows 98 first edition While connected as a...

Page 13: ...hardware and ask to have drivers installed Carefully follow the instructions below After installation of the drivers you will be able to drag and drops file between your computer and the AV300 using...

Page 14: ...l have to shut down the application Using the green disconnect arrow in the system tray will then allow you to safely disconnect the AV300 1 The safe remove icon is in the system tray next to clock Wi...

Page 15: ...source in the pre recording Settings screen This method is preferable over the built in microphone as the built in one can pick up the noise of the internal hard drive Analog Line In You can record fr...

Page 16: ...voice you record the actual bit rates will vary slightly Suggested Settings 32 7 Settings 7 1 Sound Settings Used to adjust the bass treble bass boost loudness balance etc See section 3 3 7 2 Play Mo...

Page 17: ...charger adapter DC Power operation Parameter Description Power Off 1 9 Never Values 1 9 represent the number of minutes of user inactivity no buttons pressed before the AV300 shuts off During the play...

Page 18: ...have a large video image 640x368 or larger for example increasing the DSP speed to overclock yellow or overclock red could increase the smoothness of the playback and help reduce any visual compressio...

Page 19: ...pdate Follow the on screen instructions When completed the AV300 will restart itself and you will see the new OS version displayed on the bottom right of the screen 38 8 Playing MPEG4 Video Files The...

Page 20: ...ts original format avi or mpg mpeg 1 and then encode it into a DivX based MP4 AVI file The file will be up to 640x368 pixels in resolution in order to be played back 40 properly Only MP4 files encoded...

Page 21: ...translator will signal this error condition Obviously it is pretty useless to have the video file without sound What you will need in this case is an MP3 encoder for Virtual Dub to use There are MP3 e...

Page 22: ...the video to be guarded If for example you are re encoding a video file that is 800x600 in resolution and 30 frames per second this is beyond the maximum resolution that the AV300 can play Thus the M...

Page 23: ...click of the PLAY GO button will magnify the picture one more level You can use your joystick to move the picture around in order to see the desired magnified section The small signs on the bottom lef...

Page 24: ...the paper pouch that the CD was packaged in If for some reason the autorun does not present the menu when you place the CD into your computer you can run the installation via the executable program i...

Page 25: ...Asked Questions section at the ARCHOS Website www archos com that can help answer many of your questions If you need technical help you may contact ARCHOS directly in your own language via these phone...

Page 26: ...wered hubs Do not connect to a USB port repeated through a keyboard The USB driver software on your computer may be out of date Find your USB chipset type by going to My Computer Properties Device Dri...

Page 27: ...names that I never created or they have strange gibberish names Answer Most likely the AV300 s file allocation table FAT has been corrupted This could have been due to using your AV300 connected to y...

Page 28: ...ty check disk chkdsk Do the following Make sure external AC adapter is powering the AV300 Quit all running applications Properly connect the AV300 to your computer as explained in chapter 5 Wait patie...

Reviews: