24
- To add text to your photo, use the Text Tool.
- To automatically match the color of your photo with your fantasy, use the
automatic Match Color Tool.
- To adjust the brightness in the entire photo fantasy, use the Brightness Tool.
- To adjust the contrast in the entire photo fantasy, use the Contrast Tool.
- To adjust the saturation in the entire photo fantasy, use the Saturation Tool.
Optional:
- For more information about the t ools in step 2, see the term “Adjustment Tools” in the
section “Getting Acquainted - Main Screen”.
D. Save, Print or Send Your Photo Fantasy.
1. To save your photo fantasy, click the Save As Tool. The Save As dialog box will appear,
prompting you to select the filename,path and format. Click Save when you are done.
2. To print your photo fantasy, click the Print Tool. The Print dialog box will appear,
prompting you to select your printer settings to b egin printing.
3. To e-mail your photo fantasy, click the Send Tool. Your e-mail program will launch,
allowing you to automatically send your finished creation as an e-mail attachment.
E. Create Your Own Fantasy Background.(optional)
1. In the Get Fantasy Screen, click the down arrow in the Fantasy Category Menu
and choose “My Fantasy”. The “My Fantasy” Buttons will be displayed at the bottom
of the screen.
2. Select the image you want to turn into a fantasy.
•
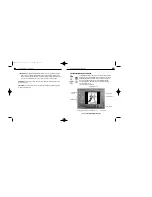
To create a fantasy from your own image, click the Add Button. The Create
Fantasy Background Screen will appear, along with an O pen dialog box.
Choose the image you want to o pen. The image will appear in the Create
Fantasy Display Area.
PhotoFantasy 2000 Quick Start Guide
23
2.
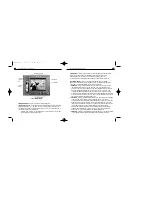
Three Live Video Buttons will automatically appear across the top of the Fantasy
Display Area.
Click the Live Preview button to turn on your desktop video camera.A blinking
green circle appears around the button. The face mask in the fantasy t emplate is
automatically replaced by your live video.
3.
Manually aim your desktop video camera towards the face of your subject. Click
the Snap Photo button located to the left of the Preview button. This will
automatically take the photo of the subject in the Preview window and place it in
the fantasy template. Using the adjustment tools you can position and move your
photo into place for the perfect PhotoFantasy.
Optional:
- To create your own categories with y our own photos, see the term “Photo Category
Menu” in the section “Getting Acquainted - Get Photo Screen”.
C. Adjust Your Photo Fantasy.
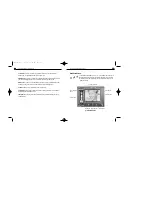
1. Highlight the Get Photo Button (1,2 or 3) for the photo you want to adjust. (To
highlight, click on the appropriate Get Photo Button, or click on the actual
photo in the Main Display Area.)
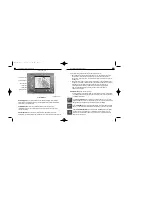
2. Use the Adjustment Tools to adjust the position,size and color of the photo within
its mask.
- To adjust the placement of the photo, position your cursor over the photo and
drag the hand cursor that appears.
- To flip the photo, click the Flip Tool.
- To move the photo in a specific direction,use the Move tools.
- To enlarge or reduce the size of the photo, use the Resize tools.
- To rotate the photo clockwise or counter-clockwise,use the Rotate tools.
- To control the precision of movements,use the Zoom In/Zoom Out tools.
PhotoFantasy 2000 Quick Start Guide
PFANTASY.200 3/14/01 10:28 AM Page 25


