16
Tip: To remove the outline that you are drawing and start over, press your Esc key at
any time.
•
Subtract
- lets you outline the portion of the mask you want to remove. To outline,
use the same drawing technique as described under the “Add”masking tool term.
The outlined portion will automatically be removed.
Tip: To remove the outline that you are dr awing and start o ver, press your Esc
key at any time.
Tip: To remove your entire mask, press your Delete key.
•
Paint
- lets you “paint” your mask,like a paintbrush. To paint, click the Paint Tool to
turn it “on” and choose your desired brush size. Position your cursor on the area you
want to mask,then click and drag the cursor. Release the mouse when you are done.
•
Blur
- lets you soften the edges of your mask. To blur, click the Blur Tool to turn it
“on” and click on your desired brush size. Position your cursor on the mask,then
click and drag the cursor o ver the edges. Release the mouse when you are d one.
•
Erase
- lets you “erase” parts of the mask,like an eraser. To erase, click the Erase
Tool to turn it “on” and click on your desired brush size. Position your cursor on
the area you want to mask,then click and drag the cursor. Release the mouse whe n
you are done.
Tip: To remove your entire mask, press your Delete key.
•
Brush Size
- gives you different brush sizes to use in conjunction with the Paint, Blur
and Erase Tools. Small brushes allow you to do more detailed work, whereas large
brushes allow you to cover a bigger area.
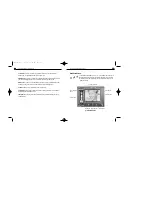
Brightness Tool
- lets you increase or d ecrease the brightness in your entire fantasy
background. To adjust,slide the bar to the right or left.
PhotoFantasy 2000 Quick Start Guide
15
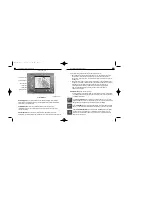
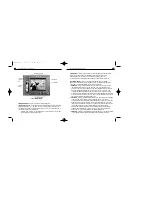
Create Display Area
- displays the image you want to turn into a fantasy background.
“mask”
- the designated area in your fantasy background that will lat er contain your
chosen photo.
Create Mask Button 1,2 or 3
- lets you specify the mask (1,2 or 3) you want to create
or edit. To do this,highlight (or click on) the button that corresponds to your desired
mask.A highlighted button indicates the Masking Tools for that particular mask are
now enabled.
Note: When creating new masks, you must highlight the b uttons in order from 1
to 3. For example,if you want to create two masks, you will need to click on
button 1 before you click on button 2.
Tip: Create each mask in a consistent manner. For example, by creating masks from
left to right, you will know mask #1 is always on the left,mask #2 in the middle and
mask #3 on the right. This is helpful when you are rea dy to use the fantasy
background and must select the appropriate photo for each mask.
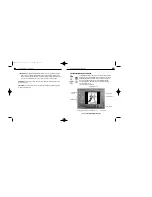
Masking Tools
- let you create the mask (1,2 or 3) that you specified.Once created,the
color of the mask will mat ch the color of its corresponding Create Mask Button.
•
Add
- lets you “draw” your mask. To draw, click the Add Tool to turn it “on”. Position
your cursor on any point on the outline of the mask,then click once with your mouse.
A small square will appear to show you your starting point and ending point. By
imagining the outline as a dot-to-dot drawing, move your cursor from the square
and click once on the next c onnecting “dot”. A line will c onnect the dots. Continue
clicking until you reach the square again. Click on the square to close the area and
generate the mask.
PhotoFantasy 2000 Quick Start Guide
PFANTASY.200 3/14/01 10:28 AM Page 17


