6-12
CF266A
CF267A
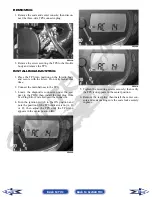
10. Apply a liberal coat of grease to the O-ring; then
install it on the assembled cover assembly making
sure to seat the O-ring completely down around
the circumference of the bearing flange.
CF275A
11. Making sure the O-ring is properly positioned on
the gear case cover assembly, install the cover with
existing hardware. Account for the ID tag. Tighten
the cap screws to 23 ft-lb.
NOTE: Grease can be applied to the O-ring for
ease of assembling.
NOTE: If a new gear case housing is being
installed, tighten the cap screws to 28 ft-lb.
Removing Needle Bearing
NOTE: Removing the needle bearing is rarely
necessary. Avoid removing the needle bearing
unless the bearing is clearly damaged.
NOTE: This procedure can be performed on a
rear gear case (Prowler/XT)/rear differential (XTX).
1. Place a 1/4 in. drill bit on the inside surface of the
needle bearing (against the bottom side); then drill
through the pinion shaft needle bearing housing.
CC885
2. Using a propane torch, heat the area surrounding
the needle bearing to soften the Loctite.
CC886
3. Using a flat-nosed punch, drive the bearing out of
the housing.
CC887
Installing Needle Bearing
1. Apply red Loctite #271 to the outside of a new
bearing; then place the new bearing into the hous-
ing.
Back to TOC
Back to Section TOC
Next
Back

