8-14
PR473A
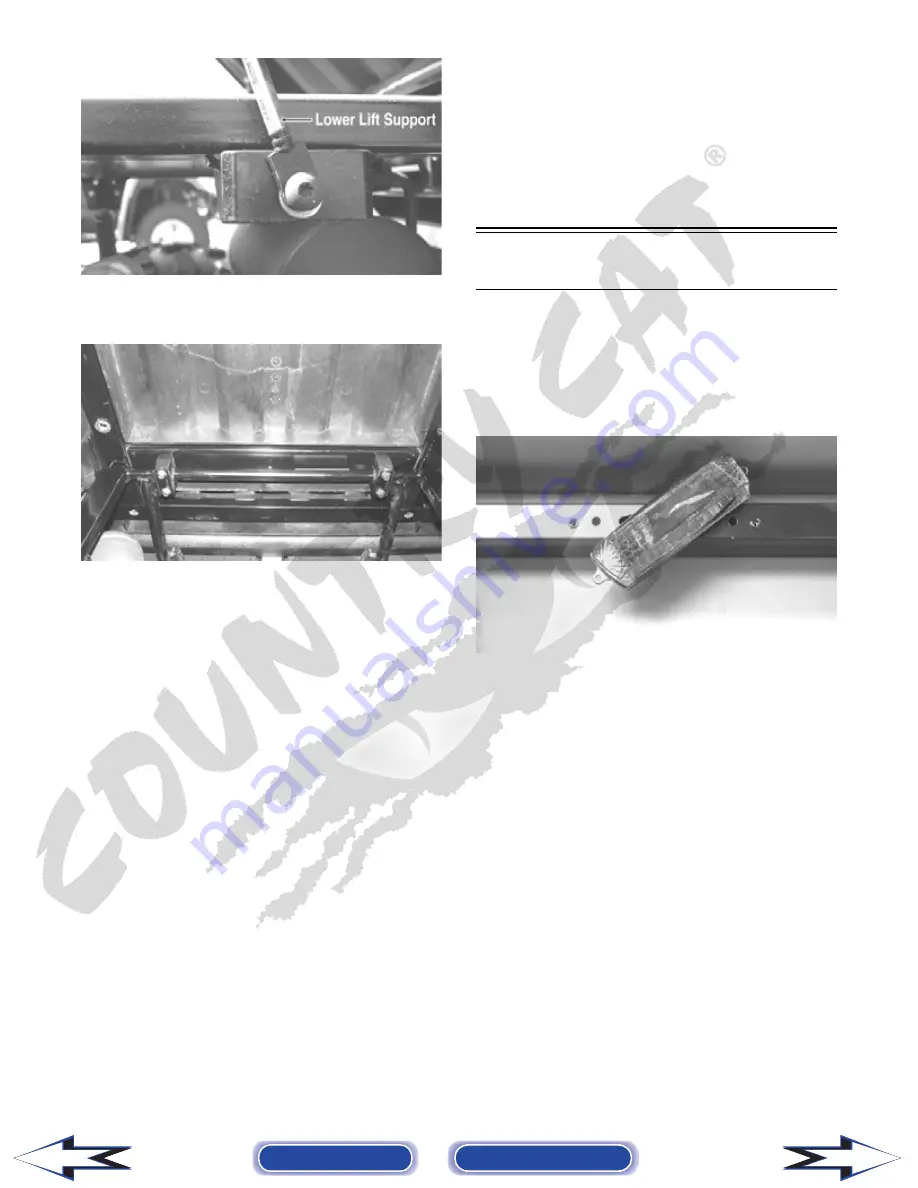
2. Loosen but do not remove the four shoulder cap
screws securing the pivot housings to the cargo box.
PR335
3. Lower the cargo box; then remove the four cap
screws (from step 2).
4. With the help of an assistant or an adequate lift,
remove the cargo box from the vehicle. Account
for four pivot housings.
CLEANING AND INSPECTING
NOTE: Whenever a part is worn excessively,
cracked, or damaged in any way, replacement is
necessary.
1. Clean all cargo box components with soap and water.
2. Inspect the cargo box for cracks, tears, and loose
hardware.
3. Inspect the welds of the cargo box frame for crack-
ing or bending.
4. Inspect the cargo box gate latches for smooth
operation.
INSTALLING
1. With the help of an assistant or an adequate lift, set
the cargo box into position on the frame; then posi-
tion the two upper pivot housings between the cargo
box and frame. Lightly grease the pivot housings.
2. Align the holes in the upper pivot housings with
the holes in the cargo box; then install the lower
pivot housings and secure with the four shoulder
cap screws. Tighten to 20 ft-lb.
3. Raise the cargo box; then connect the lift support
to the frame, install the cap screw and nut, and
tighten the nut securely.
4. Lower the cargo box and lock into position.
Taillight Assembly
REMOVING
1. Remove two torx-head screws securing the tail-
light assembly to the rear canopy tube; then rotate
the taillight assembly left or right to allow the con-
nector to clear the access opening.
PR056
2. Disconnect the three-prong connector from the
bulb socket and remove the taillight assembly.
INSPECTING
NOTE: Whenever a part is worn excessively,
cracked, or damaged in any way, replacement is
necessary.
1. Inspect wiring harness, three-prong connector,
lens, base, cap screws, and socket for damage.
2. Inspect all wires for corroding, pinching, and
cracking.
3. Inspect the bulb for wattage, voltage, and proper
operation.
INSTALLING
1. Connect the three-prong connector to the bulb
socket; then place the taillight assembly into posi-
tion on the rear canopy tube.
2. Install the two torx-head screws and tighten securely.
Back to TOC
Back to Section TOC
Next
Back


