5-11
5
DE519B
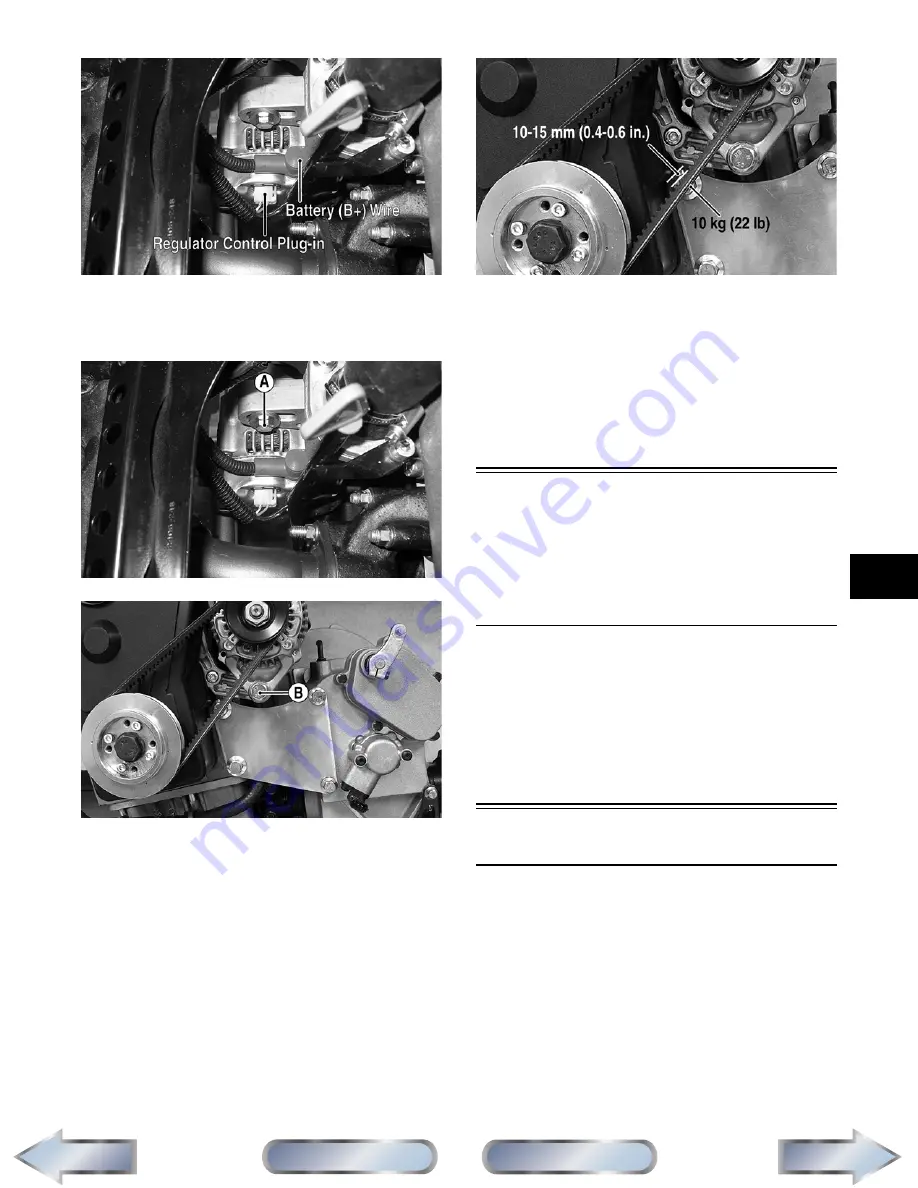
3. Loosen the alternator adjuster cap screw (A) and
the pivot bolt (B); then remove the alternator drive
belt.
DE519C
DE103C
4. Remove the adjuster cap screw and pivot bolt and
remove the alternator.
NOTE: The alternator/regulator is not a service-
able part; therefore, it must be replaced as an
assembly.
INSTALLING
1. Place the alternator/regulator into position on the
engine; then secure with the existing hardware. Do
not tighten at this time.
2. Place the alternator drive belt into position; then
using a suitable pry, tension the drive belt so that a
10 kg (22 lb) force applied at the midway point
will result in a deflection of 10-15 mm (0.4-0.6
in.).
DE103B
3. Holding tension on the belt, tighten the adjuster
cap screw securely; then remove the pry and
tighten the pivot bolt securely.
4. Connect the battery (B+) wire and connect the reg-
ulator control plug-in; then connect the negative
battery cable to the battery.
5. Install the left-side engine cover and seat making
sure the seat latches securely.
Neutral Start/Front
Drive Actuator/
Start-in-Gear/
Differential Lock/
2WD Relays
The relays are identical plug-in type located on the
power distribution module. Relay function can be
checked by switching relay positions. The relays are
interchangeable.
NOTE: The module and wiring harness are not a
serviceable component and must be replaced as
an assembly.
Headlights
The connectors are the four 2-prong ones secured to
the front bumper supports (two on each side) with
cable ties.
BULB VERIFICATION
(Low and High Beam)
NOTE: Perform this test on each headlight bulb.
Also, a 12-volt external power supply w/jumpers
will be needed.
1. Disconnect the wiring harness from the bulb to be
tested.
Next
Back
Section
Table of Contents
Manual
Table of Contents
FOR ARCTIC CAT ATV DISCOUNT PARTS CALL 606-678-9623 OR 606-561-4983
www.mymowerparts.com


