2-10
Headlight/Taillight-
Brakelight
Each time the ATV is used, lights should be checked
for proper function. Rotate the ignition switch to the
lights position; the headlights and taillight should illu-
minate. Test the brakelight by compressing the brake
lever. The brakelight should illuminate.
HEADLIGHT
NOTE: The bulb portion of the headlight is frag-
ile. HANDLE WITH CARE. When replacing the
headlight bulb, do not touch the glass portion of
the bulb. If the glass is touched, it must be cleaned
with a dry cloth before installing. Skin oil residue
on the bulb will shorten the life of the bulb.
To replace the headlight bulb, use the following proce-
dure.
1. Remove the wiring harness connector from the
back of the headlight.
2. Grasp the bulb housing, turn it counterclockwise,
and remove the bulb.
3. Install the new bulb into the housing and rotate it
completely clockwise.
4. Install the wiring harness connector.
TAILLIGHT-BRAKELIGHT
To replace the taillight-brakelight bulb, use the follow-
ing procedure.
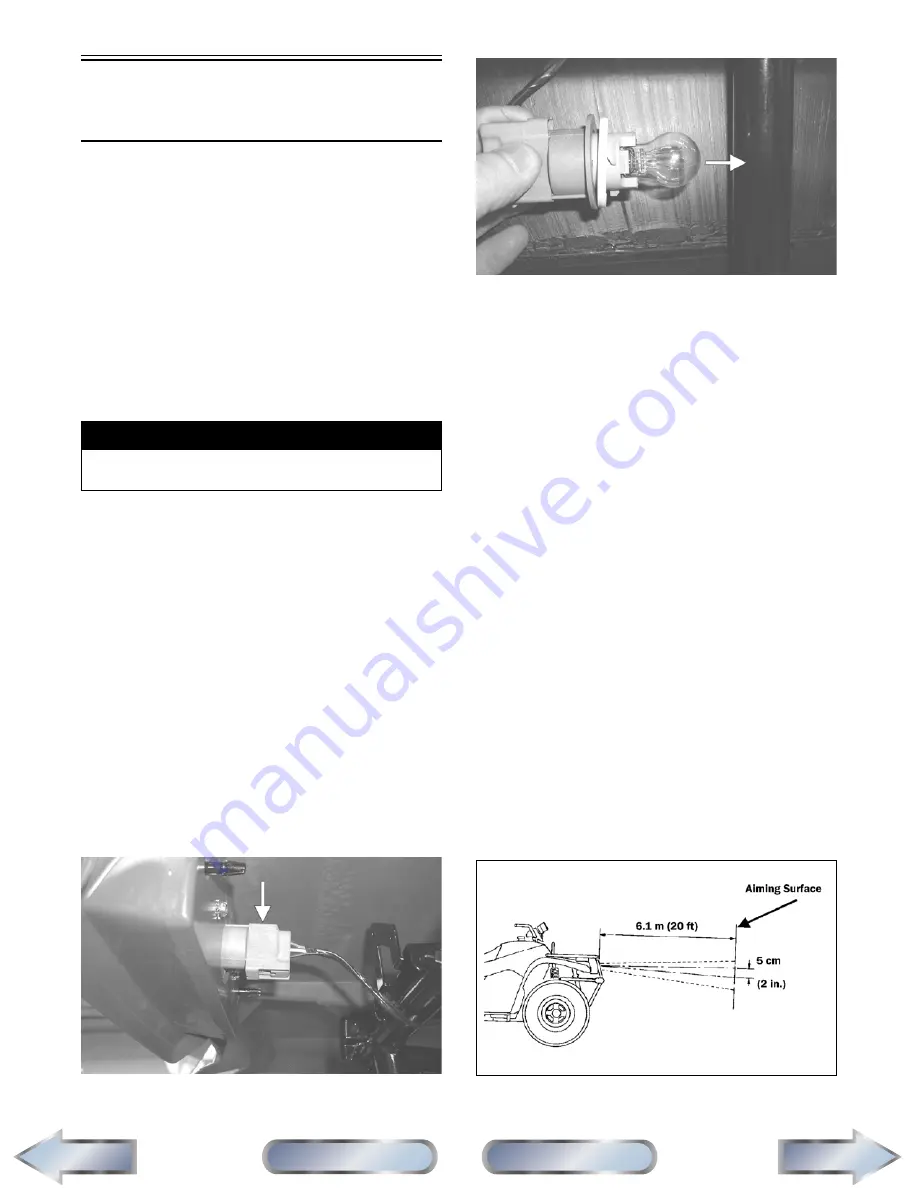
1. Turn the bulb socket counterclockwise and remove
from the housing.
CF135A
2. Pull the bulb straight out of the socket; then insert
a new bulb.
CF132A
3. Insert the socket into the housing and turn it clock-
wise to secure.
CHECKING/ADJUSTING
HEADLIGHT AIM
The headlights can be adjusted vertically and horizon-
tally. The geometric center of the HIGH beam light
zone is to be used for vertical and horizontal aiming.
1. Position the ATV on a level floor so the headlights
are approximately 6.1 m (20 ft) from an aiming
surface (wall or similar aiming surface).
NOTE: There should be an average operating
load on the ATV when adjusting the headlight aim.
2. Measure the distance from the floor to the
mid-point of each headlight.
3. Using the measurements obtained in step 2, make
horizontal marks on the aiming surface.
4. Make vertical marks which intersect the horizontal
marks on the aiming surface directly in front of the
headlights.
5. Switch on the lights. Make sure the HIGH beam is
on. DO NOT USE LOW BEAM.
6. Observe each headlight beam aim. Proper aim is
when the most intense beam is centered on the ver-
tical mark 5 cm (2 in.) below the horizontal mark
on the aiming surface.
ATV-0070C
! WARNING
Do not attempt to remove the bulb when it is hot.
Severe burns may result.
Next
Back
Section
Table of Contents
Manual
Table of Contents
FOR ARCTIC CAT ATV DISCOUNT PARTS CALL 606-678-9623 OR 606-561-4983
www.mymowerparts.com


