99
3. Inspect the gear case seals for nicks or damage.
DISASSEMBLING AXLES
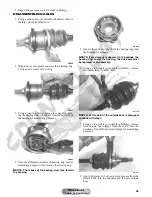
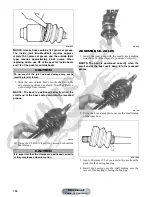
1. Using a side-cutters (or suitable substitute), remove
the large clamp from the boot.
CD020
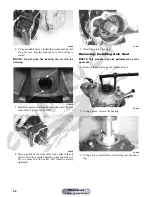
2. Wipe away excess grease to access the retaining ring.
Using an awl, remove the circlip.
CD021
3. Using a snap ring pliers, remove the snap ring secur-
ing the bearing ring to the shaft. Note the direction of
the bearing for assembling purposes.
CD023
4. Note the difference inside each bearing ring end for
assembling purposes; then remove the bearing ring.
NOTE: The recess of the bearing must face toward
the housing.
CD022
5. Inspect the splines of the shaft, the bearing ring, and
the housing for damage.
NOTE: If any damage is apparent to the splines, the
bearing ring, and/or the housing, the drive axle must
be replaced as an assembly.
6. Using a side-cutters (or suitable substitute), remove
the small clamp from the shaft.
CD752
NOTE: At this point if the outside boot is damaged,
continue with step 7.
7. Using a side-cutters (or suitable substitute), remove
both outside boot clamps from the shaft. Note the
position of the different-sized clamps for assembling
purposes.
CD751
8. Apply 40 grams (1/3 of contents) of grease from the
Grease Pack into the knuckles and the new outside
boot.
Manual
Table of Contents

