background image

52

U.S. EPA Emission Control

Statement/Warranty Coverage

(U.S. Only)

STATEMENT/WARRANTY

Arctic Cat warrants to the original retail purchaser, and each subsequent purchaser, that all
U.S. EPA-certified Arctic Cat ROV’s are designed, built, and equipped to conform to all U.S.
EPA Emission Control Regulations. Please read the following information completely.
Your authorized Arctic Cat ROV dealer will repair or replace any defective emission-related
component at no cost to you during the warranty period. You may have non-warranty service
performed by any repair establishment that uses equivalent components. The regulations pro-
vide significant civil penalties for tampering that causes your ROV to no longer meet U.S. EPA
emission standards.
Arctic Cat further warrants that the engine and its emission-related components are free from
defects in materials or workmanship that could cause the engine to fail to comply with applica-
ble regulations during the warranty period.
If you have any questions about this information, or the emission warranty coverage statement,
contact your local authorized Arctic Cat ROV dealer.

WARRANTY PERIOD

The emission warranty period for this ROV begins on the same date as the standard warranty
coverage and continues for 30 months or 3100 miles, whichever comes first.

COMPONENTS COVERED

The emissions warranty covers major emissions control components and emission-related
components listed as follows:

Engine Management and Sensors

Fuel/Air System

Barometric Pressure Sensor

Fuel Injectors

Camshaft Position Sensor

Fuel Pressure Regulator

Engine Control Unit (ECU)

Fuel Pump

Engine Coolant Temperature Sensor

Carburetor(s)

Intake Air Temperature Sensor

Turbocharger Assembly

Manifold Absolute Pressure Sensor

Air Bypass Valve

Oxygen Sensor

Turbo Waste Gate Control Valve

Throttle Position Sensor

Crankcase Ventilation System

Crankshaft Position Sensor

ISC Valve

Exhaust Temperature Sensor

Ignition System

Miscellaneous Items Used in 

Ignition Coil

Aforementioned Systems

Knock Sensor System

Connectors

Capacitive Discharge Ignition (CDI) Module

Switches

Magneto Pick-Up

Grommets

Spark Plugs

Clamps

Hoses

Ties

Gaskets

Wiring

OWNER’S RESPONSIBILITIES

The owner of any ROV warranted under this Arctic Cat Emission Control Statement is responsi-
ble for the proper maintenance and use of the ROV in accordance with Arctic Cat’s recommen-
dations in the Operator’s Manual.

Summary of Contents for 2012 WildCat

Page 1: ... the U S Consumer Product Safety Commission Read this manual carefully It contains important safety information Always use common sense when operating this vehicle UNDER 16 WARNING Operating this ROV if you are under the age of 16 increases your chance of serious injury or death NEVER operate this ROV if you are not 16 or older and possess a valid driver s license ...

Page 2: ...g The ROHVA two hour safety course helps develop safe driving habits but it is not a learn to drive course It is intended to improve awareness about ROV s and inspire a safety minded approach to off road recreation Users can save their progress and stop the course at any time and pick up later where they left off At the end of the course they have the option of taking an ROV safety quiz to test wh...

Page 3: ...rator of this vehicle to become thoroughly familiar with its basic opera tion maintenance and storage procedures Read and understand the entire Operator s Manual before operating this vehicle to ensure safe and proper use Always oper ate the vehicle within your level of skill and current terrain conditions Division II of this manual covers opera tor related maintenance operating instructions and s...

Page 4: ...ds 32 General Maintenance 33 47 Maintenance Schedule 34 Liquid Cooling System 35 Oil Cooler 35 Shock Absorbers 36 General Lubrication 36 Hydraulic Brake 38 Protective Rubber Boots 38 Battery 39 Spark Plugs 42 Air Filter Housing Drain 43 Draining V Belt Cover 44 Tires 44 Wheels 45 Muffler Spark Arrester 45 Light Replacement 45 Checking Adjusting Headlight Aim 46 Fuses 46 Electrical Output Terminals...

Page 5: ...ownhill if you feel the vehicle may tip Always use proper procedures if you stall or roll backward when climbing a hill To avoid stalling maintain a steady speed when climbing a hill If you stall or roll back wards follow the special procedure for braking described in this manual Always check for obstacles before operating in a new area Never attempt to operate over large obstacles such as large r...

Page 6: ...d colliding with other vehicles Never operate this vehicle without an approved motorcycle helmet gog gles boots gloves long pants and a long sleeved shirt or jacket Never consume alcohol or drugs before or while operating this vehi cle Never operate this vehicle at exces sive speeds Go at a speed which is proper for the terrain visibility con ditions and your experience Never attempt to do wheelie...

Page 7: ...ates a potential hazard that could result in a serious injury or death 5 Warning Labels Pour commander des Etiquettes de Mise en Garde gratuites voyez votre détailant de autorisé VTT Arctic Cat pour le numéro de pièce 1436 477 WC073B ...

Page 8: ... WARNING Indicates a potential hazard that could result in a serious injury or death 6 Warning Labels WC076B ...

Page 9: ...ghts 3 Reverse Override Switch 4 Seat Lock Lever 5 Glove Box 6 Brake Pedal 7 Fuses 8 Ignition Start Switch 9 Shift Lever 10 DC Power Outlet 11 Accelerator Pedal 12 Taillight Brakelight 13 Operator s Manual Location 14 Headlight Switch 15 Driver Seat Belt 16 Passenger Seat Belt 17 Drive Select Switch 18 Tilt Steering Latch 19 Tool Kit 20 Driver Door 21 Passenger Door 22 Door Latch ...

Page 10: ...s abilities or judgment needed to operate this vehicle safely and may be involved in a serious accident HOW TO AVOID THE HAZARD Only people 16 years of age or older with a valid driver s license should operate this vehicle WARNING POTENTIAL HAZARD Allowing passengers to ride in the cargo bed WHAT CAN HAPPEN Serious injury or death This vehicle is not designed to carry passengers in the cargo bed P...

Page 11: ...ng sleeved shirt or jacket Long pants WARNING POTENTIAL HAZARD Operating this vehicle after or while consuming alcohol or drugs WHAT CAN HAPPEN Could seriously affect your judgment Could cause you to react more slowly Could affect your balance and perception Could result in an accident HOW TO AVOID THE HAZARD Never consume alcohol or drugs before or while driving this vehicle WARNING POTENTIAL HAZ...

Page 12: ...r body inside the passenger compartment during operation WHAT CAN HAPPEN Serious injury or death Body parts could strike objects outside of vehicle or be crushed in the event of a rollover or accident HOW TO AVOID THE HAZARD Do not place your head arms hands legs or feet outside of the passenger com partment during operation Stay seated with your seat belt and helmet on and doors properly latched ...

Page 13: ...es and schedules described in this Operator s Manual WARNING POTENTIAL HAZARD Failure to use extra care when operating this vehicle on unfamiliar terrain WHAT CAN HAPPEN You can come upon hidden rocks bumps or holes without enough time to react Could result in the vehicle overturning or going out of control HOW TO AVOID THE HAZARD Go slowly and be extra careful when operating on unfamiliar terrain...

Page 14: ... WHAT CAN HAPPEN This vehicle can overturn more easily on steep hills than on level surfaces or small hills HOW TO AVOID THE HAZARD Never operate the vehicle on hills too steep for the vehicle or for your abilities Practice on smaller hills before attempting larger hills WARNING POTENTIAL HAZARD Operating with the ROPS removed WHAT CAN HAPPEN Could lead to serious injury or death HOW TO AVOID THE ...

Page 15: ...d An obstacle a sharp drop or another vehicle or person could be on the other side of the hill WARNING POTENTIAL HAZARD Crossing hills or turning on hills WHAT CAN HAPPEN Could cause loss of control or cause the vehicle to overturn HOW TO AVOID THE HAZARD Never attempt to turn the vehicle around on any hill If you must cross the side of a hill drive slowly and stop or turn downhill if you feel the...

Page 16: ...n it is safe to proceed go slowly WARNING POTENTIAL HAZARD Skidding or sliding WHAT CAN HAPPEN You could lose control of the vehicle You could also regain traction unexpectedly which may cause the vehicle to overturn HOW TO AVOID THE HAZARD Learn to safely control skidding or sliding by practicing at slow speeds and on level smooth terrain On extremely slippery surfaces such as ice go slowly and b...

Page 17: ...fied in this Operator s Manual for this vehicle Always maintain proper tire pressure as described in this Operator s Manual WARNING POTENTIAL HAZARD Operating this vehicle with improper modifications WHAT CAN HAPPEN Improper installation of accessories or modification of the vehicle may cause changes in handling which in some situations could lead to an accident HOW TO AVOID THE HAZARD Never modif...

Page 18: ...hrough or over thick brush timber debris or large rocks whenever possible Watch for and avoid sharp branches rocks or other large objects that could impede or impact the vehicle or enter the passenger compartment WARNING POTENTIAL HAZARD Securing a person improperly in the vehicle due to physical size WHAT CAN HAPPEN Serious injury or death Occupant could strike objects in the passenger compart me...

Page 19: ...sion Travel Front 43 2 cm 17 in Tire Size Front 26 x 9R14 Tire Size Rear 26 x 11R14 Tire Inflation Pressure 0 84 kg cm 12 psi MISCELLANY Dry Weight Approx 616 kg 1359 lb ROPS Tested Curb Weight 975 kg 2150 lb Gas Tank Capacity 33 3 L 8 8 U S gal Coolant Capacity 3 3 L 3 5 U S qt Differential Capacity 275 ml 9 3 fl oz Rear Drive Capacity 250 ml 8 5 fl oz Engine Oil Capacity Approx 2 6 L 2 8 U S qt ...

Page 20: ...t leaking mountings secure Shock spring pre load equal on left and right Components free of all debris Lights Switches Check headlight HI LO beam light switch to OFF Check taillight brakelight light switch to OFF Check drive select switch set to 2WD Air Filter Drains clear of all debris Ducting secure no holes or tears Tires Wheels Properly inflated tread adequate Check tires for cuts or tears Whe...

Page 21: ...e the shift lever forward through reverse and neutral until the letter H is displayed on the gauge WC093 2 To select low range from high range move the shift lever forward one position until the letter L is dis played on the gauge WC094 NOTE The high range is for nor mal driving with light loads The low range is for carrying heavy loads or trailer towing Compared to HIGH range the LOW range positi...

Page 22: ... time to stop smoothly Sometimes quick stops are inevitable so always be prepared Whether you re stopping slowly or stop ping quickly do this 1 Release the accelerator then press the foot brake pedal to apply the brake 2 If the wheels lock release them for a second then apply them again On surfaces such as ice mud or loose gravel pump the brake pedal rapidly 3 Never ride the brake Even main tainin...

Page 23: ...ange select four wheel drive for traction and gradually press the accel erator then maintain a constant speed 3 If the vehicle stalls on a hill press the foot brake pedal to apply the brake shift into reverse and slowly back down the hill Do not attempt to turn around on a hill NEVER OPERATE UP OR DOWN HILLS STEEPER THAN 15 Driving Downhill Always drive straight down the hill and always avoid hill...

Page 24: ...backing up 2 If possible it is advisable to have someone spotting for you while backing up 3 If you are unsure of what is behind the vehicle set the parking brake and get out and inspect the area behind Skidding or Sliding If you lose control after hitting sand ice mud or water follow these guidelines 1 Turn the steering wheel into the direc tion of the slide 2 Keep your foot off the brake until y...

Page 25: ...n to the ground pour warm water around them to melt the ice 3 If the brakes are frozen use a suitable heating device to thaw out the brakes NOTE After the brakes thaw dry them by applying them several times while riding slowly NOTE After riding through water mud snow or slush it is important to dry both brake systems before parking the vehicle 4 Practice driving in an open snow cov ered or ice cov...

Page 26: ...e place An identifying number is stamped on each key Use this number when ordering a replacement key Control Locations And Functions Ignition Switch The ignition switch has three positions ATV 0056A OFF position All electrical circuits except accessory are off The engine will not start The key can be removed in this position NOTE The accessory plugs are powered by the battery at all times RUN posi...

Page 27: ...d be applied whenever brak ing is needed Apply the brake by pressing the brake pedal down Steering Wheel Tilt Lever Pull on the lever located on the steering column and move the steering wheel to the desired position then release the lever and make sure the steering wheel locks securely WC039A Seat Belt Reminder Indicator Each time the ignition switch is turned ON the indicator will illuminate on ...

Page 28: ...an RPM limiter that retards ignition timing when maximum RPM is approached When the RPM limiter is activated it could be mis interpreted as a high speed misfire Seat Latches 1 To remove the seat lift up on the latch release located at the rear of the seat then raise the rear of the seat and tilt it forward WC017A 2 To lock the seat into position place the front of the seat into the seat retainers ...

Page 29: ...fluids to check or change and the EPS system is entirely self contained and sealed to protect it from the elements The EPS system is battery system pow ered therefore the battery must be in good condition and fully charged Power delivery and overload protection is pro vided by an EPS relay and 30 amp fuse located under the passenger seat in the Power Distribution Module PDM The system is self moni...

Page 30: ...eter Trip Meter 1 and 2 Odometer registers the total distance the vehicle has traveled Trip meters can register two distances for instance 1 could register trip dis tance and 2 could register distance between stops The trip meters can be reset while the odometer only reg isters accumulated miles kilometers NOTE To select odometer ODO trip 1 T1 or trip 2 T2 press and release the Right Button 3 unti...

Page 31: ...wash the radiator and the engine to remove any debris preventing air flow 15 Electronic Power Steering EPS Indi cator Illuminates when there is a mal function in the power steering control ciruit A code will also be flashing 16 Seat Belt Indicator Illuminates for approximately eight seconds after ignition switch is turned ON 17 Park Indicator Illuminates when Park is selected in the transmission N...

Page 32: ...hicle When transporting Arctic Cat recommends that the vehicle be in its normal operating position on all four wheels and the fol lowing procedure be used 1 Place the transmission in park 2 Secure the vehicle with load rated hold down straps WC079A WC081B NOTE Suitable hold down straps are available from your Arctic Cat dealer Ordinary rope is not recom mended because it can stretch under load CAU...

Page 33: ...Differential Rear Drive Differential Lubricant NOTE Arctic Cat recommends the use of genuine Arctic Cat lubricants The recommended front differential rear drive lubricant is SAE approved 80W 90 hypoid This lubricant meets all of the lubrication requirements of this vehicle Filling Gas Tank Since gasoline expands as its temperature increases the gas tank must be filled to its rated capacity only Ex...

Page 34: ...to place some stress on the engine compo nents during break in care should be taken not to overload the engine too often Do not pull a trailer during the break in period When the engine starts allow it to warm up properly Idle the engine several minutes until the engine has reached normal operat ing temperature Do not idle the engine for excessively long periods of time Burnishing Brake Pads Brake...

Page 35: ...er functioning of any component of this vehicle is detected DO NOT OPERATE THE VEHICLE Take the vehicle to an authorized Arctic Cat dealer for inspection and adjustment or repair If the owner operator does not feel quali fied to perform any of these maintenance procedures or checks take the vehicle to an authorized Arctic Cat dealer for pro fessional service NOTE The following instructions and inf...

Page 36: ...I Gear lubricant front differential rear drive differential 37 I I 37 Replace every 4 years V Belt 44 I I Spark arrester muffler 45 C Tires air pressure 44 17 I Inspect every time before operating Brake components 38 I Inspect every time before operating Brake fluid 38 I Replace every 2 years Brake hoses 38 I Replace every 4 years Steering I Inspect every time before operating Suspension Ball join...

Page 37: ...iode gradable glycol based automotive type antifreeze Oil Cooler NOTE The oil cooler is located above and to the rear of the front right wheel WC047 NOTE Dirt and debris must be cleaned from the cooling fins regularly to ensure proper engine oil cooling NOTE High engine RPM low vehicle speed or heavy load can raise engine temperature Decreas ing engine RPM reducing load and selecting an appropriat...

Page 38: ...pring preload nuts clockwise to stiffen or counterclockwise to soften WC112A WC117A NOTE Before attempting to adjust suspension clean dirt and debris from the sleeve and remove load from the suspension then use an appro priate spanner wrench to adjust the sleeve to the desired position General Lubrication Cables None of the cables require lubrication however it is advisable to lubricate the ends o...

Page 39: ...minutes 8 Turn the engine off and wait approxi mately one minute Recheck the oil level 9 Inspect the area around the drain plug and oil filter for leaks Front Differential and Rear Drive Differential Gear Lubricant Inspecting Changing Inspect and change the gear lubricant in each according to the Maintenance Schedule When changing the lubricant use the appropriate hypoid oil and use the following ...

Page 40: ... The clearance between the brake pads and brake discs is adjusted automatically as the brake pads wear The only mainte nance that is required is replacement of the brake pads when they show excessive wear Check the thickness of each of the brake pads as follows 1 Remove a front wheel 2 Measure the thickness of each brake pad 3 If thickness of either brake pad is less than 1 0 mm 0 039 in take the ...

Page 41: ...sping the tie rod near the end and attempting to move it up and down 5 If boot damage is present or tie rod end free play seems excessive con tact an authorized Arctic Cat dealer for service Drive Axle Boots WC110A 1 Inspect all drive axle boots for cracks tears or perforations 2 If boot damage is present contact an authorized Arctic Cat dealer for service Battery The battery is located in a compa...

Page 42: ... then connect the black terminal lead of the charger to the negative terminal of the battery NOTE Optional battery charging adapters are available from your authorized Arctic Cat dealer to con nect directly to your vehicle from the recommended chargers to simplify the maintenance charging process Check with your authorized Arctic Cat dealer for proper installation of these charging adapter connect...

Page 43: ...t NOTE If after charging the bat tery does not perform to operator expectations bring the battery to an authorized Arctic Cat dealer for further troubleshooting Jump Starting NOTE Arctic Cat does not recom mend jump starting a vehicle with a dead battery but rather to remove the battery service it and correctly charge it however in an emergency it may be necessary to jump start a vehicle If so use...

Page 44: ...l away from the dead bat tery and start the vehicle with the good battery Allow the vehicle to run for several minutes applying some charge to the dead battery 9 Start the vehicle with the dead bat tery and allow it to run for several minutes before disconnecting the jumper cables 10 Remove the jumper cables in oppo site order of hook up 4 3 2 1 Be careful not to short cables against bare metal NO...

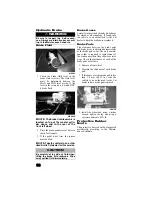
Page 45: ...erated in dusty wet or muddy conditions inspect and service the filter more frequently Use the following procedure to remove the fil ter and inspect and or clean it NOTE The air filter is located above and in front of the rear right wheel 1 Remove dirt and debris from around the filter housing 2 Unsnap the five spring clip fasteners and remove the air filter cover WC023A WC024 3 Fill a wash pan la...

Page 46: ...eless tires Air is sealed by the contact surfaces of the inner wheel rim and the tire bead If either the inner wheel rim or tire bead is damaged air may leak Be extremely careful not to damage these areas when replacing tires It is very important to use the proper tools when repairing or replacing tires to prevent damage to the tire bead or wheel rims If proper tools and related items are not avai...

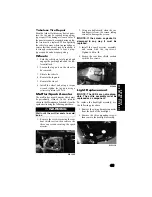
Page 47: ...e muffler has a spark arrester which must be periodically cleaned At the intervals shown in the Maintenance Schedule clean the spark arrester using the following procedure 1 Remove the screws securing the rear heat shield section then remove the three cap screws securing the spark arrester WC136C 2 Using a suitable brush clean the car bon deposits from the screen taking care not to damage the scre...

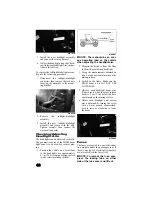
Page 48: ...roximately 6 1 m 20 ft from an aiming surface wall or similar aiming surface 0740 647 NOTE There should be an aver age operating load on the vehicle when adjusting the headlight aim 2 Measure the distance from the floor to the mid point of each headlight 3 Using the measurements obtained in step 2 make horizontal marks on the aiming surface 4 Switch on the lights Make sure the HIGH beam is on DO N...

Page 49: ... plate locks securely in place in the buckle and releases when the button is pressed Wash off any dirt and make sure the retractors are free of debris Do not grease or oil the retractors Doors and Nets Inspect the doors for broken or bent tubes hinges or latches Make sure the latches engage and lock securely WC037 Inspect the nets for fraying or tearing Replace the nets if damaged ROPS Inspect the...

Page 50: ...oth 5 Apply light oil to the upper steering shaft bushing and plungers of the shock absorbers 6 Tighten all nuts bolts cap screws and screws Make sure rivets holding components together are tight Replace all loose rivets Care must be taken that all calibrated nuts cap screws and bolts are tightened to specifications 7 Fill the cooling system to the bottom of the stand pipe in the radiator neck wit...

Page 51: ... then install Con nect the battery cables making sure to connect the positive cable first 7 Check the entire brake systems fluid level pads etc all controls head lights taillight brakelight and head light aim adjust or replace if necessary 8 Check the tire pressure Inflate to rec ommended pressure as necessary 9 Tighten all nuts bolts cap screws and screws making sure all calibrated nuts cap screw...

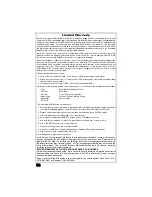
Page 52: ...pplied batteries Exclusions to this warranty include normal wear abuse or corrosion and the following parts and items Tires Drive Driven Clutch Wear Parts Oil Filter Drive Belt Air Filter Torn or Punctured Upholstery Brake Pads Cracks or Gouges in Body Panels Light Bulbs Spark Plug s CV Boots The following will VOID Arctic Cat s warranty 1 Failure to perform the proper break in procedure and all r...

Page 53: ...uthorized Arctic Cat ROV dealer The authorized Arctic Cat ROV dealer will examine the ROV to determine if in his opinion a warrantable condition exists If a warrantable condition appears to exist the dealer will repair or replace at Arctic Cat s option free of charge including any related labor costs all parts that are found to be warrantable and any other parts which the warrantable part caused t...

Page 54: ...ctic Cat ROV dealer WARRANTY PERIOD The emission warranty period for this ROV begins on the same date as the standard warranty coverage and continues for 30 months or 3100 miles whichever comes first COMPONENTS COVERED The emissions warranty covers major emissions control components and emission related components listed as follows Engine Management and Sensors Fuel Air System Barometric Pressure ...

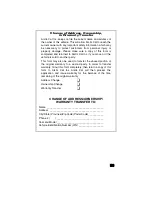
Page 55: ... the unused portion of the original warranty to a second party In order to transfer warranty fill out this form completely then return a copy of this form to Arctic Cat Inc Arctic Cat will then process the application and issue warranty for the balance of the time remaining of the original warranty Address Change Ownership Change Warranty Transfer CHANGE OF ADDRESS OWNERSHIP WARRANTY TRANSFER TO N...

Page 56: ...Fold Back CHANGE OF ADDRESS OWNERSHIP ARCTIC CAT INC PRODUCT SERVICE AND WARRANTY DEPT P O BOX 810 THIEF RIVER FALLS MN 56701 Place Stamp Here ...

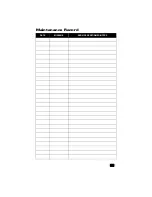
Page 57: ...55 Maintenance Record DATE MILEAGE SERVICE PERFORMED NOTES ...

Page 58: ...56 NOTES ...

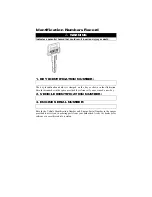
Page 59: ...r reference if you ever need a new key 2 VEHICLE IDENTIFICATION NUMBER 3 ENGINE SERIAL NUMBER Record the Vehicle Identification Number and Engine Serial Number in the spaces provided to assist you in ordering parts from your authorized Arctic Cat dealer or for reference in case this vehicle is stolen WARNING Indicates a potential hazard that could result in serious injury or death ...

Page 60: ...p n 2259 267 2011Arctic Cat Inc Trademarks ofArctic Cat Inc Thief River Falls MN 56701 218 681 9851 U S 204 982 1656 Canada ...

Reviews: