5-7
5
NOTE: If the meter does not read as specified,
replace the sensor.
Speed Sensor
NOTE: Prior to testing the speed sensor, inspect the
three-wire connector on the speed sensor for con-
tamination, broken pins, and/or corrosion.
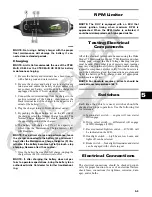
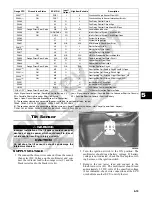
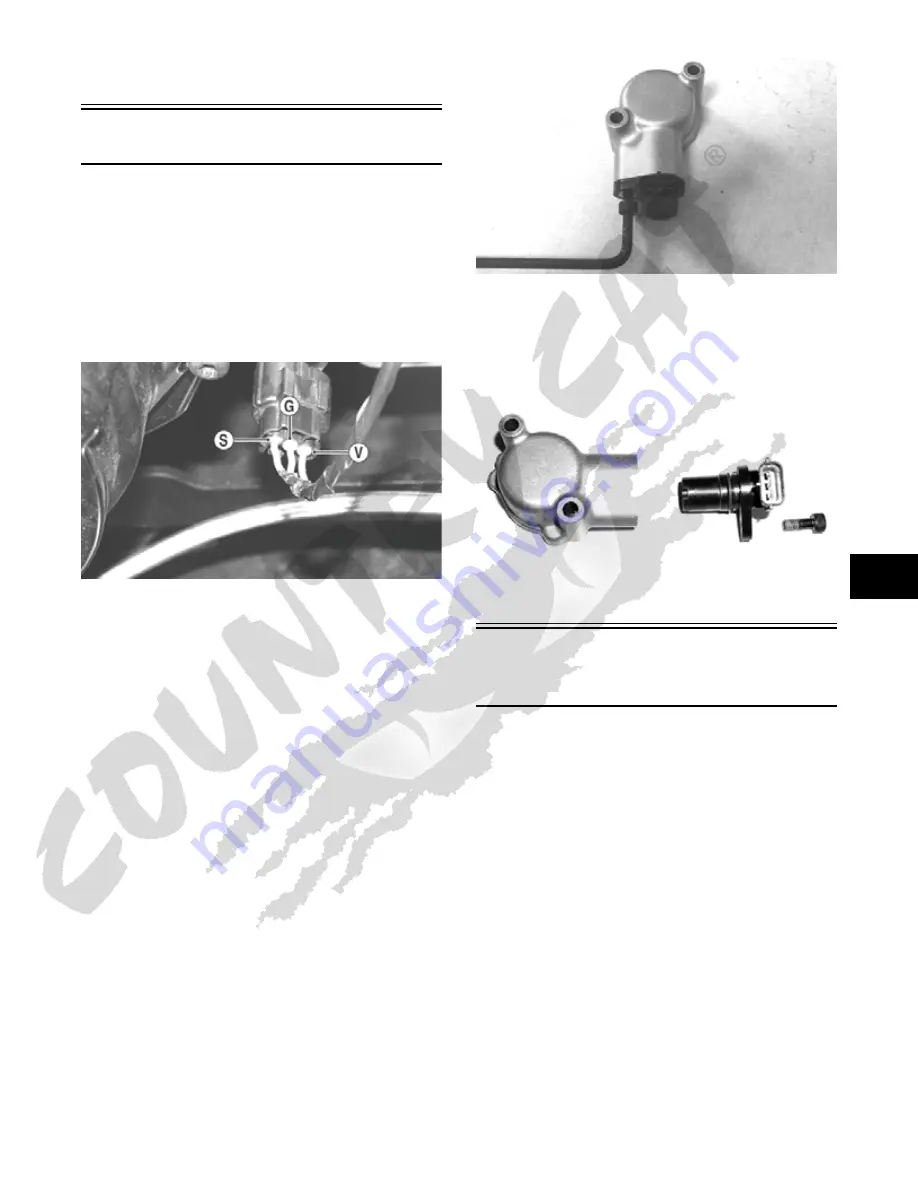
1. Set the meter selector to the DC Voltage position.
2. With appropriate needle adapters on the meter leads,
connect the red tester lead to the voltage lead (V);
then connect the black tester lead to the ground lead
(G).
PR279A
3. Turn the ignition switch to the ON position.
4. The meter must show approximately 6 DC volts.
5. Leave the black tester lead connected; then connect
the red tester lead to the signal lead pin (S).
6. Slowly move the vehicle forward or backward; the
meter must show 0 and approximately 6 DC volts
alternately.
NOTE: If the sensor tests are within specifications,
the LCD gauge must be replaced (see Section 8).
To replace a speed sensor, use the following procedure.
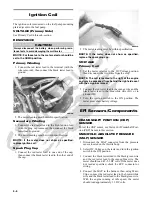
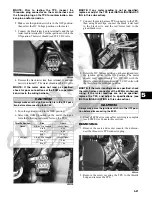
1. Disconnect the three-wire connector from the speed
sensor harness or from the speed sensor; then remove
the Allen-head cap screw securing the sensor to the
sensor housing.
2. Remove the sensor from the sensor housing account-
ing for an O-ring.
CD070
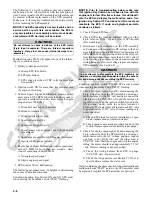
3. Install the new speed sensor into the housing with
new O-ring lightly coated with multi-purpose grease;
then secure the sensor with the Allen-head cap screw
(threads coated with blue Loctite #242). Tighten
securely.
CD071
Electronic Power
Steering (EPS) (XTZ)
The electronic power steering (EPS) system is an elec-
tro-mechanical device that utilizes 12 volt DC power to
drive a motor linked to the steering shaft to assist the
driver when rotating the steering wheel. Driver steering
inputs are detected by a torque-sensing transducer assem-
bly within the EPS housing. These inputs are converted
to electronic signals by the transducer and control cir-
cuitry to tell the motor which way to drive the steering
shaft. When no steering input (pressure on the steering
wheel) is detected, no torque signal is generated, and no
steering assist is provided by the motor.
The EPS system is battery-system powered; therefore,
the battery must be in good condition and fully charged.
Power delivery and overload protection are provided by
an EPS relay and 30-amp fuse, located under the seat in
the Power Distribution Module (PDM).
If a system malfunction occurs, a malfunction code
“P0635” will be displayed on the LCD gauge. Initially,
the gauge will go blank for 30 seconds and the code will
flash: then the gauge will return to normal except the
code will continue to be displayed.
Summary of Contents for 2013 Prowler XT
Page 1: ...Prowler XT XTX XTZ ...
Page 3: ......
Page 5: ......
Page 149: ...4 16 NOTES ...
Page 211: ...7 8 NOTES ...
Page 232: ...8 21 8 NOTES ...
Page 233: ... Printed in U S A Trademarks of Arctic Cat Inc Thief River Falls MN 56701 p n 2259 530 ...

