5-15
5
3. Connect the Test Plug from Test Plug/Error Code
List to the diagnostic plug.
ATV-112
4. Turn the ignition switch to the ON position and read
the error code on the LCD. Refer to the following Code
List to identify the specific problem area.
Code List
NOTE: Each of the following numerical codes will
have a two-letter prefix. A prefix of AC (Active Code)
or SC (Stored Code) will be displayed. Always correct
and clear Active Codes before clearing Stored Codes.
• 00 = No Fault Detected (active code only)
• 12 = CKP (Crankshaft Position) Sensor*
• 13 = APS (Air Pressure Sensor) - H1
• 13 = MAP (Manifold Absolute Pressure) Sensor - H2
• 14 = TPS (Throttle Position Sensor)
• 15 = ECT (Engine Coolant Temperature) Sensor
• 16 = Speed Sensor
• 21 = IAT (Inlet Air Temperature) Sensor
• 23 = Tilt Sensor*
• 24 = Ignition Coil #1*
• 26 = Ignition Coil #2* - H2
• 32 = Fuel Injector #1*
• 34 = Fuel Injector #2* - H2
• 40 = ISC (Idle Speed Control) Valve
• 41 = Fuel Pump Relay*
• 60 = Cooling Fan Relay
• 95 = Sensor Power
• 96 = Incorrect ECM*
• 97 = ECM Memory Power (constant battery power)
• 98 = ECM to Gauge Comm Link - H2
• 99 = Start/Run Not Possible (active code only)
*Will initiate code 99.
After all stored codes are cleared, clear the error code(s)
using the following procedure.
NOTE: The ignition switch should be in the OFF
position.
1. With the test plug connected to the diagnostic plug
and the drive select switch in the 4WD position, hold
the reverse override switch down and turn the igni-
tion switch to the ON position.
2. After ten seconds, release the reverse override switch
and turn the ignition switch to the OFF position; then
turn the ignition switch to the ON position. The dis-
play should read AC00 (no fault detected).
NOTE: If the LCD still displays an error code, con-
tinue troubleshooting the appropriate component.
3. Disconnect the test plug; then install the black rubber
cap.
4. Install the seats making sure they lock securely in
place.
EFI Diagnostic System
(XTX)
DIGITAL GAUGE
The digital gauge can be used as a diagnostic tool for
many of the DTC’s displayed. To place the gauge into the
diagnostic mode, use the following procedure.
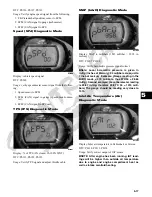
1. Turn the ignition switch ON.
2. Depress and hold both Mode and Set buttons
together for approximately 10 seconds after which
the letters “dIAg” will appear on the LCD momen-
tarily followed by COOL.
EFI002A
NOTE: The display on the gauge will display in
SAE (speedometer in MPH mode) or Metric (speed-
ometer in km/h mode), For example to read tem-
perature in degrees Celsius, select km/h mode on
the gauge or to read Fahrenheit, select MPH mode.
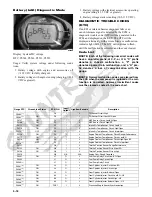
3. Cycle the display by depressing either the Set or
Mode button to step to the desired function.
EFI004
Summary of Contents for 2013 Prowler XT
Page 1: ...Prowler XT XTX XTZ ...
Page 3: ......
Page 5: ......
Page 149: ...4 16 NOTES ...
Page 211: ...7 8 NOTES ...
Page 232: ...8 21 8 NOTES ...
Page 233: ... Printed in U S A Trademarks of Arctic Cat Inc Thief River Falls MN 56701 p n 2259 530 ...

