5-22
INSTALLING/ADJUSTING (XT/XTZ)
1. Place the TPS into position on the throttle body and
secure with the screw. Do not tighten at this time.
2. Connect the main harness to the TPS.
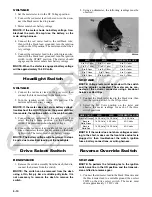
3. Locate the diagnostic plug under the seat next to the
PDM; then install the Test Plug from Test Plug/Error
Code List onto the plug.
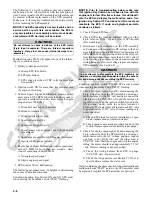
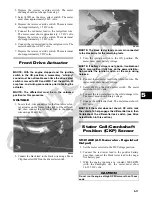
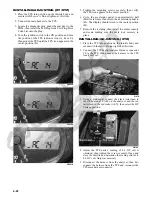
4. Turn the ignition switch to the ON position and note
the position of the TPS indicator icon (A, B, or C);
then adjust the TPS until the TPS icon appears in the
center position (B).
PR542A
PR540A
PR541A
5. Tighten the mounting screws securely; then verify
the TPS icon appears in the center position.
6. Cycle the accelerator pedal to approximately half
throttle six times; then return the accelerator pedal to
idle. The display should return to the center position
(B).
7. Remove the test plug; then install the center console
and seats making sure the seats lock securely in
place.
INSTALLING/ADJUSTING (XTX)
1. Place the TPS into position on the throttle body and
secure with the screw. Do not tighten at this time.
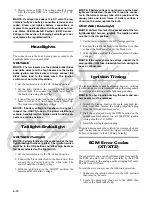
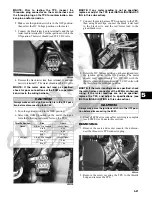
2. Connect the TPS Multi-Analyzer Harness connector
#8 to the TPS; then connect the harness to the TPS
Analyzer Tool.
FI672
3. Using a multimeter, connect the black tester lead to
the white socket (VAR) on the analyzer and the red
tester lead to the red socket (+SV); then select the DC
Voltage position.
FI676A
4. Adjust the TPS until a reading of 0.6 DC volt is
obtained; then tighten the screw securely. Open and
close the throttle and determine the reading returns to
0.6 DC volt. Adjust as necessary.
5. Disconnect the harness from the analyzer; then dis-
connect the harness from the TPS and reconnect the
TPS main harness connector.
Summary of Contents for 2013 Prowler XT
Page 1: ...Prowler XT XTX XTZ ...
Page 3: ......
Page 5: ......
Page 149: ...4 16 NOTES ...
Page 211: ...7 8 NOTES ...
Page 232: ...8 21 8 NOTES ...
Page 233: ... Printed in U S A Trademarks of Arctic Cat Inc Thief River Falls MN 56701 p n 2259 530 ...

