7-4
AF616D
CLEANING AND INSPECTING
NOTE: Whenever a part is worn excessively,
cracked, or damaged in any way, replacement is nec-
essary.
1. Clean all A-arm components in parts-cleaning solvent.
2. Clean the ball joint mounting hole of all residual Loc-
tite, grease, oil, or dirt for installing purposes.
3. Inspect the A-arm for bends, cracks, and worn bush-
ings.
4. Inspect the ball joint mounting holes for cracks or
damage.
5. Inspect the frame mounts for signs of damage, wear,
or weldment damage.
INSTALLING
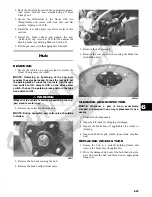
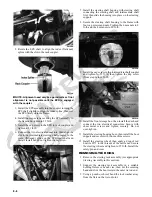
1. Apply Loctite Primer “T” to the A-arm socket; then
apply green Loctite #609 to the entire outside diameter
of the ball joint. Install the ball joint into the A-arm
and secure with the snap ring.
AF616D
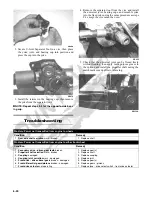
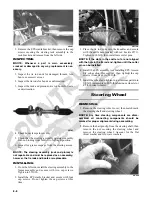
2. Install the A-arm assemblies into the frame mounts
and secure with the cap screws. Only finger-tighten at
this time.
AF610D
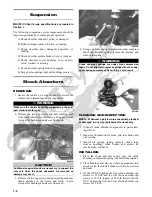
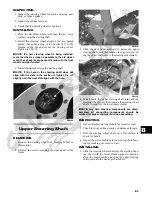
3. Route the brake hose through the upper A-arm shock
absorber mount.
AF627D
4. Secure the lower eyelet of the shock absorber to the
upper A-arm. Tighten nut to 35 ft-lb.
5. Secure the A-arm assemblies to the frame mounts
(from step 2). Tighten the cap screws to 35 ft-lb.
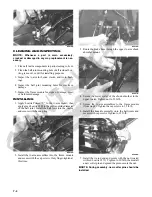
6. Install the knuckle assembly onto the ball joints and
secure with cap screws. Tighten to 35 ft-lb.
AF628D
7. Install the tie rod end and secure with the nut (coated
with red Loctite #271). Tighten to 30 ft-lb; then install
a new cotter pin and spread the pin to secure the nut.
NOTE: During assembly, new cotter pins should be
installed.
Summary of Contents for 2013 Prowler XT
Page 1: ...Prowler XT XTX XTZ ...
Page 3: ......
Page 5: ......
Page 149: ...4 16 NOTES ...
Page 211: ...7 8 NOTES ...
Page 232: ...8 21 8 NOTES ...
Page 233: ... Printed in U S A Trademarks of Arctic Cat Inc Thief River Falls MN 56701 p n 2259 530 ...


