7-6
PR220A
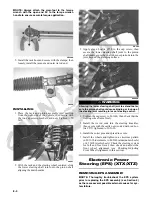
NOTE: Never reuse a lock nut. Once a lock nut has
been removed, it must be replaced with a new lock
nut.
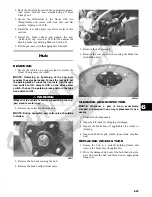
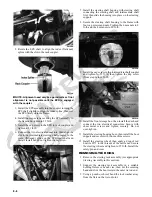
9. Remove the cap screws and lock nuts securing the
A-arms to the frame; then remove the A-arms.
CLEANING AND INSPECTING
NOTE: Whenever a part is worn excessively,
cracked, or damaged in any way, replacement is nec-
essary.
1. Clean all A-arm components in parts-cleaning solvent.
2. Inspect the A-arm for bends, cracks, and worn bush-
ings.
3. Inspect the frame mounts for signs of damage, wear,
or weldment damage.
INSTALLING
1. Install the A-arm assemblies into the frame mounts
and secure with the cap screws and new lock nuts.
Finger-tighten only at this time.
2. Slide the knuckle onto the drive axle and into position
on the A-arms; then secure the knuckle to the A-arms
with cap screws and new lock nuts. Tighten to 35 ft-lb.
3. Tighten the hardware securing the A-arms to the
frame mounts (from step 1) to 35 ft-lb.
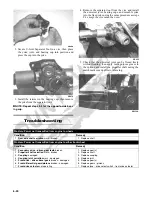
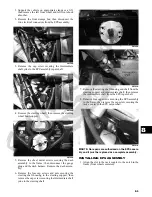
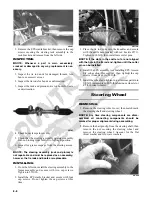
4. Apply grease on the drive axle splines; then install the
hub assembly onto the drive axle.
PR221
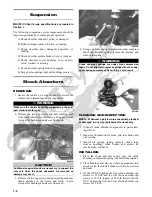
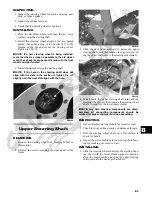
5. Secure the hub assembly with the nut. Tighten to 200
ft-lb.
6. Install a new cotter pin and spread the pin to secure the
nut.
NOTE: If the cotter pin cannot be inserted due to
misalignment of the hole in the axle and the slots in
the nut, tighten the nut until properly aligned.
PR196
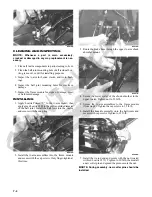
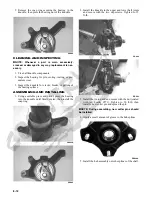
7. Secure the shock absorber to the frame with a cap
screw and new lock nut. Tighten to 33 ft-lb.
8. Secure the shock absorber to the lower A-arm with a
cap screw and new lock nut. Tighten to 20 ft-lb.
9. Secure the boot guard to the lower A-arm with the two
cap screws. Tighten securely.
10. Install the wheel and tighten in a crisscross pattern in
20 ft-lb increments to 80 ft-lb (aluminum wheels) or
45 ft-lb (steel wheels).
11. Remove the vehicle from the support stand.
Wheels and Tires
TIRE SIZE
The ROV models are equipped with low-pressure tube-
less tires of the size and type listed in Section 1. Do not
under any circumstances substitute tires of a different
type or size.
TIRE INFLATION PRESSURE
Front and rear tire inflation pressure should be 0.84-1.41
kg/cm
2
(12-20 psi).
! WARNING
Use only Arctic Cat approved tires when replacing tires.
Failure to do so could result in unstable vehicle operation.
! WARNING
Always use the size and type of tires specified. Always
maintain proper tire inflation pressure.
! WARNING
Do not mix tire tread patterns. Use the same pattern type
on front and rear. Failure to heed warning could cause
poor handling qualities of the vehicle and could cause
excessive drive train damage not covered by warranty.
Summary of Contents for 2013 Prowler XT
Page 1: ...Prowler XT XTX XTZ ...
Page 3: ......
Page 5: ......
Page 149: ...4 16 NOTES ...
Page 211: ...7 8 NOTES ...
Page 232: ...8 21 8 NOTES ...
Page 233: ... Printed in U S A Trademarks of Arctic Cat Inc Thief River Falls MN 56701 p n 2259 530 ...


