143
WT436
INSTALLING
NOTE: If the carrier bearing was not removed, pro-
ceed to step 5.
NOTE: The carrier bearing is intended to be a “slip
fit” assembly. It is very important that the surface is
free of nicks and rust. It may be necessary to lightly
scrub unpainted surfaces with emery cloth to ensure a
smooth surface.
WT438
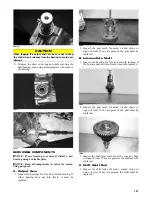
1. Slide the carrier bearing onto the shaft with the set
screws facing down towards the longer end of the
driveshaft making sure it is past the snap ring
groove. Do not tighten the set screws at this time.
WT432
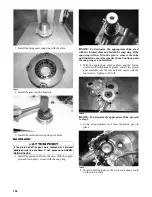
2. Slide the snap ring over the shaft and snap them into
position.
WT431
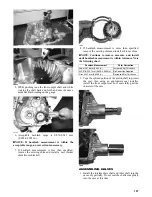
3. Remove each set screw and place one drop of red
Loctite #271 on each; then tighten to 75 in.-lb.
4. With the front differential slid forward against the
frame, apply a small amount of molybdenum grease
to the splines and install the front driveshaft into the
front differential. Tighten the clamp securely.
WT422A
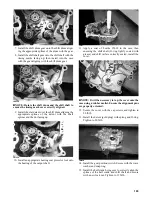
5. Apply molybdenum grease to the splines on both
ends of the rear driveshaft and insert the rear drivesh-
aft into the mating end of front driveshaft. Tighten
the clamp securely.
WT427
6. Mate the rear driveshaft with the output shaft of the
transaxle so they are meshed together by pushing on
the front axles rearward until the front differential
mounting holes are aligned. Tighten the clamp
securely.


