35
2. Remove the six cap screws securing the recoil to
the engine and note the location of the ground wire
for assembling purposes.
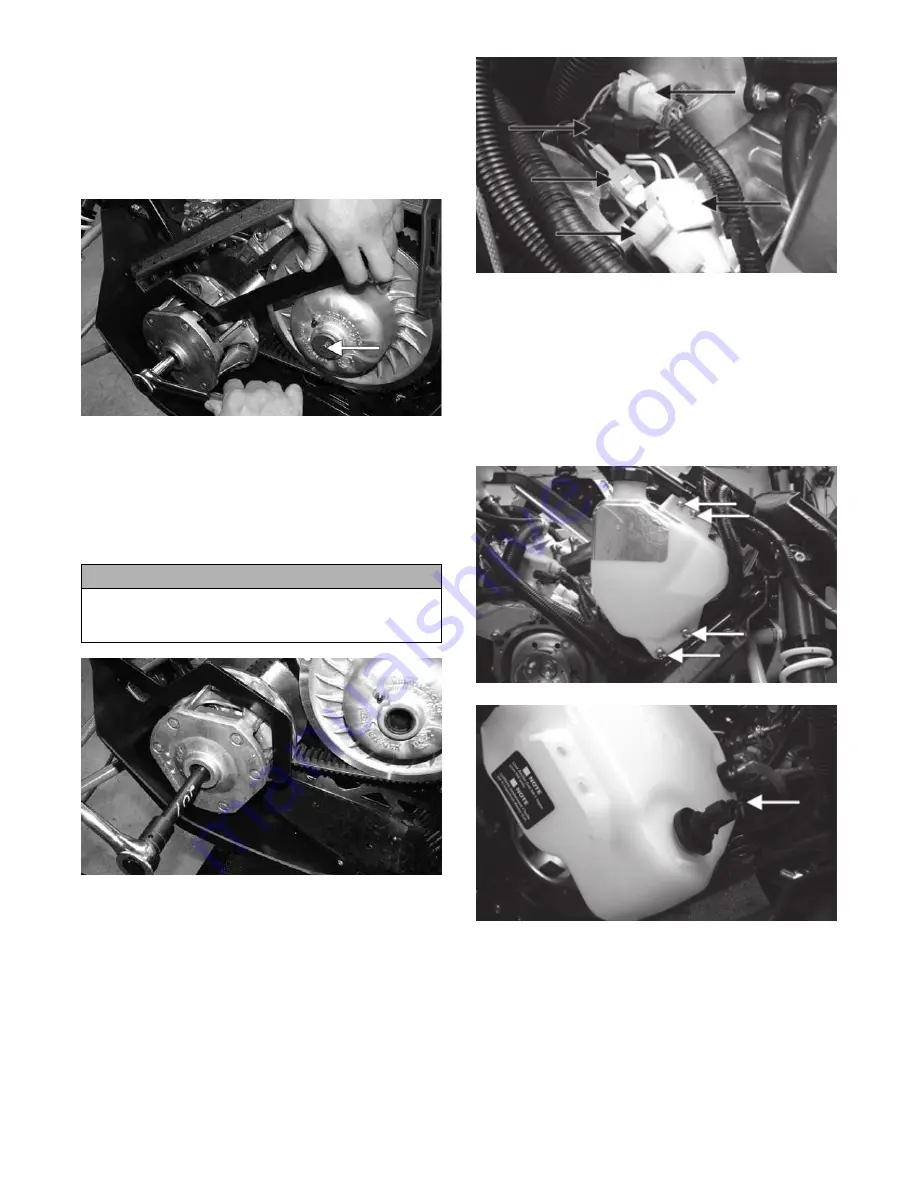
3. Using Drive Clutch Bolt Tool (p/n 0644-281),
remove the cap screw and lock washer securing
the drive clutch to the crankshaft; then remove the
cap screw securing the driven pulley to the shaft.
RS067A
4. Using Clutch Puller (p/n 0744-062) and an impact
wrench or breaker bar and Spanner Wrench (p/n
0644-136), tighten the puller. If the drive clutch
will not release, sharply strike the head of the
puller. Repeat this step until the clutch releases.
Remove the drive clutch/driven pulley and the
drive belt.
RS068
5. Remove the cap from the coolant filler neck; then
using Vacuum Test Pump (p/n 0644-131) or a suit-
able substitute, drain the engine coolant.
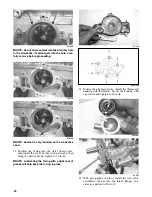
6. Remove the cable ties securing the harness cover;
then remove the cover and disconnect the five har-
ness connectors.
IO035A
NOTE: For installing purposes, note the loca-
tions of the cable ties securing the harnesses.
7. Remove the four lock nuts and cap screws secur-
ing the oil tank to the chassis; then disconnect the
low oil sensor from the back side of the tank.
Remove the oil hoses from the oil pump and dis-
card the clamps. Plug the oil line and remove the
oil tank.
IO036A
IO037A
CAUTION
Use Clutch Puller (p/n 0744-062). This is a new puller
for 2010, so never substitute a different puller or drive
clutch damage will occur.
Summary of Contents for 500 Sno Pro
Page 1: ...TM SHARE OUR PASSION Operator s Performance Manual Performance Manual 500 Sno Pro...
Page 2: ......
Page 6: ...NOTES...
Page 22: ...16 NOTES...
Page 68: ...62 NOTES...
Page 92: ...86 NOTES...
Page 93: ...87 NOTES...
Page 94: ...88 NOTES...
Page 95: ...Printed in U S A Trademarks of Arctic Cat Inc Thief River Falls MN 56701 p n 2258 721...


