46
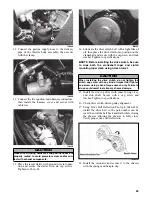
2. Insert a snap gauge into each piston-pin bore; then
remove the gauge and measure it with a microme-
ter. The diameter measurement must be within
0.8661-0.8665 in. Take two measurements to
ensure accuracy.
AC092
Connecting-rod Small End Bore
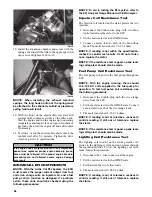
1. Insert a snap gauge into each connecting-rod small
end bore; then remove the gauge and measure it
with a micrometer.
AN061
2. The diameter measurement must be within
1.0631-1.0634 in.
Crankshaft Runout
0742-727
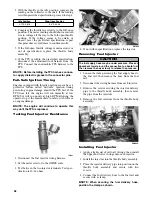
1. Using the V Blocks, support the crankshaft on the
surface plate.
NOTE: The V blocks should support the crank-
shaft on the outer bearings.
2. Mount a dial indicator and base on the surface
plate. Position the indicator contact point against
the crankshaft location point A (PTO-end) from
the crankshaft end. Zero the indicator and rotate
the crankshaft slowly. Note the amount of crank-
shaft runout (total indicator reading).
NOTE: For runout location point specifications,
see Crankshaft Runout/Repair Specifications in
Section 1 of this manual.
3. Position the indicator contact point against the
crankshaft location point B (MAG-end) from the
crankshaft end. Zero the indicator and rotate the
crankshaft slowly. Note the amount of crankshaft
runout (total indicator reading).
FC046
4. Position the indicator contact point against the
crankshaft at location point C (center). Zero the
indicator and rotate the crankshaft slowly. Note
the amount of crankshaft runout (total indicator
reading).
5. If runout exceeds 0.002 in. at any of the check-
points, the crankshaft must be either straightened
or replaced.
Assembling Engine
NOTE: The use of new gaskets and seals is rec-
ommended when assembling the engine.
NOTE: Prior to assembling the engine, use parts
cleaning solvent and compressed air and thor-
oughly clean the threaded holes of the crankcase
and cylinders to properly tighten.
NOTE: When the use of a lubricant is indicated,
use Arctic Cat Synthetic APV 2-Cycle Oil.
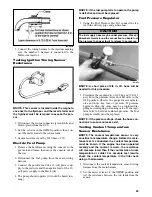
1. Apply a thin coat of grease to the inner seal lips of
the water pump seal.
! WARNING
Always wear safety glasses when drying components
with compressed air.
Summary of Contents for 500 Sno Pro
Page 1: ...TM SHARE OUR PASSION Operator s Performance Manual Performance Manual 500 Sno Pro...
Page 2: ......
Page 6: ...NOTES...
Page 22: ...16 NOTES...
Page 68: ...62 NOTES...
Page 92: ...86 NOTES...
Page 93: ...87 NOTES...
Page 94: ...88 NOTES...
Page 95: ...Printed in U S A Trademarks of Arctic Cat Inc Thief River Falls MN 56701 p n 2258 721...


