141
PR250
3. Using a socket and ratchet handle, tighten the nut
until the stud is fully drawn into the hub.
PR252A
INSTALLING
1. Secure the brake disc to the hub with the four cap
screws coated with red Loctite #271. Tighten to 15
ft-lb.
2. Install the hub assembly onto the axle; then apply
Loctite primer and red Loctite #277 to the axle
threads. Install the brake caliper and secure with new
“patch-lock” cap screws. Tighten to 20 ft-lb.
WC281
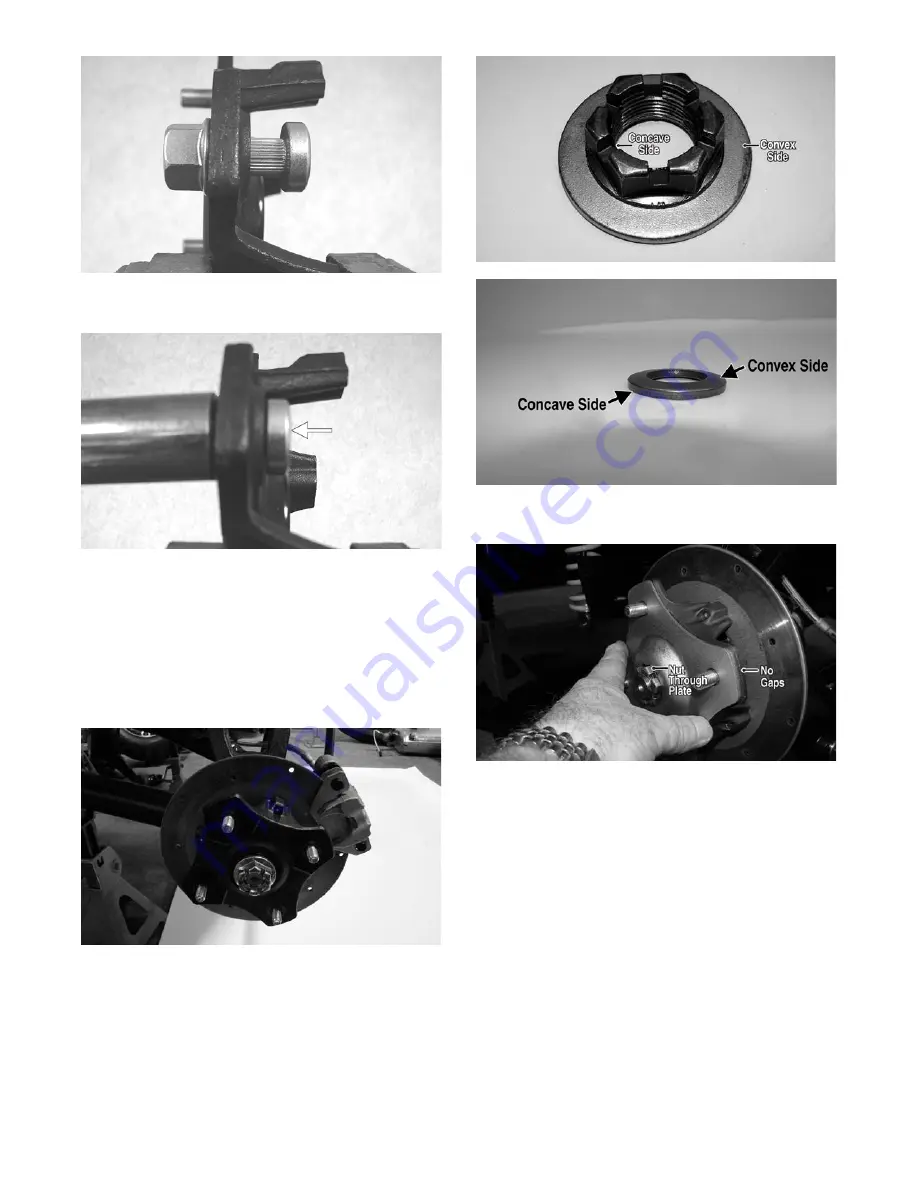
3. Engage the hub nut into the Belleville washer on the
convex side; then with the concave side of the
washer directed toward the hub, install the nut and
washer. Keeping the nut and washer engaged, tighten
the hub nut to 250 ft-lb.
WC303A
WC769A
4. Install the hub plate making sure it fits completely
over the nut and lies flat against the hub.
WC317A
NOTE: If the hub plate cannot be fully installed due
to misalignment of the nut, tighten the nut until prop-
erly aligned and the plate is fully seated.
5. Install the wheels and using a crisscross pattern,
tighten the wheel nuts in 20 ft-lb increments to a final
torque of 40 ft-lb (steel wheel), 60 ft-lb (aluminum
wheel w/black nuts), or 80 ft-lb (aluminum wheel
w/chrome nuts).
6. Remove the vehicle from the support stand.


