background image

Page 7  

Saf
ety

Pr

ecautions

WARNING

This symbol shows that this appliance used a flammable 
refrigerant. If the refrigerant is leaked and exposed to an 
external ignition source, there is a risk of fire. 

CAUTION

This symbol shows that the operation manual should be read 
carefully.

CAUTION

This symbol shows that a service personnel should be handling 
this equipment with reference to the installation manual.

CAUTION

This symbol shows that information is available such as the 
operating manual or installation manual.

EXPLANATION OF SYMBOLS DISPLAYED ON THE UNIT

•  Do not try to accelerate the defrosting process or methods of cleaning that are 

not recommended by the manufacturer.

•  The appliance shall be stored in a room without a continuously operating ignition 

source (for example, open flames or an operating gas appliance) or an ignition 
source (for example, an operating electric heater) close to the appliance. The 
appliance shall also be stored in a room without ignition sources.

•  Do not pierce or burn.
•  Be aware that the refrigerants may not contain an odor.
•  Keep ventilation openings clear of obstruction.
•  Unit is only to be serviced by a Midea authorized servicer, please call Customer 

Service at 1-866-646-4332 for support.

•  Flammable refrigerant R32 is used within air conditioner.  Please follow the 

instructions carefully to handle, install, clean, and service the air conditioner 
to avoid damage or hazard.  Do not dispose of air conditioner in regular trash. 
Contact qualified agency for proper disposal.

•  No open fire or devices that generate spark/arcing shall be around the air 

conditioner to avoid causing ignition of the flammable refrigerant used. Please 
follow the instructions carefully to store or maintain the air conditioner to 
prevent mechanical damage from occurring.

WARNING (for using R32 refrigerant only)

Caution: Risk of fire/

flammable materials

(Required for R32/R290 units only)

IMPORTANT NOTE:Read this manual 

carefully before installing or operating 

your new air conditioning unit. Make sure 

to save this manual for future reference.

Summary of Contents for KAP09R1CWT

Page 1: ...this product please read this manual carefully and keep it for future reference The design and specifications are subject to change without prior notice for product improvement Consult with your deale...

Page 2: ...Unit Specifications and Features 8 Operating Instructions 9 Installation Instructions 12 Care and Cleaning 17 Troubleshooting Tips 18 Remote Control Instructions 19 27 Warranty and Return Policy For s...

Page 3: ...ms away from the unit Ventilate room before operating the air conditioner if there is a gas leakage from another appliance Do not operate or stop the unit by inserting or pulling out the power cord pl...

Page 4: ...If the wall receptacle you intend to use is not adequately grounded or protected by a time delay fuse or circuit breaker have a qualified electrician install the proper receptacle Ensure the receptac...

Page 5: ...danger of fire or electric shock If water is spilled on the unit turn off the unit and switch off the circuit breaker Isolate supply by taking the power plug out and contact a qualified service techn...

Page 6: ...urer Grounding type wall receptacle Do not under any circumstances cut remove or bypass the grounding prong Power supply cord with 3 prong grounding plug and current detection device The power supply...

Page 7: ...hall also be stored in a room without ignition sources Do not pierce or burn Be aware that the refrigerants may not contain an odor Keep ventilation openings clear of obstruction Unit is only to be se...

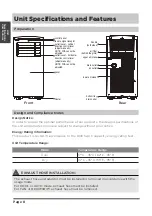
Page 8: ...F r a e R t n o r F control panel remote signal receptor handle both sides outlet louver vertical direction control lever adjust manually NOTE PHA cannot be adjusted outlet louver horizontal direction...

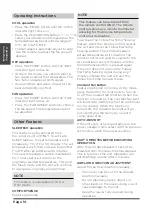
Page 9: ...and FAN modes Power Button Power switch on off Power indicator light Timer mode indicator light set only by remote controller LED display Shows the set temperature while on cool mode While on DRY and...

Page 10: ...ves as a remote thermostat allowing for the precise temperature control at its location COMFORTSENSE Feature optional To activate the Follow Me Temp Sensing feature point the remote control towards th...

Page 11: ...connector attach the drain hose to the connector Place the end of the hose in the drain area you re using Remove the drain plug Continuous drain hose When the water level of the bottom tray reaches a...

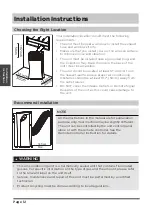
Page 12: ...e Signal Receptor of the unit as this could cause damage to the unit Choosing the Right Location Recommend Installation This air conditioning unit is a hermetically sealed unit that contains fluorinat...

Page 13: ...be shortened for smaller windows Tools Needed Accessories n o i t p i r c s e D t r a P Unit adaptor Window slider adaptor Window slider A Window slider B Exhaust hose Bolt Foam seal A adhesive Foam...

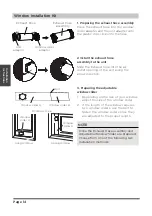
Page 14: ...epending on the size of your window adjust the size of the window slider 2 If the length of the window requires two window sliders use the bolt to fasten the window sliders once they are adjusted to t...

Page 15: ...required Foam seal C Non adhesive type Security Bracket 2 Screws 2 Insert the window slider assembly into the window opening 3 Cut the non adhesive foam seal C strip to match the width of the window I...

Page 16: ...match the window height Insert the foam seal between the glass and the window frame to prevent air and insects from getting into the room 4 If desired install the security bracket with 2 screws as sh...

Page 17: ...during cleaning A damaged power cord must be replaced with a new cord from the manufacturer Clean the unit using a damp lint free cloth and mild detergent Dry the unit with a dry lint free cloth Drain...

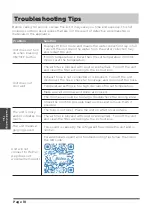
Page 18: ...set temperature in COOL mode reset the temperature The air filter is blocked with dust or animal hair Turn off the unit and clean the filter according to the instructions Exhaust hose is not connected...

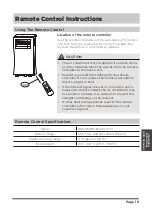
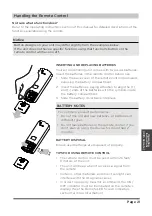
Page 19: ...ng into the remote controller Do not expose the remote controller to direct sunlight or heat If the infrared signal receiver on the indoor unit is exposed to direct sunlight the air conditioner may no...

Page 20: ...C TIMER ON Sets timer to turn unit on see How to Use Basic Functions for instructions TIMER OFF Sets timer to turn unit off see How to Use Basic Functions for instructions LED Turns the AC s LED disp...

Page 21: ...PS FOR USING REMOTE CONTROL The remote control must be used within 26 feet 8 meters of the unit The unit will beep when it receives a signal from the remote Curtains other materials and direct sunligh...

Page 22: ...ys the set temperature by default or timer setting when using TIMER ON OFF functions Temperature range 62 F 86 F 17 C 30 C Timer setting range 0 24 hours This display is blank when operating in FAN mo...

Page 23: ...temperature NOTICE If the unit does not change when the button is pressed check that the ON OFF indicator is illuminated If it is not point the remote at the unit and press the ON OFF button Operating...

Page 24: ...want the unit to turn on For example if you set TIMER ON for 2 hours 2 0h will appear on the screen and the unit will turn on after 2 hours NOTICE This number indicates the amount of time after the c...

Page 25: ...T CU T TIME R ON TE MP sec 8 1 TIMER ON X12 2 TIMER ON 5 TIMER OFF X16 6 TIMER OFF 3 7 Setting both TIMER ON and TIMER OFF at the same time Keep in mind that the time periods you set for both functio...

Page 26: ...m comfort 1 Press COMFORTSENSE button to activate function The remote control will send temperature signal to the unit every three minutes 2 Press COMFORTSENSE button again to turn off this function U...

Page 27: ...ranty does not cover the following 1 Failure caused by damage to the unit while in your possession other than damage caused by defect or malfunction by its improper installation or by unreasonable use...

Page 28: ...ermal Unit rating which indicates the amount of heat it can remove from a room A higher number means more cooling power for a larger room Be sure you are comparing only newer models to each other olde...

Page 29: ......

Page 30: ......

Page 31: ......

Page 32: ......

Reviews: