Operation Instructions
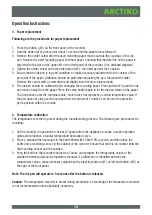
3. Paper replacement
Following are the procedures for paper replacement
1. Press the button (#3) on the front panel of the recorder.
2. Hold the button (#3) pressed for about 1 second until the paper moves leftward.
3. Remove the center screw after the used recording paper moves outside the coverage of the ink
pen. Replace the used recording paper with new paper, ensuring that the date line on the paper is
aligned with the slot on the upper left of the front panel of the recorder. (See attached diagram).
4. Tighten the center screw and press the button (#3), the inked pen will then operate.
5. Ensure that the ink pen is in good condition, or make necessary adjustment to the contact of the
pen point of the paper. (Attention should be paid when adjusting the pen. Dismount the lintel.
Remove the carrier with a screwdriver and slightly bend it before replacement).
6. The ink pen should be calibrated after changing the recording paper. Press button (#3) until the ink
pen moves away from the paper. Press the same button again to let the ink pen return to the paper.
The pen pauses over the marginal scale, which does not represent a certain temperature value. If
the pen does not stop over the said position, the arrows #1 and #2 can be used to adjust the
pen’s position within 5 seconds.
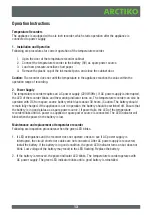
4. Temperature calibration
The temperature recorder is preset during the manufacturing process. The following are procedures for
resetting.
1. Set the recorder in operation for at least 2 hours before the appliance reaches a stable operation
status and produces a regular temperature fluctuation curve.
2. Place a standard thermocouple in the bottle filled with 100ml 10% glycerin, and then place the
bottle and a recording sensor in the cabinet of the recorder. Ensure that there is no contact between
the recording sensor and the solution.
3. Keep the bottle in the recorder cabinet for 4 hours and compare the temperature values of the
standard thermocouple and temperature recorder. If a difference is identified between the
temperature values, make necessary adjustment by pressing button (#1) at left and button (#2) at
the right of the front panel.
Note: The ink pen will operate in 5 seconds after the button is released.
Caution:
The temperature recorder is preset during production, se resetting of the temperature recorder
is not recommended unless absolutely necessary.
14
Summary of Contents for BBR 950
Page 1: ...OPERATING INSTRUCTIONS Refrigerator BBR 950 ...
Page 2: ...2 ...
Page 18: ...18 ...
Page 19: ...19 ...


