background image


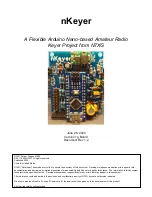
nKeyer 
 

Page 14 of 15 
 

Version 1g 
By N7XG / KI6TMF 


3.


Connectors / Options


The nKeyer was designed to be very flexible, allowing you to decide what you do or do NOT 
wish to hook to it.  As such there are many options for connections to use.  Loosely, these can 
be classified as Needed, Recommended, and Optional. 


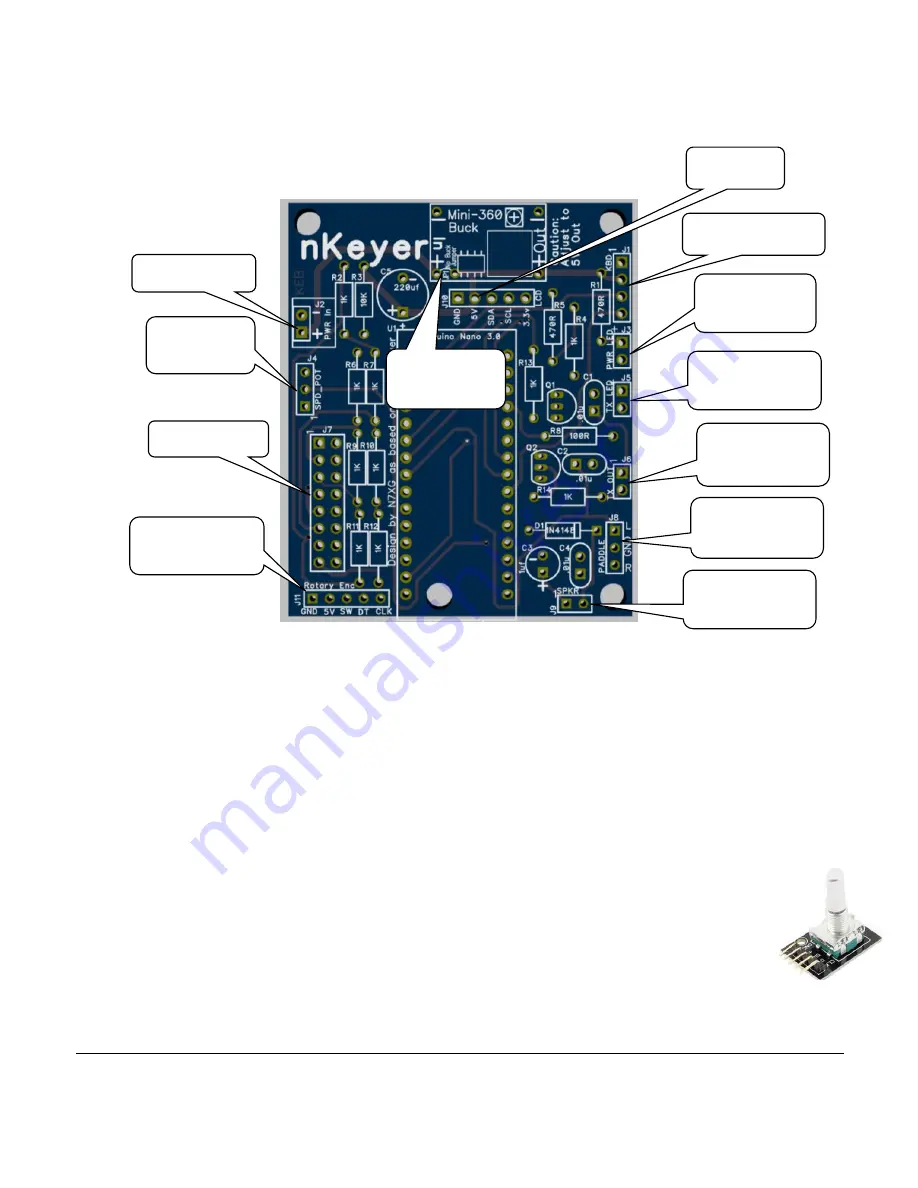
1.  Power in (J2: PWR IN  

Pinout = “+ -“) – 5V (with no buck jumper installed) or 7-23v in 

with the Mini-360 buck installed. 

NEEDED


2.  Speed Pot (J4: SPD_POT  Pinout = 3 pot pins) 

– connect to a 10K potentiometer to 

adjust the CW speed.  Requires the code to be set for the speed pot option. Use this 
OR the rotary encoder. 

OPTIONAL


3.  Buttons (J7) 

– Up to 10 function buttons (determined by the code settings).  A typical 

configuration requires at least two buttons to be used.  Button 1 connects to the top 
most two pins (horizontally across from each other), and button two connects to the two 
pins next down. 

Minimum TWO RECOMMENDED / NEEDED


4.  Rotary Encoder (J11: Rotary Enc  

Pinout = “GND, 5V, SW, DT, CLK”) – The 

code supports the connection of an inexpensive rotary encoder used with 
Arduino projects to control CW speed and potentially other functions.  This 
style of encoder 

can be found on Ebay for $1 or less.  Search for “Arduino 

Rotary Encoder”.  This connector is designed to connect straight to an Arduino 
encoder as pictured. 

RECOMMENDED


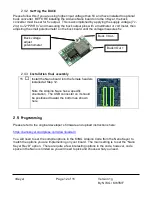
11. Power in  
 

12. Speed 

pot 


3.  Buttons 
 

10. Rotary 

encoder 


1.  LCD 
 

9.  Keyboard 
 

7.  Power 

LED 


8.  Transmit 

LED 


6.  Transmit 

Out  


5.  Paddle 

Input 


4.  Speaker 

Out  


2.  Buck 

Bypass 


Summary of Contents for K3NG

Page 1: ...t to this documentation and disclaims any implied warranties of merchantability and fitness for a particular purpose The information in this document is subject to change without notice Developer assu...

Page 2: ...2 ASSEMBLY INSTRUCTIONS 5 2 1 NKEYER BOARD BOM PARTS LIST 5 2 2 OTHER PARTS TO CONSIDER 6 2 3 NKEYER PARTS ASSEMBLY 7 2 3 1 First Things First 7 2 4 ASSEMBLY GUIDE 8 2 4 1 Install Parts 8 2 4 2 Setti...

Page 3: ...rce firmware here https github com k3ng k3ng_cw_keyer Also see https nanokeyer files wordpress com for project details on using and programming the code Compatible with the Nano Keyer Rev D open hardw...

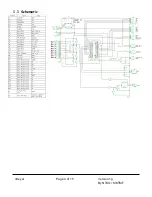
Page 4: ...nKeyer Page 4 of 15 Version 1g By N7XG KI6TMF 1 1 Schematic...

Page 5: ...r watt 1 R8 100 ohm resistor watt 1 C1 C2 C4 01uf 10nf 50v monolithic ceramic cap 3 C3 Optional for DC blocking on the audio out Jumper wire or 1uf 220uf electrolytic or tantalum cap 1 Typically not u...

Page 6: ...V power supply with buck installed 9 volt battery works A paddle key to enter Morse code 8 ohm speaker to hear the Morse tones 1601 LCD with Serial I2C SPI interface Arduino Rotary Encoder module or 1...

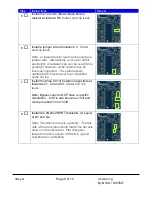
Page 7: ...om shortest smallest to tallest 2 3 1 First Things First 1 Begin by inspecting the PCB to look for any defects such as cracks or breaks The holes on the board should be open on both sides 2 Next inspe...

Page 8: ...the 1N4148 at location D1 Solder and clip leads Note The diode is polarized and must be installed with the proper orientation The end with the band cathode goes towards the right side of the board as...

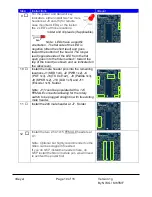
Page 9: ...io volume may be inversely impacted This option allows additional DC blocking out to an amplified audio device 7 Install the three 0 01uf Ceramic Capacitors at locations C1 C2 and C4 Solder and clip l...

Page 10: ...e hole marked toward the top of the board as shown and as indicated on the silkscreen 10 Install the male header pins into the remaining locations J1 KBD 1x4 J2 PWR 1x2 J4 POT 1x3 J6 TX Out 1x2 J8 Pad...

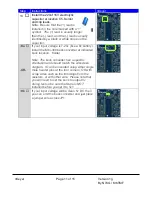
Page 11: ...ike a 9v battery install the Mini 360 buck converter at indicated buck location Solder Note The buck converter has a specific orientation and should match the silkscreen diagram It can be mounted usin...

Page 12: ...embly 15 Install the Nano board into the female headers installed at Step 12 Note the Arduino Nano has a specific orientation The USB connector on it should be positioned toward the bottom as shown he...

Page 13: ...isplay you should get a title and a hello tone from the nKeyer audio out or speaker Attach your paddle and verify you get the dits and dahs that you expect Try out other features that you may have ena...

Page 14: ...10 function buttons determined by the code settings A typical configuration requires at least two buttons to be used Button 1 connects to the top most two pins horizontally across from each other and...

Page 15: ...es to an LED to indicate when the Transmit Out TX Out is active RECOMMENDED 9 Transmit Out J6 TX OUT Pinout TX TX This connection is used to key up your transmitter to send out code via the speaker co...

Reviews: