BINDING/PAIRING GUIDE
Full manual available to download from: www.Ares-RC.com
Full manual available to download from: www.Ares-RC.com
QUICK-START GUIDE
Full manual available to download from: www.Ares-RC.com
Full manual available to download from: www.Ares-RC.com
12
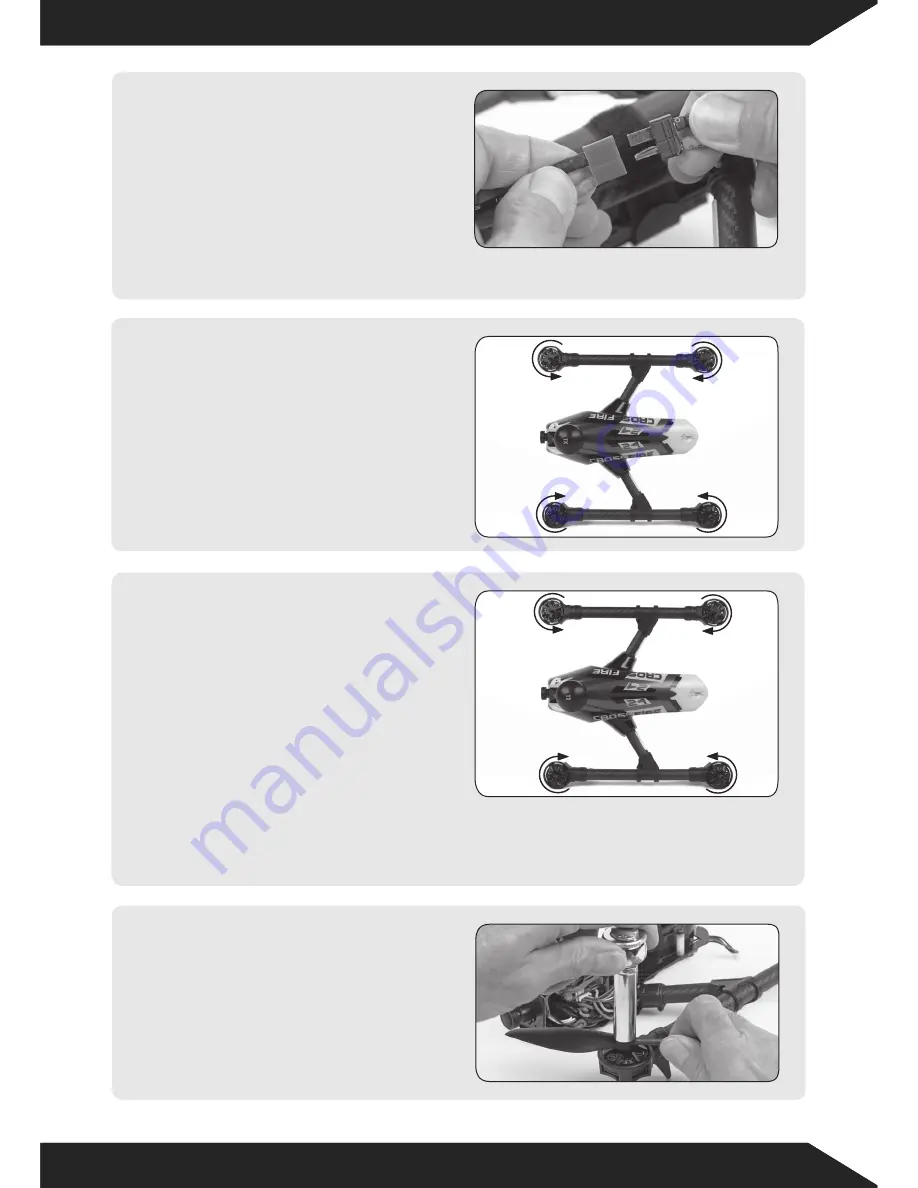
With the propellers still removed,
switch your transmitter ON and
connect the Crossfire’s battery.
A series of beeps will be heard
confirming that the quad is ready
to arm. Place the Crossfire on
a level surface and arm the
motors by moving the throttle
stick to the bottom right corner of the gimbal (the default position for Mode 2
transmitters) and holding for three seconds.
13
Check the rotation direction of the
motors by gently increasing the
throttle and viewing from above.
14
Having confirmed that all works
as it should and that the motors
rotate correctly, disconnect the
battery and switch OFF your
transmitter. Identify the propellers
noting that two of the four have
a right-hand rotation (denoted
by the letter R alongside the
dimension embossed on the
root section of the blade). R
designated propellers should be
installed on motors A and C and fitted with a black (left-hand thread) prop nut.
The remaining left-hand rotation propellers should be secured to motors B
and D.
Install the propellers using a
suitable 10mm wrench or socket
using adequate, but not excessive,
force to safely tighten the nuts.
Remember that the black prop
nuts are left hand thread and
tighten counter clockwise.
15
D
A
C
B


