background image

Service Manual


Technical Information


4


Basics in RAC


Knowledge of the basic SI standard units for temperature, pressure, mass, density, energy.


Understanding of the basic theory of refrigeration systems including the functions of the main components in the system (compressor,


evaporator, condenser, thermostatic expansion valves).


Understanding how to read a refrigerant flow chart and an electrical circuit diagram.


The determination of non condensable gases in the refrigeration system and how to eliminate them.


The importance of the use of oxygen free dry nitrogen (OFDN) for system flushing, leak test and strength test.


The elimination of humidity from the refrigeration system and how to recover or vent HC refrigerant from a system.


Usage of tables and diagrams (log p/h diagram, saturation tables of a refrigerant, diagram of a single compression refrigeration cycle)


and interpretation of these tables and diagrams.


Knowledge of the basic operation of the following components in a refrigeration system and their role and importance for refrigerant


leakage prevention and identification:


· 

Temperature and pressure controls


· 

Sight class and moisture indicators


· 

Defrost controls, reverse cycle operation


· 

System protectors


· 

Measuring devices such as the pressure gauge manifold


· 

Thermometer


· 

Leak detector


· 

Refrigerant charging devices


· 

Vacuum pump


· 

Oxygen free dry nitrogen cylinder and pressure regulator


Fault finding 

 analysis and repair.


· 

Knowledge of flammable refrigerants


· 

Risk analysis for the application of flammable refrigerant and properties of 

flammable refrigerants


· 

Electrical circuit assessment and repair


Checks before putting  in  operation, after  a  long period  of


nonuse, after maintenance or repair intervention or during


operation.


Carry out a pressure and leak test to check the strength and the tightness of the system.


Usage of a vacuum pump.


Evacuation of the system to remove air and moisture according to standard practice.


Checks for Leakage


Knowledge  of  potential  leakage  points  of  refrigeration,  air-conditioning  and  heat  pump  equipment.  Making  a  visual  and  manual


inspection of the whole system.


Carry out a check for leakage of the system using an indirect method and/or one of the direct methods.


Direct leak detection methods:


1. Fixed leakage detection systems


2. Portable electronic gas detectors


3. Ultraviolet (UV) indication fluids


4. Weak soapy water solution (bubble test) also in combination with OFDN


5. New installation tightness test for leakage detection procedure e.g. H2/N2


6. Operational system tightness test for leakage detection procedure


Indirect refrigerant detection methods:


1. Visual


2. Manual checks


Read More! 

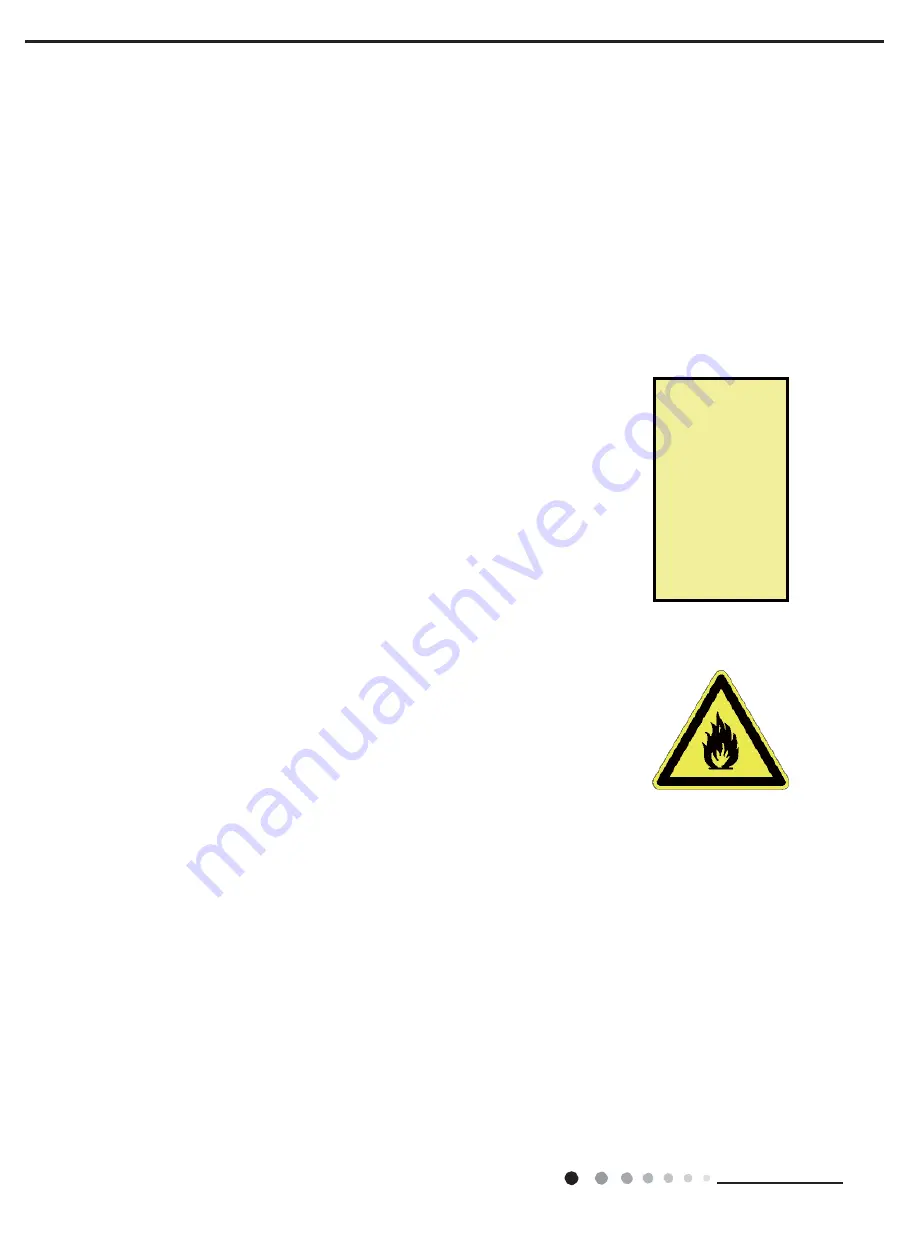
SAFETY CODE 

OF PRACTICE 

FOR REFRIGE- 

RATING SYS- 

TEMS 

UTILISING A2 & 

A3 REFRIGE- 

RANTS


ISBN


1 872719 15 5


Summary of Contents for ALICE 13

Page 1: ...ALICE 13 ALICE 17 V 10 19 SERVICE MANUAL DEHUMIDIFIER EN ...

Page 2: ...Drainage Option 26 8 2 Clean and Maintenance 27 8 3 Check Before Use season 27 8 4 Care After Use season 27 8 5 Long time Storage 27 9 Maintenance 28 9 1 Safety Principle of Maintenance 28 9 2 Preparation before Maintenance 28 9 3 Maintenance Cautions 29 9 4 Error Code 31 9 5 Malfunction Detection Flowchart 32 9 6 Maintenance Method for Common Malfunction 36 10 Exploded View and Parts List 38 11 R...

Page 3: ...er unit Careless installation and operation could cause severe injuries to operators workers and damage to the air conditioner unit itself Keep this manual in a location for easy access as it is needed for reference during installation maintenance service and operation of the unit This manual does not cover all aspects of installation maintenance and service of the chiller units if additional info...

Page 4: ... the country within which the equipment is installed Key sections and or sentences are highlighted with specific icons and symbols to the right side of the page Please pay particular attention to this information The Symbols Used in this Manual are as Follows Information window highlighting important content of the specific section or additional information to consider This sign will indicate that...

Page 5: ...can occur Consider the wiring diagram and follow the instructions of this manual very carefully whilst working on electrical parts Wrong connections or incorrect grounding may lead to severe injuries and mortal danger Ground the system according to the particular requirements of the country within which the equipment is installed Connect all the wires properly and durably Loose cables may lead to ...

Page 6: ...ld Thermometer Leak detector Refrigerant charging devices Vacuum pump Oxygen free dry nitrogen cylinder and pressure regulator Fault finding analysis and repair Knowledge of flammable refrigerants Risk analysis for the application of flammable refrigerant and properties of flammable refrigerants Electrical circuit assessment and repair Checks before putting in operation after a long period of nonu...

Page 7: ...th most other refrigerants Propane is often used as a fuel such as for heating or barbecues However for use on refrigeration systems fuel grade propane is not suitable since it contains high levels of impurities which would damage the refrigeration system and may not provide the desired refrigerating capacity or efficiency The structural formula of HC R 290 propane Important Refrigerant Properties...

Page 8: ...mmable F Readily forms an explosive air vapour mixture at ambient temperatures Vapour is heavier than air and may travel to remote sources of ignition e g along drainage systems into basements etc Liquid releases generate large volumes of flammable vapour approx 250 1 Cold burns frostbite will result from skin eye contact with liquid Liquid release or vapour pressure jets present a risk of serious...

Page 9: ...hting Measures HC R 290 is delivered stored and used at temperatures above their flash point Avoid all naked flames sparks cigarettes etc In case of fire immediately alert fire brigade Ensure an escape path is always available from any fire If gas has ignited do not attempt to extinguish but stop gas flow and allowto burn out Use water spray to cool heat exposed containers and to protect surroundi...

Page 10: ...and the risk of fire or explosion during servicing special safety rules must be followed during operation In order to avoid damage for people and property particular requirements are listed hereafter Before servicing the unit the surrounding area were the work will be done must be clear of safety hazards to ensure safe working Nevertheless it is required to carry out a risk assessment in order to ...

Page 11: ...read carefully In case of any questions refer to the detector manufacturer Furthermore ensure the detector is correctly calibrated Instructions for calibration can be found in the instruction manual of the detector or upon request from the manufacturer A possible re calibration must be done within an area which is free of refrigerants In case of a positive detection by the detector any work must b...

Page 12: ...2 53 36 76 153 44 1 53 22 26 18 0 4 262 61 2 63 38 09 162 61 1 63 23 58 17 1 4 272 03 2 72 39 45 172 03 1 72 24 95 16 3 2 281 70 2 82 40 86 181 70 1 82 26 35 15 5 291 62 2 92 42 30 191 62 1 92 27 79 14 6 8 301 81 3 02 43 78 201 81 2 02 29 27 13 8 6 312 27 3 12 45 29 212 27 2 12 30 79 12 10 4 323 00 3 23 46 85 223 00 2 23 32 34 11 12 2 334 00 3 34 48 44 234 00 2 34 33 94 10 14 345 28 3 45 50 08 245...

Page 13: ... 87 34 93 2 1189 12 11 89 172 47 1089 12 10 89 157 97 35 95 1217 88 12 18 176 64 1117 88 11 18 162 14 36 96 8 1247 16 12 47 180 89 1147 16 11 47 166 38 37 98 6 1276 94 12 77 185 21 1176 94 11 77 170 70 38 100 4 1307 24 13 07 189 60 1207 24 12 07 175 10 39 102 2 1338 07 13 38 194 07 1238 07 12 38 179 57 40 104 1369 42 13 69 198 62 1269 42 12 69 184 12 41 105 8 1401 31 14 01 203 25 1301 31 13 01 188...

Page 14: ...Service Manual Technical Information 12 Part Ⅰ Technical Information 1 Summary 492000080 492000081 ...

Page 15: ...f Carton Box LXWXH mm 393X271X510 393X271X510 Dimension of Package LXWXH mm 396X274X525 396X274X525 Application Area m2 15 15 Net Weight kg 11 5 12 Gross Weight kg 12 5 13 Refrigerant R290 R290 Refrigerant Charge kg 0 06 0 08 Bucket Capacity L 3 3 5 3 3 5 Control Type Electronic Electronic Evaporator Evaporator Form Aluminum Fin copper Tube Aluminum Fin copper Tube Evaporator Pipe Diameter mm Φ7 Φ...

Page 16: ...Service Manual Technical Information 14 3 Outline Dimension Diagram Unit mm 255 353 496 ...

Page 17: ...porator and condenser in turn and then be discharged due to centrifugal blade When the air is passing through evaporator refrigerant will absorb the heat in air to let its temperature decrease to the temperature point of dew water vapor in air will condensate Condensate water comes into water tank through water tray or is discharged directly through drainage hose The saturated low temperature air ...

Page 18: ... cap YE Yellow BN Brown COMP Compressor RD Red BU Blue Grounding wire YEGN Yellow Green BK Black VT Violet OG Orange These wiring diagrams are subject to change without notice please refer to the one supplied with the unit 78 7 03 6 1625 48 9 6 7 57 1 02725 0 3 78 1 3 0 1 1 1 2 5 63 2 5 3 1 1 1 203 1 1 1 8 1 1 67 80 7 6 1625 5 8 1 32 5 3 6 203 8 5 600007061656 1 3 203 ...

Page 19: ...tion 17 1 2 3 5 2 PCB Printed Diagram Silk Screen on Main Board Top view 7 6 5 4 1 Compressorrelay 5 Fan relay 2 Piezoresistor 6 Connecting wire of display panel 3 Fuse 7 Interface of water level switch 4 Interface of fan Bottom view ...

Page 20: ...eset button for filter 9 Button for setting humidity 2 Buzzer 6 Wire connection 10 Dual 8 nixie tube 3 Fan speed button 7 Needle stand for ambient temperature sensor 11 Button for setting humidity 4 ON OFF button 8 Needle stand for room temperature and humidity sensor 12 Needle stand for tube temperature sensor Bottom view ...

Page 21: ...in 5 reduce or at CO for continuous operation NOTE If CO Continuous is selected the dehumidifier will operate continuously at its maximum dehumidification settings if attached to a hose to drain or until the bucket is full For drier air press the pad and set to a lower percent value For damper air press the pad and set to a higher percent value When you first use the dehumidifier set the humidity ...

Page 22: ...or the humidity is 5 lower than the set humidity unit will automatically stop 3 Memory Function If power is lost all of the control settings are remembered So when power is restored the unit will start back up in the settings it was in when power was lost 4 Bucket full light This indicates that bucket is full or removed or not placed correctly 5 Clean the Filter On indicator light When dehumidifie...

Page 23: ...tes continously for 3min If water blow protection occurred for 3min the buzzer will stop after it gives out a beep for 10s Indicator of bucket full blinks and all the buttons are invalid except on off button When the water level or assembly of water tank resume to normal signal of bucket full protection will cancelled Indicator is off buzzer stops to give out a beep and the fan resumes to normal o...

Page 24: ...bient humidity If CO is set the nixie tube displays CO When there s malfunction of temperature sensor nixie tube displays F2 and LED is OFF 5 Filter alarming function a After the fan operates for 250s totally the filter indicator is on for reminding customer to clean filter User presses filter button to clear time and then filter indicator is OFF b Under off status the filter indicator is off the ...

Page 25: ...ust be applied prohibit sharing the same circuit with other electric appliances protection switch must be installed 3 Have the unit adequately grounded The grounding wire can t be used for other purposes 4 The live wire neutral wire and grounding wire of power sup ply must be corresponding to the live wire neutral wire and grounding wire of the dehumidifier 5 The power cord can t be pressed by har...

Page 26: ...late for the charging quantity of R290 WARNING Appliance filled with flammable gas R290 Applianceshallbeinstalled operatedandstoredinaroomwithafloorarealarger than4m2 Theapplianceshallbestoredinaroomwithoutcontinuouslyoperatingignitionsources for example open flames an operating gas appliance or an operating electric heater Theapplianceshallbestoredinawell ventilatedareawheretheroomsizecorresponds...

Page 27: ...ce 25 Main Tools for Maintenance 1 Electroprobe 2 Screw driver 3 Open end wrench inner hexagon spanner 4 Electronic leakage detector 5 Vacuum pump 6 Pressure meter 7 Universal meter 8 Soldering appliance refrigerant container ...

Page 28: ...e is not provided so user shall prepare it in advance Size The hose should have an inner diameter of 14mm 2 Use a hose Water can be automatically emptied into a floor drain by attaching 14mm inner diameter hose not included 1 Remove the continuous drain cap 1by turning it counter clockwise then remove the rubber stopper 2 from the spout 2 Screw the drain connector to included in the package the sp...

Page 29: ...Service Manual Maintenance 27 ...

Page 30: ...y before replacing it To install Put the filter back into the dehumidifier NOTE DO NOT rinse or put the filter in an automatic dishwasher Buttons Check whether air fillter is clean Check whether drain hose is damaged 8 4 Care After Use season Disconnect power Clean air filter and case Clean dust and obstacle of the dehumidifier Empty the water bucket 8 5 Long time Storage If you wont use the dehum...

Page 31: ... the leak testers are suitable for this air conditioner 3 Ensure that the room area reaches the requirement 4 Check if the maintenance area is ventilated Keep the room ventilated 2 Inspection of Air Conditioner 1 Ensure that the air conditioner is reliably grounded 2 Ensure that the power supply of the air conditioner is cut off Discharge the electricity of the capacitor If power supply is necessa...

Page 32: ...Disconnect the live wire first and then ground wire 6 During maintenance do not remove the protective component Use the component of same supplier and specification 7 When servicing the hermetic parts cut of the power of the air conditioner before opening the sealing cover If it is necessary to use power supply perform leak test to prevent potential danger 8 Do not replace the case which may affec...

Page 33: ... 2 Replace main board Concentration detector Leakage test for the complete unit Remove panel Remove front case The qualified parts provided by manufacturer Replace main board Leakage No Yes Remove the shielding box of electric box ...

Page 34: ...on F2 Compressorand fanmotor stop Buttons are invalid Temperature sensor on the evaporator is loosen or is poorly connected with the terminal of display board Some element of display board may have been put upside down and cause short circuit Temperature sensor on the evaporator is damaged Please refer to Checking Table for Temperature Sensor Resistance Display board is damaged 3 Humidity Sensor M...

Page 35: ......

Page 36: ... the same model Replace the controller with one ofthe same model Start Is the wiring terminal between temperature sensor and the controller loosened or poorly contacted yes no no Malfunction is eliminated Is there short circuit due to trip over of the par ts yes no no Malfunction is eliminated yes Is the temperature sensor normal according to the Resistance Table no yes yes no Malfunction is remov...

Page 37: ...he same model Trouble shooting for malfunction of humidity sensor Humidity sensor is not connected well with mainboard yes no no Is malfunction eliminated The foot of humidity sensor is short circuit or the display board is short circuit yes no no Is malfunction eliminated yes Is the humidity sensor normal according to the Resistance Table no yes no Is malfunction eliminated yes yes End ...

Page 38: ... Insert the evaporator sensor tightly Replace a main board with the same model Troubleshooting for F0 malfunction Check whether the refrigerant is leaking Yes No Heat exchangers are too dirty or the air inlet outlet is blocked Yes Malfunction is eliminated Yes No No evaporator sensor is inserted tightly Yes Malfunction is eliminated Yes No No End ...

Page 39: ...mally Make compressor run normally Replace a display board with the same model Start Heatexchangersare too dirty or the air inlet outlet is blocked Yes Malfunction is eliminated Yes No No at a normal fan speed fan speed is too low or the fan doesn t run Yes Malfunction is eliminated Yes No No normally Strangenoiseorleakageoccurs Casingis toohot Yes Malfunction is eliminated Yes No No End ...

Page 40: ...tank is improper Check whether therere obstacles around the dehumidifier blocked the air outlet Make sure therere no obstacles around the dehumidifiers Refrigerant is leaking Air outlet temperature is lower than normal temperature during dehumidifying period Find out the cause of leakage and solve the problem charge refrigerant Malfunction of capillary Air outlet temperature is lower than normal t...

Page 41: ...orrectly Water is coming out from indoors Eliminate the blocking objects inside the drainage channel 6 Abnormal Sounds and Vibration Possible causes Discriminating method dehumidifier status Troubleshooting There is abnormal sound in some parts when just turning on or turning off the unit Theres the sound of PAPA Normal phenomenon Abnormal sound will disappear after a few minutes There is abnormal...

Page 42: ...oded View and Parts List 17 18 19 20 21 16 15 22 14 13 23 12 11 10 24 9 8 7 25 6 4 5 26 3 27 1 2 28 29 30 31 32 48 47 46 45 44 43 42 41 33 34 35 36 40 39 38 37 The component picture is only for reference please refer to the actual product ...

Page 43: ... 1112610601 1112610601 1 23 Wire catch 7101600601 7101600601 2 24 Rear Case 2220621002 2220621002 1 25 Cover of drainage hole 2224609703 2224609703 1 26 Adaptor sub assy 26116155 26116155 1 27 Rubber Plug 76716054 76716054 1 28 Water Tray 2018614302 2018614302 1 29 Liquid Level Switch Sub assy 00019406000401 00019406000401 1 30 Inching Switch 4501009502 4501009502 1 31 Water Tray Assy 000069000610...

Page 44: ...10601 1112610601 1 23 Wire catch 7101600601 7101600601 2 24 Rear Case 2220621002 2220621002 1 25 Cover of drainage hole 2224609703 2224609703 1 26 Adaptor sub assy 26116155 26116155 1 27 Rubber Plug 76716054 76716054 1 28 Water Tray 2018614302 2018614302 1 29 Liquid Level Switch Sub assy 00019406000401 00019406000401 1 30 Inching Switch 4501009502 4501009502 1 31 Water Tray Assy 0000690006101 0000...

Page 45: ...sy 1112610601 1112610601 1 23 Wire catch 7101600601 7101600601 2 24 Rear Case 2220621002 2220621002 1 25 Cover of drainage hole 2224609703 2224609703 1 26 Adaptor sub assy 26116155 26116155 1 27 Rubber Plug 76716054 76716054 1 28 Water Tray 2018614302 2018614302 1 29 Liquid Level Switch Sub assy 00019406000401 00019406000401 1 30 Inching Switch 4501009502 4501009502 1 31 Water Tray Assy 0000690006...

Page 46: ...aining the refrigeration system pipeline and parts include evaporator condenser compressor capillary etc Steps Procedure 1 Before disassembly 2 Remove tank Draw the tank outwards to remove the tank tank 3 Remove front panel Remove 2 screws showing in the picture and hold the bottom to draw it The front panel can be removed screws ...

Page 47: ...rews 5 Remove top cover Remove connection screws fixing top cover 6 screws on the side 5 screws on the front face Lift the top cover to remove it a Remove side plates Remove connection screws fixing side plates 2 screws on each side Then remove the right and left side plates b Remove display panel Remove 6 connection screws fi display panel Then remove display panel left side plate screws top cove...

Page 48: ...d then remove the cover plate b Remove flow guide loop Remove 4 connections screws and then remove the flow guide loop c Remove centrifugal fan blade Remove nut fixing centrifugal fan blade Then remove the fan blade as shown in fig3 d Remove motor Remove 3 connection screws and then remove motor as shown in fig 4 screws screws fig 1 flow guide loop centrifugal fan blade screws nut fig 2 fig 3 fan ...

Page 49: ...lectric box cover and electric box Loosen 5 clasps between electric box cover and electric box Then remove electric box cover Then remove 2 connection screws showing in fig 2 and remove electric box subsequently electric box screws electric box cover clasps ...

Page 50: ...9 75 76 75 2 24 84 85 84 2 29 68 68 20 77 77 25 86 86 30 Fahrenheit display temperature Fahrenheit Celsius Fahrenheit display temperature Fahrenheit Celsius Fahrenheit display temperature Fahrenheit Celsius 32 33 32 0 55 56 55 4 13 79 80 78 8 26 34 35 33 8 1 57 58 57 2 14 81 80 6 27 36 35 6 2 59 60 59 15 82 83 82 4 28 37 38 37 4 3 61 62 60 8 16 84 85 84 2 29 39 40 39 2 4 63 62 6 17 86 87 86 30 41 ...

Page 51: ...11 0 737 5 63 46 34 10 2 73 2 358 112 0 717 4 60 23 35 9 779 74 2 28 113 0 697 3 57 18 36 9 382 75 2 206 114 0 678 2 54 31 37 9 003 76 2 133 115 0 66 1 51 59 38 8 642 77 2 064 116 0 642 0 49 02 39 8 297 78 1 997 117 0 625 1 46 6 40 7 967 79 1 933 118 0 608 2 44 31 41 7 653 80 1 871 119 0 592 3 42 14 42 7 352 81 1 811 120 0 577 4 40 09 43 7 065 82 1 754 121 0 561 5 38 15 44 6 791 83 1 699 122 0 547...

Page 52: ... 73 3 144 112 0 956 4 80 31 35 13 04 74 3 04 113 0 93 3 76 24 36 12 51 75 2 94 114 0 904 2 72 41 37 12 76 2 844 115 0 88 1 68 79 38 11 52 77 2 752 116 0 856 0 65 37 39 11 06 78 2 663 117 0 833 1 62 13 40 10 62 79 2 577 118 0 811 2 59 08 41 10 2 80 2 495 119 0 77 3 56 19 42 9 803 81 2 415 120 0 769 4 53 46 43 9 42 82 2 339 121 0 746 5 50 87 44 9 054 83 2 265 122 0 729 6 48 42 45 8 705 84 2 194 123 ...

Page 53: ...2 15 362 9 24 51 41 63 10 93 102 3 13 14 342 8 25 49 19 64 10 54 103 3 04 13 323 9 26 47 08 65 10 18 104 2 96 12 306 2 27 45 07 66 9 83 105 2 87 11 289 6 28 43 16 67 9 49 106 2 79 10 274 29 41 34 68 9 17 107 2 72 9 259 3 30 39 61 69 8 85 108 2 64 8 245 6 31 37 96 70 8 56 109 2 57 7 232 6 32 36 38 71 8 27 110 2 50 6 220 5 33 34 88 72 7 99 111 2 43 5 209 34 33 45 73 7 73 112 2 37 4 198 3 35 32 09 74...

Page 54: ...3 25 83 23 92 22 15 20 52 65 44 38 40 78 37 74 35 11 32 78 30 70 28 42 26 34 24 42 22 65 64 48 75 44 81 41 48 38 59 36 05 33 77 31 24 28 93 26 80 24 83 63 53 64 49 31 45 65 42 48 39 68 37 17 34 34 31 74 29 36 27 15 62 59 14 54 36 50 32 46 82 43 73 40 97 37 83 34 96 32 32 29 87 61 65 31 60 02 55 55 51 68 48 26 45 20 41 70 38 51 35 58 32 86 60 72 27 66 40 61 43 57 13 53 33 49 94 46 07 42 53 39 28 36...

Page 55: ...19 o C 20 o C 21 o C 22 o C 23 o C 24 o C 90 2 70 2 56 2 43 2 31 2 19 2 08 1 99 1 91 1 83 1 75 89 2 91 2 76 2 61 2 48 2 35 2 23 2 13 2 04 1 95 1 86 88 3 12 2 96 2 80 2 66 2 52 2 39 2 28 2 18 2 08 1 98 87 3 36 3 18 3 01 2 85 2 70 2 56 2 44 2 33 2 22 2 12 86 3 61 3 42 3 23 3 06 2 90 2 75 2 62 2 50 2 38 2 27 85 3 90 3 69 3 49 3 30 3 12 2 95 2 81 2 67 2 54 2 42 84 4 20 3 97 3 76 3 55 3 36 3 18 3 03 2 ...

Page 56: ...43 787 81 715 55 646 36 30 1906 00 1731 91 1568 38 1414 20 1268 36 1130 00 1034 60 943 64 856 73 773 51 29 2300 00 2089 81 1892 37 1706 22 1530 13 1363 08 1244 55 1131 54 1023 56 920 17 28 2810 00 2550 31 2306 37 2076 38 1858 82 1652 43 1505 84 1366 07 1232 52 1104 65 27 3470 00 3144 23 2838 22 2549 70 2276 79 2017 87 1836 86 1664 27 1499 35 1341 45 26 4290 00 3885 50 3505 53 3147 28 2808 41 2486 ...

Page 57: ... 13 68 48 63 03 57 78 52 70 49 02 45 46 42 00 38 65 44 89 00 82 54 76 32 70 33 64 54 58 96 54 75 50 69 46 74 42 92 43 101 00 93 48 86 25 79 28 72 55 66 06 61 28 56 65 52 17 47 82 42 115 00 106 23 97 79 89 66 81 81 74 23 68 69 63 33 58 14 53 10 41 131 00 120 81 111 01 101 56 92 44 83 64 77 33 71 23 65 31 59 57 40 149 90 138 01 126 56 115 53 104 88 94 60 87 37 80 37 73 58 66 99 39 170 00 156 52 143 ...

Page 58: ... 91 3 74 3 57 3 41 3 25 3 09 65 5 45 5 19 4 93 4 68 4 44 4 20 4 01 3 83 3 65 3 47 3 30 64 5 88 5 59 5 31 5 04 4 78 4 52 4 31 4 11 3 91 3 72 3 53 63 6 31 6 00 5 70 5 41 5 13 4 85 4 63 4 41 4 20 4 00 3 80 62 6 84 6 50 6 17 5 84 5 53 5 22 4 98 4 75 4 52 4 30 4 09 61 7 40 7 03 6 66 6 31 5 97 5 63 5 37 5 12 4 88 4 64 4 41 60 8 05 7 64 7 24 6 86 6 48 6 11 5 83 5 55 5 28 5 01 4 76 59 8 78 8 33 7 89 7 46 ...

Page 59: ...4 95 29 315 00 291 16 267 97 245 41 223 43 202 00 187 96 174 26 160 88 147 81 135 03 28 372 00 342 25 313 32 285 16 257 73 231 00 215 94 201 25 186 90 172 88 159 17 27 441 00 404 50 369 01 334 45 300 80 268 00 251 39 235 18 219 35 203 88 188 76 26 528 00 484 54 442 27 401 13 361 06 322 00 301 66 281 81 262 43 243 49 224 98 25 640 00 590 21 541 79 494 65 448 75 404 00 375 91 348 49 321 72 295 57 27...

Page 60: ...www argoclima com ...

Reviews: