background image


User’s Manual                                                            

42


4.2 Scan driver 

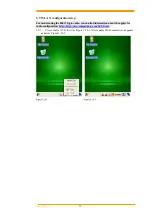
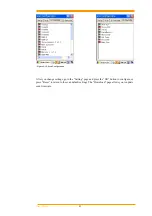
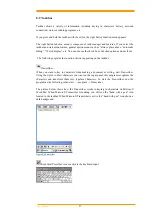
Scan driver lets you put data into Microsoft WordPad. Open scan driver and the scan module 

powers on the scanner. You can scan barcode. To turn off the power, press “

Exit

” on the 

task bar. 


4.3 Scan test 

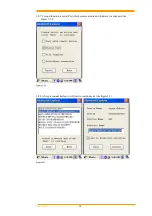
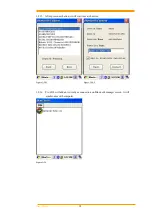
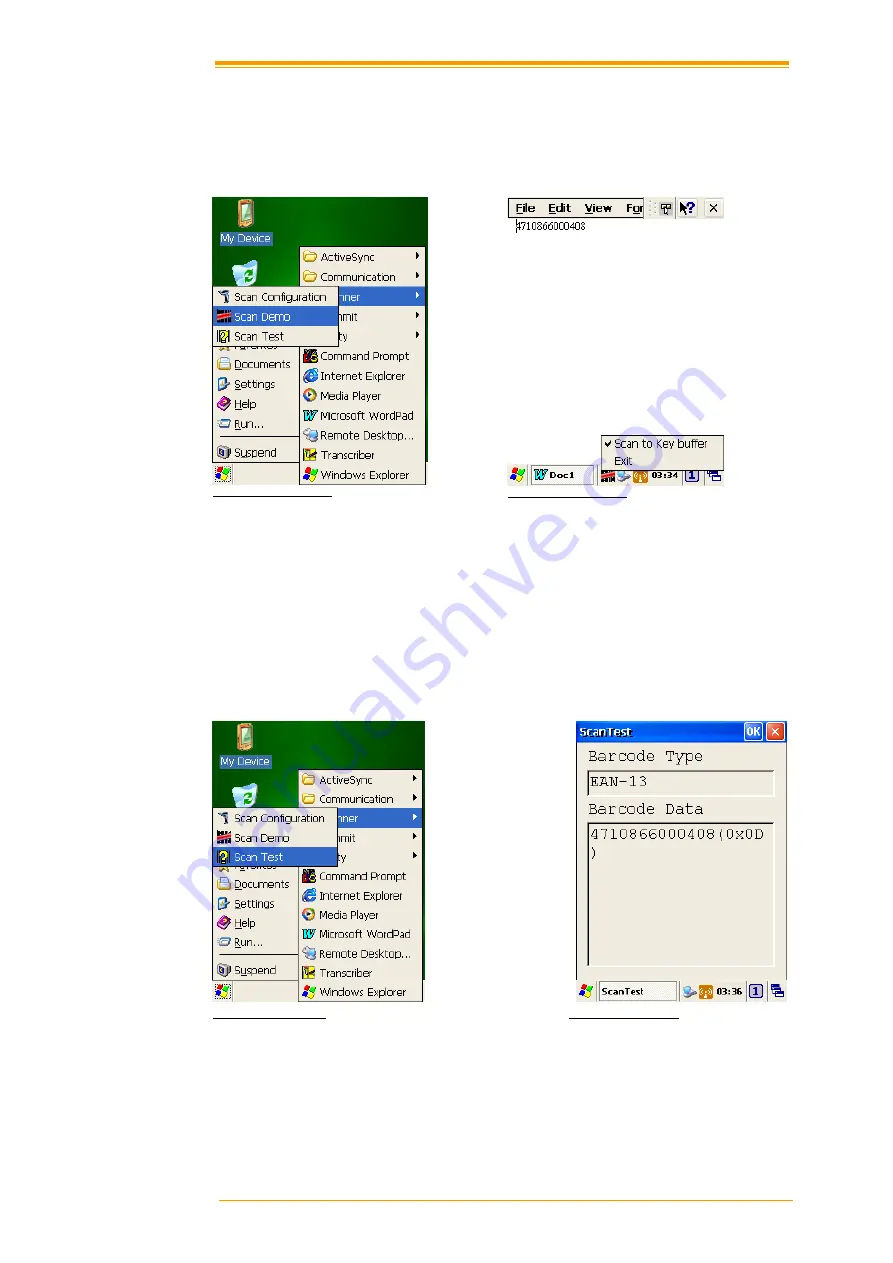
The PA-6230 has a built-in Scan Test.exe program that allows you to test the barcode scan 

function.  Scan Test.exe is located in directory 

\Programs\Scanner\Scan Test.exe. 


This program shows barcode type and barcode data when pressing the “

Scan

” key.  


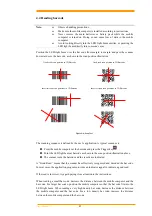
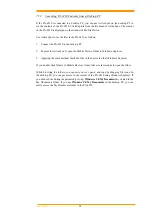
Figure 4-3-1 Scan Test                                                                                  Figure 4-3-2 Scan Test 


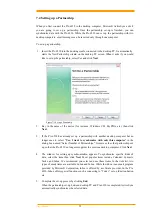
Figure 4-2-1 Scan Demo


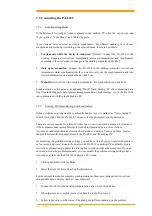
Figure 4-2-2 Scan Demo


Summary of Contents for PA-6230

Page 1: ...User s Manual PA 6230 Mobile Computer DOC NO UM PA605 01 Nov 2015 Version 1 0 Empower the Bar Code ...

Page 2: ... under proper use during the warranty period Argox will not be liable in case modifications are made by the customer In such case the standard repair charge will be applicable The standard charge for repair will also be applicable in case no defect is found at all These rules also apply for products that are still under warranty Therefore you are advised to have the product specifications always a...

Page 3: ... SD CARD 19 3 2 1 Inserting SD card into the PA 6230 19 3 3 CONFIGURING PA 6230 SETTINGS 20 3 3 1 Calibrating Touch Screen Alignment 20 3 3 2 Adjusting LCD Backlight Brightness 21 3 3 3 Adjusting Sound Volume 21 3 3 4 Using the Stylus 21 3 4 ENTERING INFORMATION 22 3 4 1 Entering Information Using a Keypad 22 3 4 2 Entering Information Using the Keyboard Input Panel 22 3 4 3 Entering Data via the ...

Page 4: ...7 5 CONNECTING THE PA 6230 53 7 5 1 Synchronizing Data 53 7 5 2 Solving Problems during Synchronization 53 7 5 3 Searching PA 6230 Contents from a Desktop PC 54 8 OVERVIEW OF MICROSOFT WINDOWS CE 5 0 55 8 1 MAIN WINDOWS 55 8 2 TASKBAR 57 8 3 SETTING UP THE PA 6230 59 8 3 1 Certificates 60 8 3 2 Date Time 61 8 3 3 Dialing 62 8 3 4 Display 63 8 3 5 Hot Function Key 64 8 3 6 Input Panel 64 8 3 7 Inte...

Page 5: ...User s Manual III 8 3 22 Timeout and Brightness 76 8 3 24 Volume and Sound 76 9 TROUBLE SHOOTING 78 9 1 GENERAL CHECKS 78 9 2 READ OPERATION PROBLEMS 78 9 3 MOBILE COMPUTER PROBLEMS 78 ...

Page 6: ...ttery life Transmissive type color LCD display Backlit keypad 1 1 About this Manual The chapters contained in this manual are Chapter 1 Introduction Presents general information about the PA 6230 Chapter 2 Getting started Describes basic use of the PA 6230 Chapter 3 Operating the Mobile computer Describes customizing the PA 6230 Chapter 4 Scanning Chapter 5 Useful Utilities Chapter 6 Software Appl...

Page 7: ...o a drained battery Lithium ion battery packs may get hot explode ignite and or cause serious injury if abused Please follow the safety warnings listed below Warnings Do not place the battery pack in fire or heat the battery Do not install the battery pack backwards so the polarity is reversed Do not carry or store battery pack together with metal objects Do not pierce the battery pack with nails ...

Page 8: ...imal charging capacity Do not use water when cleaning the cradle This can cause malfunction of the chargers Using the Mobile Computer Avoid temperature changes Sudden temperature changes can cause condensation to form on the mobile computer Using the mobile computer while condensation is present can cause malfunction Always wait until the condensation clears naturally before attempting operation D...

Page 9: ...uter Rechargeable 3 7V 1950mAh Li Polymer Battery 2 Optional Pistol Grip Rechargeable 3 7V 5000mAh Li ion Battery Working hours 8 hours Backup power 15 min data retention Data retention 30 days Batteries must be charged at a temperature ranging from 0 45 C 32 F to 113 F At temperatures below 0 C and above 45 C display or battery performance degradation may occur Wireless Communication WPAN Bluetoo...

Page 10: ...leaved 2 5 Matrix 2 5 MSI Standard 2 5 Code 39 Full ASCII EAN UPC ext Symbologies 2D Matrix symbologies included Data Matrix ECC200 Maxicode QR Code Aztec Environment Operating Temperature 10 to 60 14 to 140 Storage Temperature 20 to 70 4 to 158 Humidity 1 Operating Non condensed 10 90 2 Storage Non condensed 5 95 Impact resistance 1 1 2M 4ft Terminal 0 9M Cradle 4 drops per 6 sides 2 IP54 Electro...

Page 11: ...PA 6230 for the first time 2 1 Check the package Carefully remove all protective material from around the PA 6230 and save the shipping container for later storage and shipping Depending on the configuration ordered the PA 6230 shipping container may include 2 1 1 PDT Package PA 6230 Quick Reference Guide Battery pack CD ROM Hand strap Stylus Power supply Thread Power plug Figure 2 1 Compact Packa...

Page 12: ... 2 1 2 Cradle Package CRD 22 USB cable Figure 2 2 Cradle Package Inspect the package contents for damage If any item is missing or damaged please contact the Argox Technical Support Center immediately Cradle USB cable ...

Page 13: ...tatus of communication 3 Touch Screen Use the stylus to perform specific actions on the touch panel 4 Stroke keys A total of 29 keys are provided to turn power ON and OFF and for other operations 5 Reset switch Use a paper clip or other thin object to press the RESET switch located inside the hole 6 Stylus 7 SD card slot 8 Hand strap hook Used to install the hand strap 9 Speaker 10 Main battery co...

Page 14: ...transmission or charging 2 Power LED Indicator Power indicates 3 Charging LED Indicator Indicates the charge status of the battery Green no battery or charging complete Red battery is charging 4 Charging Slot For charging a spare rechargeable battery pack 5 DC Input Socket Input for AC adapter 6 USB Socket For connecting to PC USB port through a standard USB cable 7 RS 232 Socket For connecting to...

Page 15: ...d strap 1 Fix the small cord of the strap around the pillar of the terminal 2 Insert the handle of the strap in the thin loop 3 The strap is fixed to the terminal 4 Hold the hand strap around the wrist when carrying the terminal Figure 2 5 Hand Strap Start with a full battery 1 To be sure of proper operation it is advised to start with a full battery charge the battery pack according to the instru...

Page 16: ...during charging state and gets green when fully charged 2 When the PA 6230 terminal with the rechargeable battery placed in the cradle to charge the charging LED on the Terminal turns on in red and gets green when full charged Figure 2 6 BatterCharging Terminal on cradle Take notice that the PA 6230 cradle is designed for the PA 6230 or PA 20 terminal No other type of terminal can be placed into t...

Page 17: ...r for batteries The rechargeable battery pack form Argox can be charged in the cradle when either it is in the terminal or alone in the charging slot in the back of the cradle The life of a battery pack is limited and charging a battery pack causes it to gradually lose its ability to maintain a charge If your battery pack requires frequent charging it probably means it is time to purchase a new on...

Page 18: ...Load a lithium ion battery pack into the main battery compartment in the direction shown in the figure Figure 2 8 2 Installing Replacing The Battery Pack 3 Attach the battery compartment cover to the terminal and slide the main battery compartment cover lock to the LOCK position Figure 2 8 3 Installing Replacing The Battery Pack Note Please follow the above procedure in reverse to reassemble the b...

Page 19: ... Manual 14 How to install or replace the battery in the gun grip 1 Turn the screw Figure 2 9 1 Installing Replacing The Gun Grip Battery Figure 2 9 2 Installing Replacing The Gun Grip Battery 2 Open the cover ...

Page 20: ...e battery pack is fully charged the LED turns green Caution Ambient Temperature Ranges for the Battery Pack Temperature ranges for battery pack use in the terminal charging and storage is specified below Temperatures outside these ranges create the danger of deterioration of battery pack performance and shortening of its service life as well as fluid leakage and heat generation Operating Temperatu...

Page 21: ...eed a special cable for some cases contact your supplier to purchase the right cables or technical support System Connection Data Communication The PA series portable data mobile computers let you link to a host computer through RS 232 cable or the CRD 22 cradle for data communication 2 5 1 Via CRD 22 Cradle The CRD 22 cradle provides two methods for data transmission through RS 232 cable 9 pin co...

Page 22: ...input mode Character input mode Input alphanumeric and symbols Number input mode Inputs the numbers 0 to 9 and the decimal point 4 ENT key Enter key 5 Power key Turns power ON and OFF 6 Function keys Combination key Keys that can be assigned any function The following are the initial functions assigned to these keys FUNC P1 Adjust speaker volume FUNC P2 Adjust LCD Backlight FUNC BKSP Turns the key...

Page 23: ...ode When 1 on the screen Icon Bar indicate that the input mode at number input mode Default on number mode When a or A on the screen Icon Bar indicate that the input mode at character input mode ESC Escape key BKSP Backspaces key SPACE Space key TAB Tab key ALT Alt key CTRL Control key SHIFT Shift key ...

Page 24: ...ged the battery before turning the unit on 3 2 1 Inserting SD card into the PA 6230 1 Open the SD cover 2 Insert a correctly oriented SD card 3 Close the SD cover Figure 3 2 Installing SD Card Note When removing an SD card please press push first SD Installation Remove the cover ...

Page 25: ... Calibration Whenever the response of the touch screen is poor or the operations executed do not match your tapping on the touch screen please recalibrate the alignment of the touch screen using the following method A Press the stylus against the center of the target mark mark as indicated on the screen The screen shown to the right appears after you press the stylus against the target at five dif...

Page 26: ...ent working conditions Press the FN P1 key and press the or key Press the key adjusts for a louder sound while pressing the key adjusts for a softer sound To continue making adjustments press the or after pressing the FN P1 key Sound settings are also be made by accessing the menu and tab in order of Start Settings Control Panel Volume Sounds 3 3 4 Using the Stylus The stylus is located next to CF...

Page 27: ... alphabet A Z number s 0 9 function keys and assorted characters The keypads default characters functions are printed white 3 4 2 Entering Information Using the Keyboard Input Panel Use the keyboard input panel soft keyboard to enter information in any program To launch the keyboard input panel press the button on the taskbar Tap a key to enter a value Tap a key board input panel button to display...

Page 28: ...or Battery icon is displayed double tap this icon to bring up the Power Properties screen Or select Settings Control Panel from the Start menu and then double tap the Power icon to display Power Properties Figure 3 6 Settings Control Panel Check Battery Status The battery menu item shows the status of the main and backup batteries Figure 3 7 Power Properties ...

Page 29: ... 6230 is either plugged in via the DC 5V 2 5A power adapter or in the cradle Charging icon Indicates that the battery is charging Battery Low icon Shows there is no external power supply the battery charge is low Battery Very low icon Indicates the battery is very low Stop operation and charge the PA 6230 immediately You must charge the battery when the battery Very Low icon is displayed If the Ve...

Page 30: ...periods The available time periods are 1 2 3 4 5 10 30 minutes and never Activate this function when the PA 6230 is plugged into the power adapter or placed in its cradle by tapping the check box and then tapping the arrow to select from a list of time periods The available time periods are 1 2 3 4 5 10 30 minutes and never Figure 3 8 Power Properties Backlight Setting Because the power consumptio...

Page 31: ...a period of time Customize the idle duration using the Power control panel refer to Figure Schemes Tab Suspend mode appears just like you have turned the unit off Press the key to suspend the PA 6230 Press the key again for the PA 6230 to resume its previous state Use the Battery Power control panel to set the duration to switch to Suspend mode when the system uses battery power This saves battery...

Page 32: ...keup the PA 6230 These setting are configurable and the factory default settings are subject to change update Status Description Condition for Wakeup Power Off When the PA 6230 is set to suspend mode by pressing this action wakes the PA 6230 Press button Auto Off When the PA 6230 enters suspend mode by automatic power off this action wakes the PA 6230 Press button Tap here to put the PA 6230 into ...

Page 33: ...et Do not hold down any other keys or buttons b The PA 6230 demo window appears Caution Files that remain open during a warm boot may not be retained 3 6 2 Performing a Cold Boot A cold boot restarts the PA 6230 and erases all user stored records and entries from RAM Only perform a cold boot if a warm boot does not solve the problem Caution Cold boot resets the PA 6230 to the default settings All ...

Page 34: ...programs and important data files to the Flash Disk location Caution If an application or a data file is installed or saved in RAM a cold reset will result in the loss of that application or data file 3 7 1 Flash Disk Location To access the contents of Flash Disk storage Double tap the My Device icon on the desktop Double tap the Flash Disk icon to view Flash Disk Figure 3 12 1 My Device screen Fi...

Page 35: ...varies depending on the size of the system firmware A Inside the Flash Disk directory tap File Properties B The Flash Disk Properties dialog The number following Free is the amount of memory currently available on your device Figure 3 14 Flash Disk Properties and Size ...

Page 36: ...luetooth Enable Setting 3 8 1 Please enable Bluetooth first like Figure 3 15 Figure 3 15 Enable Bluetooth 3 8 2 After enable Bluetooth please double click BT Icon like figure 3 16 Figure 3 16 1 BT Icon Figure 3 16 2 Show BT ...

Page 37: ...nual 32 3 8 3 On Bluetooth manager screen select file new connection like Figure 3 17 Figure 3 17 Bluetooth connection 3 8 4 Bluetooth has four functions to choose like Figure 3 18 Figure 3 18 Bluetooth Explorer ...

Page 38: ...device and press Pair button it needs to enter Bluetooth PIN code like Figure 3 19 Figure 3 19 1 Bluetooth Pairing Figure 3 19 2 Bluetooth Pairing 3 8 6 After PA 6230 check pin code with device PA 6230 will appear a pop window and show success message like Figure 3 20 Figure 3 19 3 Bluetooth Pairing Figure 3 19 4 Bluetooth Pairing ...

Page 39: ...Manual 34 3 8 7 Second function is serial Port which communication with device via com port like Figure 3 20 Figure 3 20 3 8 8 After press next button it will start to search device like Figure3 21 Figure3 21 ...

Page 40: ...User s Manual 35 3 8 9 After press Connect button it will appear a connection with SPP mode like Figure 3 22 Figure 3 22 3 8 10 Third function is File Transfer like Figure 3 23 Figure 3 23 ...

Page 41: ...After press next button it will start to search device and it needs to enter pin code like Figure 3 24 Figure 3 24 3 8 12 After checking pin code with the connect device PA 6230 will enter FTP mode like Figure 3 25 Figure 3 25 ...

Page 42: ... 37 3 8 13 On Bluetooth manager screen it will add a FTP connection like Figure 3 26 Figure 3 26 3 8 14 The latest function is ActiveSync connection The function can connect with computer via ActiveSync Figure 3 27 ...

Page 43: ...38 3 8 15 After press next button it will start to search device Figure 3 28 1 Figure 3 28 2 3 8 16 PA 6230 will add an ActiveSync connection on Bluetooth manager screen It will synchronize with computer Figure 3 29 ...

Page 44: ...e 802 11 b g n radio you can find information about the applet for radio configuration http http www summitdata com SCU html 3 9 1 Please enable Wi Fi first like Figure 3 30 1 After enable Wi Fi summit icon appears as below Figure 3 30 2 Figure 3 30 1 Figure 3 30 2 ...

Page 45: ...nner 4 1 Scan Configuration When it is necessary to change the default barcode symbology for a different application use Scan Configuration to change default symbology place delimiter characters behind scanned data and save the settings Run this program from Programs Scanner Scan Configuration exe which is also accessible via Setting Control Panel on the Start menu Figure 4 1 1 Scan Configuration ...

Page 46: ...ure 4 1 3 Scan Configuration After you change settings go to the Setting page and press the OK button to configure or press Reset to return to the scan default settings The Download page allows you to update scan firmware ...

Page 47: ... power press Exit on the task bar 4 3 Scan test The PA 6230 has a built in Scan Test exe program that allows you to test the barcode scan function Scan Test exe is located in directory Programs Scanner Scan Test exe This program shows barcode type and barcode data when pressing the Scan key Figure 4 3 1 Scan Test Figure 4 3 2 Scan Test Figure 4 2 1 Scan Demo Figure 4 2 2 Scan Demo ...

Page 48: ...e scanning sequence is defined by the user s application A typical sequence is Point the mobile computer at the barcode and press the Trigger key Point the LED lightbeam at barcode as shown in the scan position illustration above The scanner reads the barcode and the results are indicated A Good Read means that the scanner has effectively recognized and decoded the bar code In most cases the appli...

Page 49: ...be read try the following 1 Change the angle between the barcode and the mobile computer 2 Change the distance between the bar code and the mobile computer If the bar code is larger than the LED light beam try moving the mobile computer a bit further away from the bar code ...

Page 50: ...om F1 to F9 hot keys 1 Choose F1 F2 F3 or F9 from pull down list 2 Tap Define inside the Function Key Setting applet 3 Select the application program you want from program list and then choose OK 4 Tap the Apply tab to complete setting 5 Tap the Default tab to return to default setting Figure 5 1 Function Key Setting ...

Page 51: ...acklight setting is a tool for changing the LCD backlight If you wish to save power use this program to change LCD backlight settings This application supports battery power backlight and external power backlight Figure 5 3 Timeout Brightness ...

Page 52: ...layer Microsoft WordPad Remote Connection Transcriber and Windows Explore Figure 6 1 Programs Implemented 6 1 Internet Explorer With Internet Explorer you can view Web or intranet Web pages on your device You will need to use WLAN to connect to an Internet Service Provider ISP or network Figure 6 2 Internet Explorer ...

Page 53: ...plates in WordPad using buttons and menu commands that are similar to those used in the desktop version of Microsoft Word You can work with files Normal or Outline view WordPad documents are usually saved as pwd files but you can also save documents in other file formats such as rtf or doc Figure 6 4 Microsoft Wordpad 6 4 Remote Desktop Connection Using Remote Desktop Connection you can log on to ...

Page 54: ...es Selector note 1 is for optimizing recognition to your own handwriting style Transcriber works transparently in the background of all Windows CE applications providing handwriting input while taking away no precious screen space Figure 6 6 Transcriber 6 6 Windows Explorer Windows Explorer works almost the same on your PDA as it does on your PC See the topics below for information about the diffe...

Page 55: ...d to connect the PA 6230 to your host computer If you run the Windows NT operating system with a service pack you will be informed during setup that you may need to reinstall the service pack Try connecting first and if unsuccessful reinstall the latest service pack Basic PC specifications for the installation of ActiveSync are as follows OS Microsoft Windows XP 2000 ME 98 or higher version progra...

Page 56: ...ween the desktop PC and PA 6230 through ActiveSync and then proceed with the synchronization of the desktop PC and PA 6230 Use a USB cable to link the PA 6230 to the desktop PC The table below shows available communication devices USB serial according to operating system Supporting operating system Desktop PC OS Connection methods Windows 95 Windows 98 Windows 2000 XP Windows NT USB Not available ...

Page 57: ...t up a partnership with another desktop computer but no longer uses it select Yes I want to synchronize with only this computer in the dialog box named Select Number of Partnerships It removes the other partnership set up so that the PA 6230 no longer recognizes the previous desktop computer Click Next 4 The window for setting up synchronization appears To synchronize specific kinds of data select...

Page 58: ...problem occurs during the synchronization process it is marked as Not completed in both ActiveSync and the PA 6230 You can solve the problem at your convenience There are various reasons for failure of ActiveSync to carry out synchronization For instance if the computer cannot access Microsoft Outlook information due to a server failure ActiveSync cannot synchronize items such as Calendar Contacts...

Page 59: ...t open the Mobile Device folder in Windows Explorer 3 Applying the same method check the files in the device in other Windows Explorer If you double click folders in Mobile Devices it may take several seconds to open the folder While browsing the folders you can carry out cut paste and copy by dragging file icons In the desktop PC you can get access to the content of the PA 6230 using Windows Expl...

Page 60: ...e settings 8 1 Main Windows When you turn on PA 6230 you will see the main Windows of Window CE 5 0 which is similar in appearance to Windows XP The main window consists of a background screen and taskbar Figure 8 1 Main Window The screen shows short cut icons for the main programs of Microsoft Windows CE 5 0 A description of the icons follows My Device Shows the internal configuration of the PA 6...

Page 61: ...skbar is designed to be simple and user friendly The picture below shows the configuration of the taskbar Start Icon Start icon is the starting point for the PA 6230 program If you point at the start menu with the stylus pen you can see various menus including program bookmark document setting help and operation If you choose each menu detailed executable programs appear as in the picture below If...

Page 62: ...e function of icons appearing on the taskbar Transcriber When you want to key in characters when making a document or setting start Transcriber Using the stylus to draw characters you want on the input panel this program recognizes the characters and transform them into typeface characters To start the Transcriber run the program as the following order start program Transcriber The picture below s...

Page 63: ... Start Setting Control Panel Input Panel and click the option you wish to set up Input Method To carry out character key in using keyboard input press keyboard icon on the taskbar You can also key in by activating Transcriber in the following order Start program Transcriber Press the keyboard once it appears on the screen Press again and it disappears Status Indicator Icon The following is a list ...

Page 64: ...wer System etc at the control panel Figure 8 5 1 Control Panel If you press Start Setting Control Panel the control panel window appears In the View option in the menu you can change the view mode into large icons small icons details or to arrange icons The control panel appears as below Figure 8 5 2 Control Panel Figure 8 5 3 Control Panel ...

Page 65: ... through the storage tap list My certificate This saves the user s personal certificate to identify the user Other certificate providers Middle certificate providers establish chains of reliability Reliable certificate providers Includes the top quality certificates 3 To add certificates or secret keys in the selected storage press the Bring button then select the way to bring certificates or keys...

Page 66: ...ue is appropriate move on to the following 2 Select year and month in the calendar If the current year is not correct press year and adjust You can select the month using left and right arrows or the monthly tab that pops up when pressed 3 Press the correct date on the calendar 4 Set time by keying in correct time in the current time box The box shows AM PM hour minutes second Press each and adjus...

Page 67: ...ically disable call waiting select Disable call waiting by dialing select the appropriate number sequence in the list or enter a new sequence Editing dialing patterns 1 Using the codes listed revise the dialing patterns as needed Notes 9 1If you need to use characters other than the ones listed here use manual dialing Hyphens and spaces in dialing strings are ignored 9 3Some modems may not respond...

Page 68: ... Display Properties Figure 8 9 2 Display Properties Desktop Change the desktop image of the background screen as follows 1 Select the desktop with a tap 2 Select an image to use for your background from the image list The image list shows you image files in a Windows folder If you want to use images from other folders click Search 3 To arrange the desktop image in a checked format choose a checker...

Page 69: ...lect keyboard and press Options The Soft Keyboard Options window appears 2 Select the size of the keys 3 To use gestures for Space Backspace Shift and Enter click the gestures check box 4 Click OK to save the changes 5 Select the handwriting recognition as the current input method and click Options The handwriting recognition features window appears 6 Set time needed to recognize handwriting 7 Cli...

Page 70: ...f the IE browser Figure 8 11 1 Internet Options Figure 8 11 2 Internet Options Figure 8 11 4 Internet Options Figure 8 11 4 Internet Options General Click the General tab 1 Define your own start page and search page on the tab 2 It also can set cache size 3 Click Clear Cache button it will clear data in cache 4 Click Clear History button it will clear browse history ...

Page 71: ...and port Security Under Security page specify the security option for your browser Privacy Under Privacy page specify the cookies setting include of privacy level 8 3 8 Keyboard Repeat Tab 1 To change the amount of time between taps before repetition starts adjust the Repeat delay slider 2 To change the repeat rate adjust the Repeat rate slider 3 Test your new setting 4 Tap OK to exit the Keyboard...

Page 72: ...ting 3 Tap OK to exit the Mouse tab Figure 8 13 Mouse Properties 8 3 10 Network and Dial up Connection You can directly link to the network via network Ethernet LAN or phone modern connection You can send or receive emails or access available files on the network server or search the Internet or Intranet Figure 8 14 Network connection ...

Page 73: ... in the user information tab To display the owner information on the start screen for system start click the Show User Information check box Notes Enter additional user information or other information in the Notes box To show notes on the initial screen when the system starts click Show User Information check box Network ID Windows CE 5 0 gains access to Network resources using the owner informat...

Page 74: ...s pen to input the password in the initial screen a keyboard appears After keying in the password press enter on the keyboard to go to the main screen You may encounter a request to enter the password again on the initial screen if you have turned off the PA 6230 s power after activating password or have done a software reset If you forget the password and cannot boot the system you may have to do...

Page 75: ...B PocketPDA link items that enable an Internet connection through the cradle Figure 8 17 PC Connection 1 Create a new connection in Go to Start Setting Network Choose the direct connection as connection format For detailed information refer to the Network and Dial up Connections section 2 Select Go to Start Setting Control Panel PC connection 3 Select Connection Change icon 4 Select the connection...

Page 76: ...s You can set up region numbers currency time and date 1 Select Go to Start Setting Control Panel 2 Open regional setting icon 3 Select the tab for information to change 4 Select the preferred option Available features are dependent on which region you have chosen in the region tab ...

Page 77: ...ct Go to Start Setting Control Panel 5 Open the Program removal icon 6 Select the program to delete from the program list 7 Click Delete Note You can only remove programs installed in RAM If you cannot delete a program see detailed information in Windows CE Help on the PA 6230 or in the program documents ...

Page 78: ... To format the partitions of the selected disk click Properties icon and choose Format icon 3 After clicking the Create New icon key in the new partition names The system automatically creates new partitions to set up 4 To dismount a partition select a partition to delete then click the Properties icon and press the dismount button 5 To see the features of the selected partitions click the Propert...

Page 79: ...tting Control Panel 2 Activate the stylus and select Double Touch Tap 3 Touch the icon twice The icon changes 4 If the icon does not change adjust the setting using the grid above Calibration If the PA 6230 screen does not respond properly adjust the screen with the calibration function To start calibration 1 Select Go to Start Setting Control Panel 2 Activate the stylus and select calibration tap...

Page 80: ...lect Go to Start Setting Control Panel 2 Run the system and select the memory tab 3 The blue part of the slider indicates the available memory capacity 4 Move the slider Left of the slider is storage memory while the right is program memory 5 As memory storage capacity increases you can save more data and files If you find a program is running too slowly move the slider to the left to secure more ...

Page 81: ...d Sound Adjust volume and select sound Volume To adjust the volume of the system 1 Select Go to Start Setting Control Panel 2 Open volume and sound icons and select the volume tab 3 Press the left right arrow icon or move the slide bar to adjust a volume 4 Click all items to activate the sound such as event warning system events application program reminder Alarm notice ...

Page 82: ...t an event from the event list 4 Select a sound from the event sound list 5 To remove the sound from the selected event choose None 6 To save the changes in another scheme select save in another name and name the sound scheme 7 To remove the sound scheme select the scheme and then Delete Figure 8 24 1 Volume Sounds Figure 8 24 2 Volume Sounds ...

Page 83: ...tions below If the suggested solutions below do not resolve the problem please contact your local supplier or Argox for technical support http www argox com If the PA 6230 mobile computer needs repair please ensure that the label with the serial number is present If sending the mobile computer or cradle back to your local supplier or Argox please use the original package to minimize the chances of...

Page 84: ...ke sure mobile computer is powered on 3 6 3 Adjust screen brightness Mobile computer either doesn t respond or responds inaccurately to touch screen input 3 7 4 Calibrate touch screen 3 6 1 Perform a warm boot WARNING Unsaved data will be lost 3 6 2 Perform a cold boot WARNING The mobile computer is reset to default settings and data will be lost Battery life is short Adjust Power Properties espec...

Page 85: ... conditions 1 this device may not cause harmful interference and 2 this device must accept any interference received including interference that may cause undesired operation RF exposure warning This equipment must be installed and operated in accordance with provided instructions and must not be co located or operating in conjunction with any other antenna or transmitter End users and installers ...

Reviews: