II
Table of Contents
1.
Getting Started
5
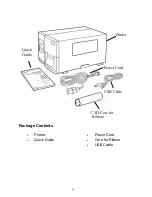
Unpacking
5
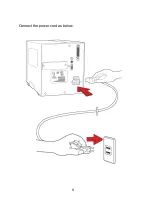
Connecting the Power Cord
8
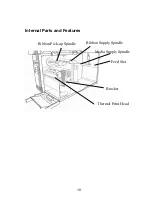
Internal Parts and Features
10
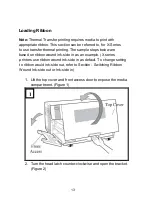
Loading Ribbon
13
Switching Ribbon Wound Ink-side in or Ink-side out
17
Loading Media
19
Standard Mode Loading Media
20
Peel Off Mode Loading Media
24
Cutter Mode Loading Media
28
Adjust Position of Label Sensor
31
2. Printer Operation
32
Front Panel
32
LED Indicators
33
Buttons
34
LCD Display
35
Setting Display Language
37
Changing Settings from the Panel
38
Media Calibration
46
Printing a Configuration Report
48
Resetting to Factory Default Settings
52
3. Computer Connections
54
USB Interface Requirements
54
Centronics Parallel Port
54
Serial (RS-232) Port
54
Ethernet 10/100 Internal Printer Server Option
56
Ethernet Module Status Indicators
56
Communicating with the Printer
58
Installing a Plug and Play printer driver (for USB only) 59
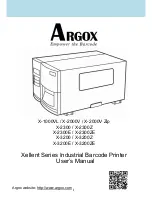
Summary of Contents for X-2300
Page 9: ...9 Connect the power cord as below ...
Page 11: ...11 Standard Mode Head Latch Paper Sensor Guide Paper Roller Thermal Print Head ...
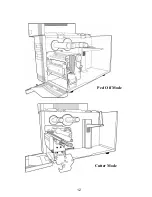
Page 12: ...12 Peel Off Mode Cutter Mode ...
Page 47: ...47 accuracy especially for small labels less than 1 5 high ...
Page 49: ...49 1 Firmware Version Information 2 Standard RAM Size ...
Page 64: ...64 The driver should now be installed ...
Page 82: ...82 Figure 1 ...
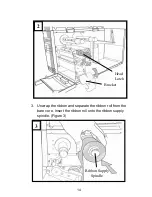
Page 83: ...83 Figure 2 Figure 3 ...
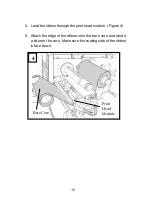
Page 85: ...85 Figure 1 Figure 2 ...
Page 106: ...106 ...

