E T V I S I O N M A N U A L
27
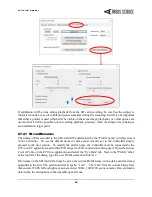
manual. Manual data event marks can be set from the System Control Table window, “Eye Data” tab.
Either click one of the “Quick Mark” buttons, use the up or down arrow to increment or decrement the
current value, or type in a value and press the <Enter> key.
Pupil and CR diameter values are expressed in “eye camera units” based on an eye camera coordinate
space of 320 horizontal by 240 vertical. Pupil diameter is the length of the major axis of the ellipse
that is fit to the pupil outline. (Note that a circular disk appears elliptical when viewed at an angle; but
the length of the major axis does not vary with the view angle). When the pupil or a CR is not
recognized, the diameter value is replaced by “loss”.
Check boxes at the top left of the window are used to select or de-select various display items, and
most of these have already been mentioned above. If a separate head-tracking device is
communicating with
ETVision
the head position and orientation data can be displayed at the bottom
left of the POG display, and the “Display HT” box determines whether or not the head tracking data
will be displayed. (Head tracking devices are usually used as part of the optional ET3Space function
and are discussed in a separate
ET3Space
manual). If the “Show Calibration Points” box is checked,
the position of calibration points (from the most recent calibration) are shown as “X” marks on the
plot. Other check boxes apply only to the optional
ET3Space
function and are explained in the
separate
ET3Space
manual.
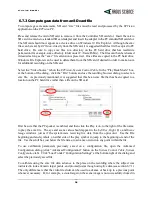
The “Adjust Gaze” buttons at the lower left of the window are used for a manual gaze data offset
feature that is explained in the next section.
If the manual offset function has not been enabled (see next section), the mouse can be used to left
drag the axes display origin to different positions on the display area. The mouse wheel can be used to
zoom in or out. Right dragging the mouse in the area restores default origin position and zoom.
6.6.5
Window Control
All
ETVision
windows can be moved by dragging the title bar, can be resized by dragging a corner, or
can be set to “full screen” by clicking the “maximize” symbol on the
Scene Image
window title bar.
Click the “restore” icon to return the window to normal size.
When the
Scene Image
window is maximized, the left and right eye windows are displayed at the
upper left and right corners. Left clicking anywhere on the maximized
Scene Image
window display
will cause it to cover the eye displays. Similarly, when an Eye window is maximized the selected Eye
window will show as full screen, with the other eye window in one top corner and the Scene image
window in the opposite bottom corner. Clicking anywhere within the full screen Eye window will
cause it to cover the alternate eye image and the scene image window displays.
Clicking the “X” at the upper right of any
ETVision
window title bar will individually close that
window. It can be re-opened by clicking the associated icon on the
ETVision
menu bar. Clicking the
“minimize” icon on one the windows will hide that window. In this case it can be restored by clicking
the “ETVision” icon on the Windows 10 task bar twice. The first click will hide the entire
ETVision
app and the second will restore all currently opened windows in the app.


