background image

10

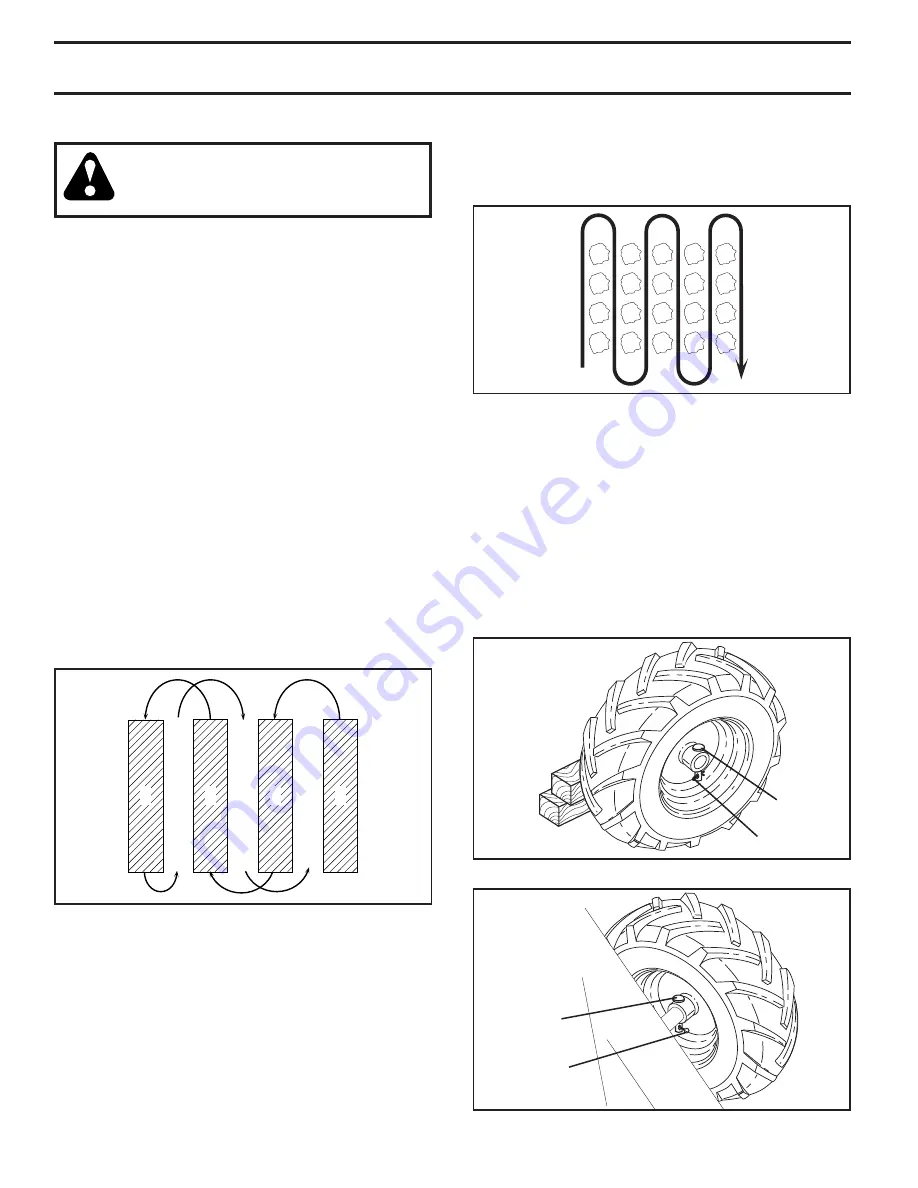
TILLING HINTS (See Fig. 14)

CAUTION:  Until you are accustomed to 

handling your tiller, start actual field use 

with throttle in slow position (mid-way 

between “FAST” and “IDLE”).

•  Tilling is digging into, turning over, and breaking up 

packed soil before planting. Loose, unpacked soil helps 

root growth. Best tilling depth is 4" to 6" (10-15 cm).  

A tiller will also clear the soil of unwanted vege ta tion. 

The de com po si tion of this vegetable mat ter enriches 

the soil.  Depending on the climate (rain fall and wind), 

it may be advisable to till the soil at the end of the 

growing season to further condition the soil.

•  You will find tilling much easier if you leave a row 

untilled between passes. Then go back between tilled 

rows. (See Fig. 14) There are two reasons for doing 

this. First, wide turns are much easier to negotiate than 

about-faces. Sec ond, the tiller won’t be pulling  itself, 

and you, toward the row next to it.

• 

Soil conditions are important for proper tilling. Tines will 

not readily penetrate dry, hard soil which may con trib ute 

to excessive bounce and difficult handling of your tiller. 

Hard soil should be mois tened before tilling; however, 

extremely wet soil will “ball-up” or clump during tilling. 

Wait until the soil is less wet in order to achieve the 

best results. When tilling in the fall, re move vines and 

long grass to prevent them from wrapping around the 

tine shaft and slowing your tilling operation.

• 

Do not lean on handle.  This takes weight off the wheels 

and reduces traction.  To get through a really tough 

section of sod or hard ground, apply upward pressure 

on handle or lower the depth stake. 

Fig. 14

Fig. 15

3

2

1

5

4

6

7

CULTIVATING

Cultivating is destroying the weeds between rows to pre-

 vent them from robbing nourishment and moisture from the 

plants. At the same time, breaking up the upper layer of 

soil crust will help retain moisture in the soil. Best digging 

depth is 1" to 3" (2.5-7.5 cm).  Lower the outer side shields 

to protect small plants from being buried.
•  Cultivate up and down the rows at a speed which will 

allow tines to uproot weeds and leave the ground in 

rough condition, promoting no further growth of weeds 

and grass (See Fig. 15).

ADJUST WHEELS FOR CULTIVATING  

(See Figs. 16 and 17)

• 

Place blocks under right hand side of tiller and remove 

hairpin clip and clevis pin from right hand wheel.

•  Move wheel outward approximately 1 inch until hole 

in inner wheel hub lines up with inner hole in axle.

•  Replace clevis pin and hairpin clip on inside of wheel 

and remove blocks.

•  Repeat preceding steps on left hand side.

NOTE

:  In extremely  rough conditions and while 

cultivating, the wheels should be moved outward on the 

axle for increased stability.

• 

Do not lean on handle, this takes weight off the wheels, 

reduces traction, and may cause the tiller to skip over 

the ground.

• 

Always lower the drag stake when using the for ward 

rotating tine drive.

Fig. 16

Fig. 17

INNER VIEW 

OF TIRE

CLEVIS PIN

HAIRPIN CLIP

OUTER VIEW 

OF TIRE

HAIRPIN CLIP

CLEVIS PIN

OPERATION

Summary of Contents for 21547000

Page 1: ...Owner s Manual 427490 Rev 1 03 18 09 Printed in USA REAR TINE TILLER Models 90102800 17 REAR TINE TILLER 3 21547000...

Page 2: ...o neutral before starting the engine motor Donotoperatetheequipmentwithoutwearingadequate outergarments Wearfootwearthatwillimprovefooting on slippery surfaces Handle fuel with care it is highly flamm...

Page 3: ...RESTERISUSED ITSHOULDBEMAINTAINED IN EFFECTIVE WORKING ORDER BY THE OPERATOR IN THE STATE OF CALIFORNIA A SPARK ARRESTER IS REQUIRED BY LAW SECTION 4442 OF THE CALIFORNIA PUBLIC RESOURCES CODE OTHER S...

Page 4: ...2 FRONT OPERATOR S POSITION LEFT RIGHT ASSEMBLY HANDLE ASSEMBLY SHIFT ROD UNPACKING CARTON See Fig 2 CAUTION Be careful of exposed staples when handling or disposing of cartoning material IMPORTANT WH...

Page 5: ...HOLD Grasp handle assembly Hold in up position Ensure handle lock remains in gearcase notch Slide handle assembly into position INSTALL HANDLE See Figs 3 4 and 5 Insert one handle lock with teeth faci...

Page 6: ...FETY REQUIREMENTS Our tillers conform to the safety standards of the American National Standards Institute CHOKE CONTROL Used when starting a cold engine DEPTH STAKE Controls depth at which tiller wil...

Page 7: ...D TO SHIFT GEARS Briefly engage tine control and release or rock tiller forward and backward until are able to shift gears The operation of any tiller can result in foreign objects thrown into the eye...

Page 8: ...ainst the handle CULTIVATING Use the forward rotating tine drive when cultivating tilling soft ground or tilling pre tilled soil Releasedepthanddragstakepins Lowerdragstake Pull thedepthstakeupforincr...

Page 9: ...VED CLEAN COVERED CONTAINERS USE CLEAN FILL FUNNELS CHECK ENGINE OIL LEVEL See Fig 12 The engine in your unit has been shipped from the fac tory already filled with SAE 30 summer weight oil With engin...

Page 10: ...eration Do not lean on handle This takes weight off the wheels and reduces traction To get through a really tough section of sod or hard ground apply upward pressure on handle or lower the depth stake...

Page 11: ...ACH USE Check engine oil level Check tine operation Check for loose fasteners LUBRICATION Keep unit well lubricated See LUBRICATION CHART LUBRICATION CHART cSAE 30 OR 10W 30 MOTOR OIL dREFER TO MAINTE...

Page 12: ...djustment to prevent accidental starting of engine Prevent fires Keep the engine free of grass leaves spilled oil or fuel Remove fuel from tank before tipping unit for maintenance Clean muffler area o...

Page 13: ...aged SPARK PLUG Replace spark plugs at the beginning of each tilling sea son or after every 50 hours of use whichever comes first Spark plug type and gap setting are shown in PRODUCT SPECIFICATIONS on...

Page 14: ...el Remove wheel and tire Repair tire and reassemble CLEVIS PIN HAIRPIN CLIP CAUTION Disconnect spark plug wire from spark plug and place wire where it cannot come into contact with plug SCREW AND WASH...

Page 15: ...continue tilling in the same tilling mode if tilling in a different mode is desired then the bolted tine and hub assembliesshouldbeswitchedbacktotheiroriginalside so that the tine edge with the least...

Page 16: ...be used for 30 days or more CAUTION Never store the tiller with gasoline in the tank inside a building where fumes may reach an open flame orspark Allowtheenginetocoolbefore storing in any enclosure...

Page 17: ...air screen 11 Dirty clogged muffler 11 Clean replace muffler 12 Carburetor out of adjustment 12 Make necessary adjustments 13 Poor compression 13 Contact an authorized service centerdepartment Engine...

Page 18: ...18 2 100 101 102 19 31 17 16 11 15 21 27 18 20 11 10 12 6 14 13 42 handle_assy_101 REAR TINE TILLER MODEL NUMBER 90102800 MFG ID NO 96096000100 HANDLE ASSEMBLY...

Page 19: ...680600 21546785 Nut Hex Crownlock 3 8 16 19 19131611 21546285 Washer 13 32 x 1 x 11 Ga 20 109228X 21546041 Lever Lock Handle 21 193129 21546306 Handle Assemble 27 73900400 21546788 Nut Hex Flange 1 4...

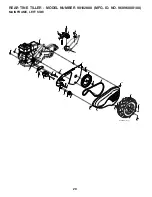
Page 20: ...20 MAINFRAME LEFT REAR TINE TILLER MODEL NUMBER 90102800 MFG ID NO 96096000100 MAINFRAME LEFT SIDE...

Page 21: ...im 795R 21546823 Tire Valve 24 126875X 21546078 Rivet Drilled 25 4497H 21546739 Retainer Spring 26 165501X422 21546168 Guard Belt 27 132801 21546085 Belt V 28 104679X 21546022 Pulley Idler 29 12000032...

Page 22: ...22 5 6 7 44 11 12 13 15 2 2 10 3 1 4 2 mainframe_right_Subaru_1 REAR TINE TILLER MODEL NUMBER 90102800 MFG ID NO 96096000100 MAINFRAME RIGHT SIDE...

Page 23: ...14 Counter Weight RH 10 74760524 21546807 Bolt Hex Head Gr 25 16 18 x 1 1 2 11 4497H 21546739 Retainer Spring 12 126875X 21546078 Rivet Drilled 13 102190X 21546015 Tire 183122X428 21546222 Rim 795R 21...

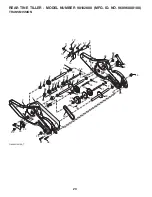
Page 24: ...21 19 18 55 56 55 54 3 2 29 31 7 6 5 4 11 10 30 28 18 32 33 34 18 48 60 24 44 18 42 43 41 49 40 39 37 38 37 50 36 20 25 27 35 25 24 44 51 58 53 52 53 transmission_7 REAR TINE TILLER MODEL NUMBER 90102...

Page 25: ...Shaft Ground Drive RH 32 106388X 21546035 Spacer 0 70 x 1 00 x 1 150 33 102121X 21546010 Sprocket and Gear Assembly 34 102112X 21546007 Shaft Reduction 2nd 35 102101X 21546006 Screw Whiz Lock 5 16 18...

Page 26: ...29 29 15 1 38 13 14 14 24 23 26 27 22 21 20 19 38 16 38 25 33 32 16 3 4 4 3 7 7 8 9 5 23 23 28 24 18 6 5 6 5 30 5 tine_shield_17_in_1 REAR TINE TILLER MODEL NUMBER 90102800 MFG ID NO 96096000100 TINE...

Page 27: ...20 x 1 1 4 Gr 5 19 102701X 21546021 Grip 20 73220600 21546776 Nut Hex 3 8 16 21 102156X 21546013 Stake Depth 22 74930632 21546819 Bolt Hex 3 8 16 x 2 23 4440J 21546738 Hinge 24 72140404 21546769 Bolt...

Page 28: ...28 REAR TINE TILLER MODEL NUMBER 90102800 MFG ID NO 96096000100 TINE ASSEMBLY...

Page 29: ...8 24 7 10040600 21546003 Washer Lock 3 8 8 74610616 21546802 Bolt Hex 3 8 24 x 1 16 163499 21546164 Tine Spade 17 163500 21546165 Tine Cleaning REAR TINE TILLER MODEL NUMBER 90102800 MFG ID NO 9609600...

Page 30: ...30 16 7 8 18 9 6 3 2 10 15 4 17 REAR TINE TILLER MODEL NUMBER 90102800 MFG ID NO 96096000100 DECALS...

Page 31: ...6209 Decal Warning DRT 10 401383 21546572 Decal Tine Shield DRT REV 15 423830 21546720 Decal Ethonal 16 424120 21546728 Decal Warning Spark Arrester 17 423703 21546715 Decal Top Dual 18 423704 2154671...

Page 32: ...UDWLRQ RI WKHVH ZDUUDQWLHV VKDOO EH GD V DIWHU WKH GDWH RI SXUFKDVH I DQ SURGXFW LV UHQWHG RU OHDVHG WKHQ WKH GXUDWLRQ RI WKHVH ZDUUDQWLHV VKDOO EH GD V DIWHU WKH GDWH RI SXUFKDVH Exceptions Limitatio...

Page 33: ...OO EH FRQVWUXHG DV REOLJDWLQJ ULHQV WR LQFRUSRUDWH VXFK GHVLJQ FKDQJHV LQWR SUHYLRXVO PDQXIDFWXUHG SURGXFWV QRU VKDOO VXFK FKDQJHV EH FRQVWUXHG DV DQ DGPLVVLRQ WKDW SUHYLRXV GHVLJQV ZHUH GHIHFWLYH LIM...

Page 34: ...with all mechanical products some adjustments or part replacement may be necessary during the life of your unit For parts and service contact your local Ariens dealer To find a dealer in your area cal...

Reviews: