EN – 68
2.
Remove pump from tank.
3.
Reconnect pump wires.
4.
Turn the ignition key to the ON position and listen for a
“humming” noise.
If fuel pump is silent, replace fuel pump.
If voltage is within range and fuel pump is operating
normally, the fuel pressure sensor is defective. Replace the
throttle body assembly. See Figure 166.
Code 28: High Battery Voltage
This trouble code will activate if ECU detects a higher
voltage from the stator.
1.
Start the engine. Refer to Operator’s Manual.
2.
Set a multi-meter to V AC and probe the red and black
stator connector wire. The output should be
11.5 V AC – 14 V AC at full throttle (3600 RPM).
If stator output measures over 14 V AC, replace stator. If
output is within range, advance to step 3. See Figure 155.
IMPORTANT:
If the engine is cold, it is normal for the
engine speed to be 100 RPM – 200 RPM higher until
operating temperature is reached.
3.
Set a multi-meter to V DC and probe the battery
connector at the battery terminals. With the engine
running at full throttle (3600 RPM), the output should
be 7.2 V DC – 8.4 V DC.
If DC output is higher than 8.4 V DC, replace ECU. See
Figure 154.
If DC output is within range and red trouble code persists,
replace ECU.
DIAGNOSTICS FOR NON-TROUBLE
CODES
IMPORTANT:
The following conditions and diagnostic
procedures apply to EFI components only.
Engine Starts and Loses Power
If the engine starts and loses power immediately, this is
usually an indication that the ECU does not detect an RPM
signal. The RPM signal is generated by the stator, which
also powers the hand warmers, headlight and charges the
ECU battery.
Common causes for RPM signal failure may be due to a
disconnected engine wire harness or a ground short in the
AC output wire from the stator to the ECU. Other possible
causes may include an ECU or engine-charging system
failure.
1.
Check wire harness connection to the ECU.
a. With the ignition key in the off position, check the
wire harness connections to the ECU. If
connections are secure, disconnect the 12-pin
and 14-pin connections to the ECU and inspect
connectors for bad connections or burn marks.
b. Check that all wire terminals are snug in their
connectors. If connections appear to be good,
reconnect wire harness and start engine to check
if issue is still present. If bad connection is
present, replace wire harness.
c. If issue is still present, advance to next step.
2.
Check the ECU.
a. Disconnect wire harness from ECU and test with a
new ECU to verify the original ECU is not cause
for malfunction. If malfunction is not resolved with
a new ECU, reconnect wire harness to original
ECU and continue diagnostics.
3.
Back probe the engine stator output connector. See
Figure 155.
a. Start the engine. Refer to Operator’s Manual.
b. At full throttle (3600 RPM), the stator output
MUST be 11.5 V AC – 14 V AC.
If AC voltage measures less than 11.5 V AC, remove
flywheel and replace stator.
Engine No-Start Condition
If the engine does not start, check for system power.
1.
Check EFI battery fuse.
2.
Check spark plug.
a. Stop engine, remove key and wait for all moving
parts to stop and for hot parts to cool.
b. Disconnect the spark plug wire and remove debris
from the spark plug area.
c. Remove spark plug.
d. Inspect the spark plug. Spark plug gap MUST be
0.7 mm – 0.8 mm (0.027" – 0.030"). Replace if the
electrodes are worn, fouled, or if the insulator is
cracked or chipped.
e. Position spark plug against engine block and pull
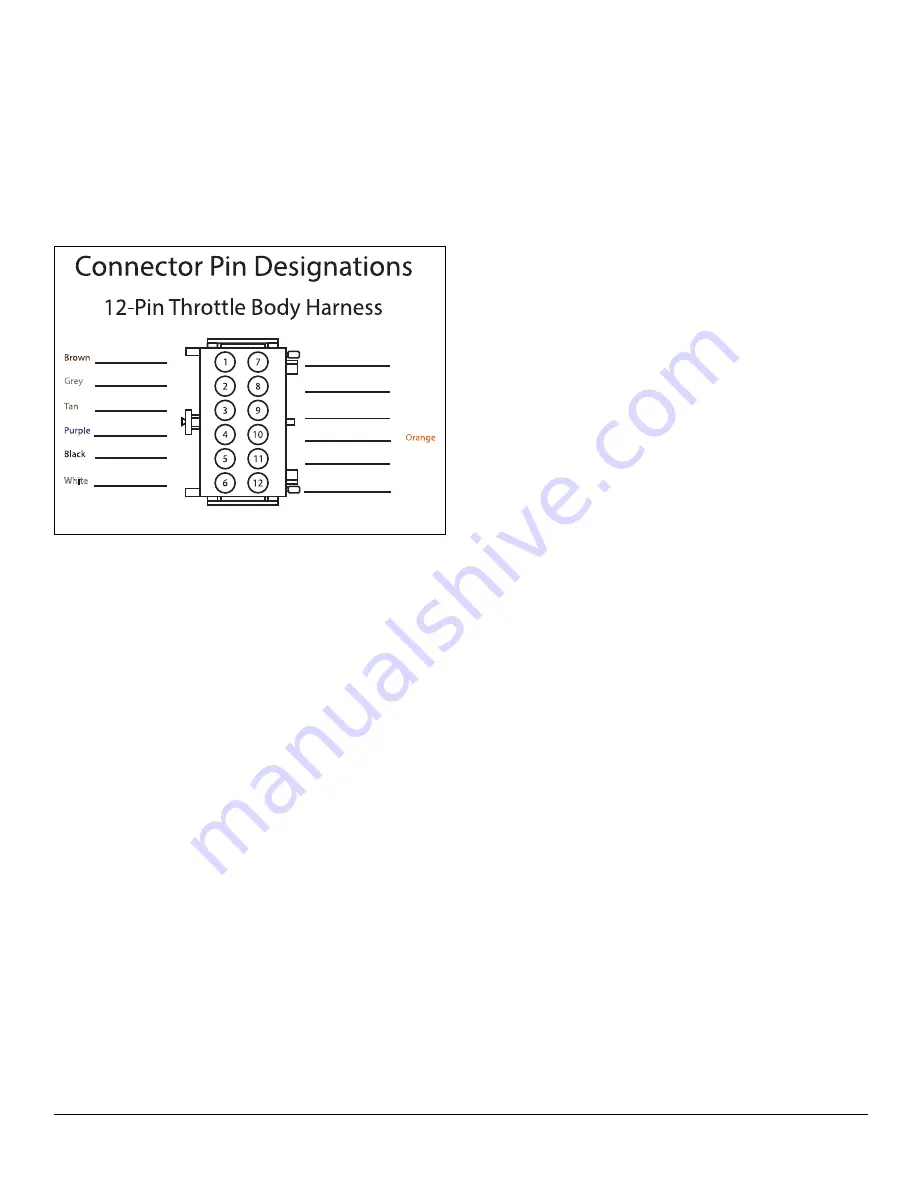
Engine Temperature
Potentiometer
Servo -
Servo +
B-
Injector-
Ext-ANA- (Potentiometer)
Fuel Pressure Input
Servo-Signal
Ext-ANA+ (Potentiometer)
ECU+
Pink
Blue
Yellow
Yellow
Pump-
Green
Red
Figure 161


