17
CLEAN AIR SCREEN
Air screen must be kept free of dirt and chaff to prevent
engine dam age from overheating. Clean with a wire brush
or com pressed air to re move dirt and stubborn dried gum
fibers.
MAINTENANCE
MUFFLER
Inspect and replace corroded muffler and spark arrester (if
equipped) as it could create a fire hazard and/or damage.
SPARK PLUGS
Replace spark plugs at the beginning of each mowing
season or after every 100 hours of use, whichever comes
first. Spark plug type and gap setting is shown in Product
Specifications section of this manual.
ENGINE COOLING SYSTEM
To ensure proper cooling, ensure the grass screen, cooling
fins, and other external surfaces of the engine are kept
clean at all times.
Every 100 hours of operation (more often under extremely
dusty, dirty conditions), remove the blower housing and other
cooling shrouds. Clean the cooling fins and external surfaces
as necessary. Ensure the cooling shrouds are reinstalled.
NOTE: Operating the engine with a blocked grass screen,
dirty or plugged cooling fins, and/or cooling shrouds re moved
will cause engine damage due to overheating.
02723
02724
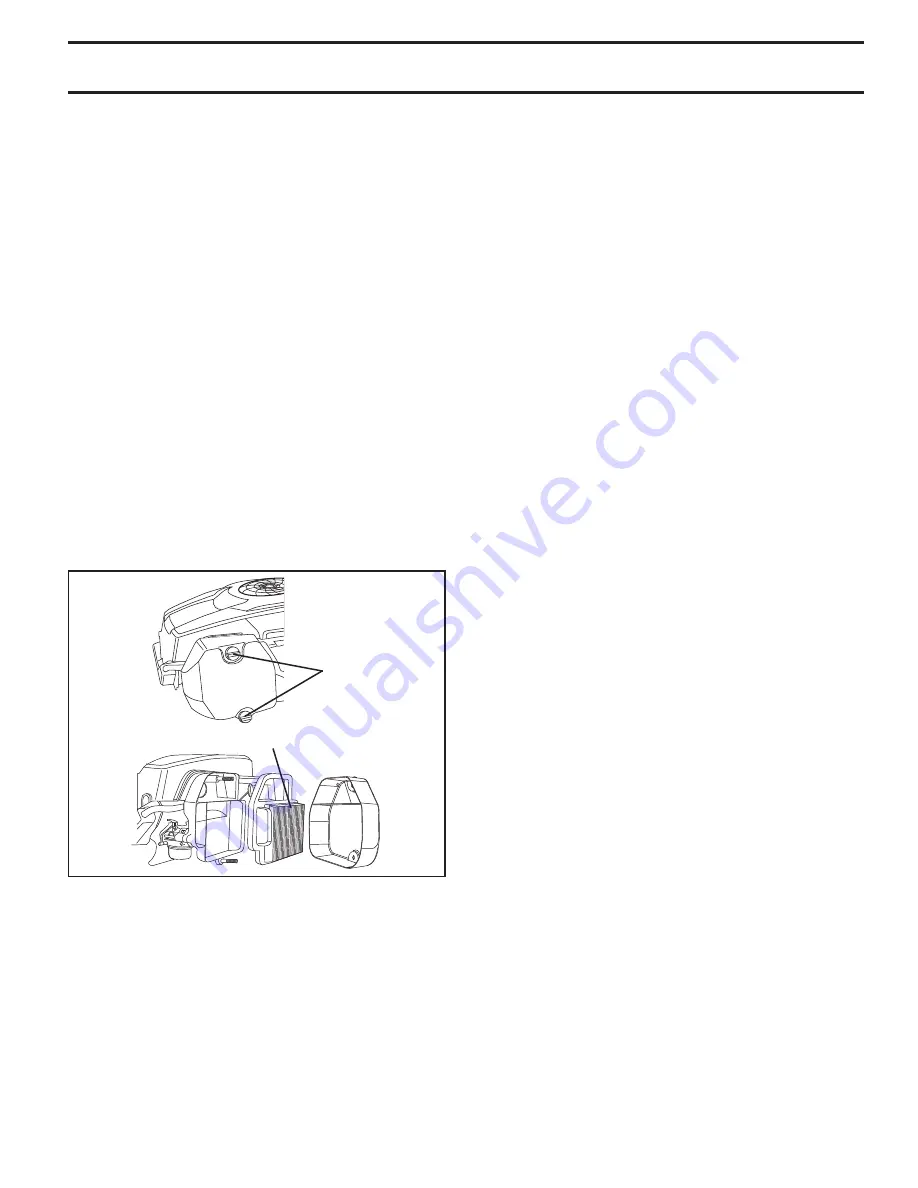
KNOB
CARTRIDGE
AIR FILTER (See Fig. 17)
Your en gine will not run prop er ly us ing a dirty air fil ter.
Service paper cartridge every two months or every 25 hours
of op er a tion, whichever occurs first.
Service paper cartridge more often under dusty conditions.
Replace the paper cartridge annually, or after every 100
hours of operation.
TO SERVICE CARTRIDGE
•
Replace a dirty, bent, or damaged cartridge. Handle
new cartridge carefully; do not use if the rubber seal
is damaged.
NOTE: Do not wash the paper cartridge or use pressurized
air, as this will dam age the cartridge.
•
Loosen knobs and remove cover.
• Remove
cartridge.
•
Gently tap pleated side of cartridge to dislodge dirt.
•
Clean all air cleaner components of any accumulated
dirt or foreign material. Prevent any dirt from entering
the throat of carburetor.
•
Install cleaned or new cartridge with the pleated side
“out” and seat the rubber seal onto the edges of the
air cleaner base.
•
Reinstall air cleaner cover and se cure by tightening
knobs.
Fig. 17
Summary of Contents for 936051
Page 1: ......


