background image

Summary of Contents for 991800

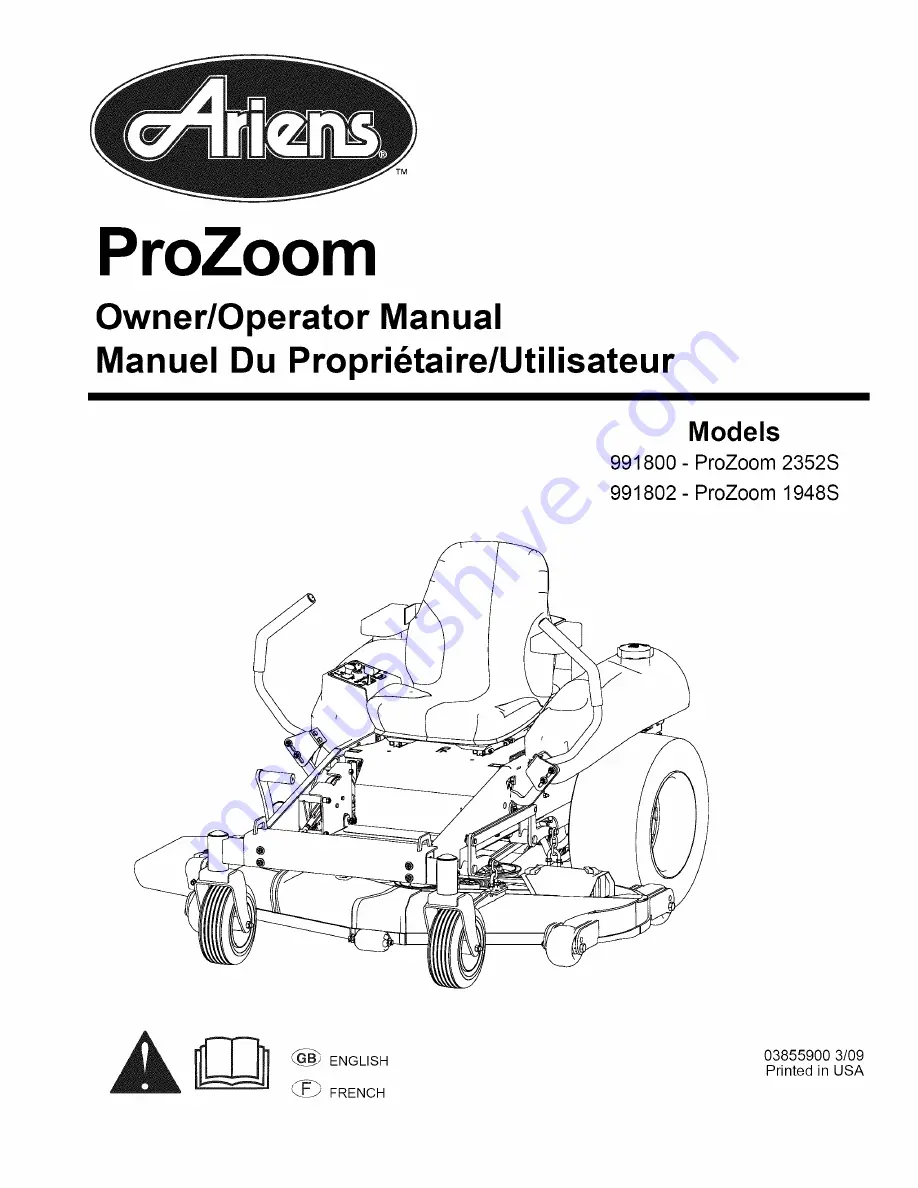
Page 1: ...TM ProZoom Owner Operator Manual Manuel Du Propri_taire Utilisateur Models 991800 ProZoom 2352S 991802 ProZoom 1948S ENGLISH FRENCH 03855900 3 09 Printed in USA ...

Page 2: ...s diff6rentes de I anglais sont 6galement disponibles en t616chargement gratuit sur notre site Web http www ariens com THE MANUAL Before operation of unit carefully and completely read your manuals The contents will provide you with an understanding of safety instructions and controls during normal operation and maintenance All reference to left right front or rear are given from operator sitting ...

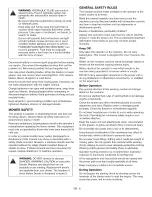
Page 3: ...ns 5 Explain Limited Warranty Policy Explain recommended lubrication and maintenance Advise customer on adjustments Instruct customer on controls and operation of unit Discuss and emphasize the Safety Precautions Give customer Owner Operator Parts and Engine Manuals Advise customer to thoroughly read and understand them OL1253 OL3900 WARNING This cutting machine is capable of amputating hands and ...

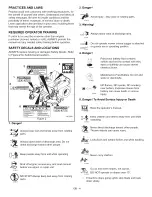
Page 4: ...rating Shut off engine remove key and read manual before you adjust or repair unit NO STEP Always keep feet away from rotating parts 2 Danger Avoid injury Stay clear of rotating parts OL1816 3 Warning OL1814 Always stand clear of discharge area Do not operate mower unless bagger is attached or guards are in operating position 0L1815 4 Danger _1_ OL4450 Poisonous battery fluid contains sulfuric aci...

Page 5: ...gaged before starting the engine Only start engine from the operator s position Slow down and use extra care on hillsides Be sure to travel in the recommended direction on hillsides Turf conditions can affect the machine s stability Use caution while operating near drop offs Slow down and use caution when making turns and when changing directions on slopes Never raise deck with the blades running ...

Page 6: ...ENERAL SAFETY RULES This manual must be made available to the operator of the Ariens mower at all times Read this manual carefully and learn how to use the machine correctly Become familiar with all machine controls and how to stop the machine and the implements or attachments quickly Beware of bystanders particularly children Always look around to make sure that it is safe to start the engine or ...

Page 7: ...d ordirection Iftireslosetraction whileonaslope disengage themower blades andbackslowly andgradually down theslope Donotturnonslopes unless necessary andthenturnslowly andgradually downhill ifpossible Useextracaution whenmowing onslopes Ifyouareunable tobackupontheslope orifyoudonotfeelcomfortable on it thendonotmowit Donotoperate themachine onslopes thatexceed 15 Mowacross slopes notupanddown toa...

Page 8: ...nder pressure can cause serious injury Escaping hydraulic fluid under pressure can have sufficient force to penetrate the skin causing serious injury Before applying pressure to the system make sure all connections are tightened and lines pipes and hoses are not damaged Fluid escaping from pinholes may be invisible Do not use your hands to search for suspected leaks Instead use a piece of cardboar...

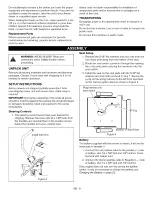
Page 9: ... is required IMPORTANT During the unpacking of the crate all goods should be matched against the packing list and all shortages or damages should be noted and reported to the carrier immediately Steering Controls 1 The steering control levers have been lowered for shipping Remove the loose 3 8 16 x 1 50 bolts from the handles and reinstall them in the location shown Adjust the handles to fit your ...

Page 10: ... hose long enough to allow you to stand to one side Hardware Check for loose hardware Check Safety Interlock System Check to see that the interlock system operates correctly See Check Safety Interlock System on page 10 Lubrication Lubricate all fittings per maintenance label under seat and check hydraulic oil level See Lubrication and Maintenance on page 19 Hydraulic Oil Service The power unit is ...

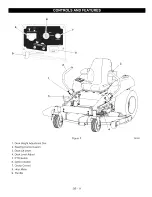
Page 11: ...5 2 1 Deck Height Adjustment Dial 2 Steering Control Levers 3 Deck Lift Lever 4 Deck Level Adjust 5 PTO Switch 6 Ignition Switch 7 Choke Control 8 Hour Meter 9 Throttle Figure 5 OE3241 GB 11 ...

Page 12: ... should stop within 3 seconds Run engine at 1 3 throttle engage the mower PTO move a steering control lever out of the neutral lock and lift off of the seat The engine should again stop within 3 seconds Repeat for the opposite steering control lever NOTE If the machine does not pass this test DO NOT OPERATE Take it to your Ariens Dealer 3 Move the steering lever rearward and release the steering l...

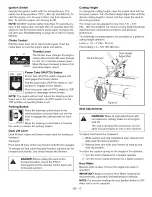
Page 13: ...rt Transport Push deck lift lever all the way forward until lift lock engages To release the lock push the pedal forward pull back on the transport lock handle and slowly release the lift lever DANGER Before raising the deck to the transport position insure the PTO is disengaged and the steering control levers are in the park position Cutting Height To change the cutting height raise the mower dec...

Page 14: ...p over the deck when mounting or dismounting PRE START INSPECTION CAUTION Make sure all hardware is tight all safety devices are in place and all adjustments are made correctly Safe operation is the responsibility of the operator The operator MUST be familiar with the mower and power unit controls how they work and all safety precautions BEFORE starting operation IMPORTANT Inspect the mowing blade...

Page 15: ...riate to your mowing conditions Anti Scalp Wheels 1 Raise the mower by pushing down on the deck lift lever and lock into transport position 2 Place the steering control levers in the park position 3 Set the anti scalp adjustment to desired height of cut 4 To adjust the anti scalp rollers remove the 5 8 11 x 4 25 bolts and reinstall the bolts in the appropriate hole for the desired height of cut se...

Page 16: ... too short To keep a healthy green lawn do not cut more than 1 3 of the overall grass blade height Mower engine speed while mowing should be at the maximum rated RPM This will ensure proper blade speed for effective cutting and discharge of grass clippings Travel speed greatly affects mowing performance Always use a lower ground speed for slower mowing rather than lowering the engine RPM Mow often...

Page 17: ... be parked as level as possible to facilitate smooth loading of the mower WARNING When transporting the mower make sure the steering control levers are in the park position the wheels have been blocked the machine has been securely fastened by cables chains or ropes and the trailer has been secured to the towing vehicle with safety chains Use a heavy duty trailer or truck to transport the mower Ma...

Page 18: ...with automotive type wax Check Tire Pressure See SPECIFICATIONS on page 34 for correct tire pressure and Conditions Wheel Bolt Torque Check regularly and tighten when necessary Steering Free Play Check regularly and repair when necessary Grass Build Up Remove after each use Inspect Mower Blades Check mower blades for wear Sharpen or replace as needed see Blade Maintenance on page 27 Follow Engine ...

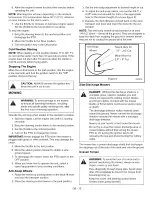
Page 19: ... the upper and lower limit on the dipstick 5 Add oil as necessary to achieve required level DO NOT overfill 6 Reinstall and tighten the dipstick 7 Clean any spilled oil IMPORTANT Use only the oil specified for use in the engine manual Engine Dipstick Figure 12 OM5035 Oil Filter Change Change the engine oil filter initially after the first 8 hours of use Change the engine oil filter every 100 hours...

Page 20: ...n before applying pressure to system FOREIGN FLUID INJECTED INTO BODY can result in gangrene Fluid must be surgically removed within a few hours by a doctor familiar with this form of injury CAUTION Be sure the engine has been stopped the steering control levers are in the park position and the key has been removed before changing or checking the hydraulic oil in the mower Allow the hydraulic flui...

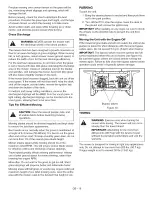
Page 21: ... pumps cool and try purging again from Step 1 10 Shut off the engine lower the unit back to the floor and check and add hydraulic oil as necessary Checking The Hydraulic Hoses Inspect the hydraulic hoses every 250 hours to ensure they are in good working order Check both the hoses and hose clamps to ensure there is no wear or damage If either is found worn or damaged repair or replace them at once...

Page 22: ...ng the Battery on page 21 2 Place battery on bench or other well ventilated place 3 Connect positive lead of charger to positive terminal and negative lead to negative terminal 4 Charge battery according to charger and battery manufacturer s instructions 5 Replace battery See Installing the Battery on page 22 Jump Starting Ariens does not recommend jump starting your unit Jump starting can damage ...

Page 23: ...hardware to hold the adjustment See Figure 17 NOTE The steering control levers need to be even in both neutral or park NEUTRAL ADJUSTMENT 2 3 See Figure 16 Before making any adjustments be sure to check the tire air pressure Incorrect air pressure can cause the unit to pull to one side The correct air pressure is 20 p s i in the front wheels and 12 p s i in the rear Stop the engine and remove the ...

Page 24: ...0 below Figure 19 0E3305 CAUTION Stop the engine put the steering control levers in the park position and remove the key from the ignition before performing any maintenance or repairs on this unit NOTE Make sure the deck is level before synchronizing the height of cut dial with the deck blade height 1 Raise the mower deck to the transport position Take the weight off of the deck lift linkage 1 by ...

Page 25: ...artridge 5 assembly every 25 hours Replace the paper element yearly or every 250 hours whichever comes first The outer cartridge is cleaned by rolling and tapping it on a hard surface If the paper pleats are punctured or torn the element must be replaced Replace the inner cartridge 6 yearly or every 250 hours whichever comes first IMPORTANT DO NOT attempt to clean the secondary element This filter...

Page 26: ...de Insulator 2 Side Electrode 3 Air Gap Not to Scale Figure 24 5 Install and tighten the spark plug to 22 N m 16 ft Ibs Reconnect the spark plug wire lead See the engine operator s manual for the recommended spark plug WARNING Hot engine components can cause severe burns Stop engine and allow it to cool before checking the spark plug Clean or replace the spark plug and reset the gap every 100 hour...

Page 27: ...ue Under Inflated Normal Over Inflated Figure 25 CAUTION Never try to straighten a blade which has been bent or try to weld a blade that is cracked Always replace with a new blade to ensure safety To sharpen the blades remove the blades by inserting a block of wood and turning the blade bolt counter clockwise see figure 26 Stop Block Figure 26 OE3356 CAUTION Always wear safety eye protection when ...

Page 28: ...e high pressure washers or sprayers BELTS Inspect the belt pulley grooves and flanges for wear A new belt or one in good condition should not contact the bottom of the pulley groove Replace the belt when the belt touches the bottom of the groove otherwise the belt will slip excessively Always use caution when changing a belt Never pry a belt on to a pulley Always keep oil and grease away from the ...

Page 29: ...care when releasing belt tension as the pressure on the arm may cause injury or damage to the unit 4 Release the tension from the pump belt by using a 3 8 breaker bar in the square hole in the tension arm Pull back on the tension arm and pull the belt back behind the engine pulley 5 Slide the belt off the pump pulley Slide the belt above the pulley to allow the belts to be removed from the other p...

Page 30: ...ine with fuel in the fuel tank inside of a building with potential sources of ignition TO TAKE THE UNIT OUT OF STORAGE 1 Refer to the engine service manual to prepare the engine for service 2 Put fresh clean fuel in the fuel tank 3 Begin the maintenance schedule 4 Charge the battery PROBLEM Excessive Vibration Uneven Cutting Height Blades Wear Too Fast PROBABLE CAUSE 1 2 CORRECTION Loose spindle b...

Page 31: ...roken 1 Replace deck belt Deck belt off pulley 2 Reinstall deck belt Clutch failed 3 Contact dealer Engine RPM too low 1 Use full throttle position Ground speed too fast 2 Reduce ground speed Excessive grass buildup under deck 3 Clean underside of deck Excessive grass buildup under deck 1 Clean underside of deck Carburetor incorrectly adjusted 1 Contact Dealer Improper spark plug gap 2 Check and r...

Page 32: ...at switch 4 5 Bad parking brake switch 5 1 Steering control levers need adjustment 1 2 Hydraulic pump failure 2 3 Wheel motor failure 3 4 Bypass valve open 4 1 Steering control levers need adjustment 1 1 Steering control levers need adjustment 1 2 Hydraulic pump failure 2 3 Wheel motor failure 3 4 Tires improperly inflated 4 1 Engine mounting bolts loose 1 2 Loose engine pulley 2 3 Engine pulley d...

Page 33: ... Number 00181071 1 00181072 1 00191199 00180273 00181296 00180231 00181073 00181060 00181251 1 1 1 1 1 1 1 Description Air Filter Primary Air Filter Secondary 23hp Kawasaki Belt Hydraulic Pump Drive Choke Cable Throttle Cable Dampener Steering Control Engine Oil Filter Fuel Filter Fuel Tank Cap 00180909 AA191600 00105684 00191621 03551000 00180620 00191256 00136574 00181074 03785659 AA191200 1 1 1...

Page 34: ...Fuel Type Unleaded Min 87 Octane Fuel Tank Capacity Gal L 11 8 44 8 Transmission Type Hydraulic Drive Transmission Oil Use 20W 50 engine oil with an SL API classification Hydraulic Oil Filter Yes Size and Weight Length in cm 72 7 184 7 Width With Chute Up in cm 53 6 136 1 48 5 123 2 Height in cm 47 119 3 Weight lb kg 963 436 8 955 433 2 Tires Front Tire Size in cm 11 x 4 5 6 Caster Rear Tire Size ...

Page 35: ...Three Year Limited Warranty on Deck Spindles Mower deck spindles are warranted to the original purchaser for three years from the date of purchase Any defect in material or workmanship of the mower deck spindles will be repaired free of charge parts and labor to the original pur chaser for two years after the date of purchase After two years the parts required to repair a defect in material or wor...

Page 36: ...This warranty applies only to products purchased in the United States including Puerto Rico and Canada In all other countries contact place of purchase for warranty information Disclaimer Ariens may from time to time change the design of its products Nothing contained in this warranty shall be construed as obligating Ariens to incorporate such design changes into previously manufactured products n...

Page 37: ... Street Brittion WI 54110 1072 920 756 2141 Fax 920 756 2407 www ariens com WARNING The engine exhaust from this product contains chemicals known to the State of California to cause cancer birth defects or other reproductive harm ...

Page 38: ...TM ProZoom Manual del Propietario Operador Models 991800 ProZoom 2352S 991802 ProZoom 1948S _ ESPANOL 03855902 3 09 Printed in USA ...

Page 39: ...NUAL Antes de hacer funcionar la unidad lea con atenci6n yen su totalidad los manuales El contenido de los manuales le ayudar8 a entender las instrucciones y los controles durante el funcionamiento normal y el mantenimiento Las referencias a los lados izquierdo derecho delantero y trasero se dan desde el asiento del operador en la posici6n de funcionamiento y orientado en la direcci6n de desplazam...

Page 40: ...t_ activada On V6ase Sistema de interbloqueo de seguridad en la p_gina 13 3 Rellenar la Tarjeta de registro del comprador original y enviela de vuelta a Ariens 4 Explicar la p61iza de la garantia limitada 5 Explique los procedimientos de lubricaci6n y mantenimiento recomendados Asesore al cliente sobre los ajustes Mu6strele los controles y el funcionamiento de la unidad Comente y enfatice las prec...

Page 41: ...eguridad dafiadas o que se hayan perdido Consulte Figura 2 para los emplazamientos de las calcomanias de seguridad 5 OL3200 1 iPeligro 4 OL1809 Mantener siempre los pies y las manos alejados de las piezas giratorias Mant6ngase siempre alejado del 8rea de descarga No dirija la descarga hacia otras personas D _1 tt antener a terceros alejados de la unidad durante el funcionamiento de la misma OL18t2...

Page 42: ...en engancharse en las piezas m6viles Examine la zona en la que va a utilizar el equipo y retire todos los elementos presentes que puedan ser arrojados por la m_quina como piedras juguetes y cables Tenga especial precauci6n al manejar gasolina y otros combustibles Son inflamables y los vapores son explosivos a Utilice solo un recipiente homologado b Nunca retire la tapa del dep6sito de combustible ...

Page 43: ... la bateria o quite el cable de la bujia de encendido antes de realizar alguna reparaci6n Desconecte el borne negativo en primer lugar seguido del positivo AI volver a conectarlos empiece por el borne positivo y luego el negativo Revise las cuchillas con cuidado Envu61valas o Ileve guantes y repSrelas con precauci6n Sustituya las cuchillas no las enderece ni las suelde nunca Mantenga las manos y l...

Page 44: ...con luz artificial la zona donde se va a cortar No quite nunca el protector de descarga porque 6ste dirige el material cortado hacia el suelo Si el protector est_ da_ado c_mbielo inmediatamente No intente nunca eliminar los residuos de la zona de descarga o de las cuchillas del cortac6sped a menos que las palancas de control de la direcci6n est6n en posici6n de estacionamiento el interruptor de la...

Page 45: ...yen el varillaje de control del movimiento mant6ngase en uno de los lados del tractor y del cortac6sped bien alejado de los componentes en movimiento Deje que se enfrie el cortac6sped Ariens antes de tocar el motor el silenciador u otras piezas que puedan estar calientes Pare siempre la unidad de alimentaci6n desconecte la TDF y deje que se enfrie la unidad antes de repostar Mantenga el motor limp...

Page 46: ... bateria Tenga cuidado cuando retire los cables de la bateria de los bornes para evitar la aparici6n de chispas Desconecte el cable de tierra de la bateria antes de trabajar en piezas el6ctricas o cerca de elias Mantenimiento de los neum ticos PRECAUCION La separaci6n de un neum_tico y la Ilanta pueden provocar una explosi6n con resultados de accidentes graves o incluso la muerte Compruebe los neu...

Page 47: ...siento 2 Pase el conector del interruptor del asiento por la abertura de la placa del asiento y enchOfelo al interruptor 3 Monte el asiento en la placa con las arandelas planas de 5 16 y las contratuercas desmontadas en paso 1 Asegure el clip p en los cables al vSstago del asiento frontal izquierdo de manera que se guien los cables como se observa en Figura 4 Conecte el arn6s en el interru p_r ___...

Page 48: ... funciona correctamente Consulte Compruebe el sistema de interbloqueo de seguridad en la pSgina 11 Lubricacibn Lubrique todos los puntos de engrase segOn se indica en la etiqueta de mantenimiento que se encuentra debajo del asiento y revise el nivel de aceite hidr_ulico Consulte Mantenimiento General en la pSgina 21 Servicio del aceite hidr ulico La unidad de alimentaci6n se entrega con aceite hid...

Page 49: ...lataforma 2 Palancas decontrol deladirecci6n 3 Palanca deelevaci6n delaplataforma 4 Ajustedelniveldelaplataforma 5 Interruptor delaTDF 6 Interruptor deencendido 7 Control delestrangulador 8 Hor6metro 9 Regulador Figura 5 OE3241 E 12 ...

Page 50: ... de apagado del motor 1 Haga funcionar el motor a 1 3 de regulaci6n accione la TDF del cortac6sped y lev_ntese del asiento El motor se debe parar en un tiempo de 3 segundos 2 Haga funcionar el motor a 1 3 de regulaci6n accione la TDF del cortac6sped saque la palanca de control de la direcci6n del bloqueo en punto muerto y levSntese del asiento El motor debe pararse de nuevo en 3 segundos Repita pa...

Page 51: ...a direcci6n est6n en la posici6n de punto muerto y el interruptor de la TDF est6 en la posici6n Off y est6 accionado el freno de estacionamiento OE3255 Frenos de estacionamiento Coloque las palancas de control de la direcci6n en la posici6n de punto muerto y col6quelas en las ranuras para activar el freno de estacionamiento para cada lado Mueva las palancas de control de la direcci6n hacia el cent...

Page 52: ...egQn necesidades y repare cualquier fuga que pueda aparecer Observe si se ha aflojado alguna tuerca perno o tornillo y apri6telos segQn necesidades Observe esta posibilidad principalmente en las tuercas de retenci6n de las ruedas Durante el periodo de rodaje revise los ajustes del brazo de control y del freno de estacionamiento Puede que haya que ajustar el freno de estacionamiento despu6s de las ...

Page 53: ...al menos diez minutos para que se caliente la unidad 7 Aumente o disminuya la velocidad del motor con el acelerador Ajuste el acelerador a la posici6n r_pida para cortar hierba Para detener el motor 1 Coloque las palancas de direcci6n en la posici6n de punto muerto y desactive la TDF 2 Mueva la palanca del acelerador a la posici6n lenta 3 Gire la Ilave de contacto a la posici6n apagado Arranque en...

Page 54: ... de la direcci6n de la unidad de alimentaci6n marcha adelante Prepare previamente el corte de c6sped en un terreno irregular y espere a que est6 bien seco para evitar que las ruedas resbalen y giren en vacio Io que da_aria el terreno Antes de cortar revise la zona para determinar la mejor operaci6n Tenga en cuenta el tipo de c6sped y su altura y el tipo de terreno irregular donde se va a realizar ...

Page 55: ...sviaci6n est6n cerradas antes de trabajar de nuevo con la m_quina Si no se cierran a fondo las vSIvulas de desviaci6n antes de la operaci6n puede da_arse el sistema hidrSulico V_lvulas de desviaci6n Figura 10 REMOLQUE iADVERTENCIA Tenga cuidado cuando gire el cortac6sped durante el remolque El cortac6sped girar_ m_s abruptamente que el objeto remolcado IMPORTANTE Si se intenta remolcar m_s de 90 7...

Page 56: ...E LAS LESIONES Antes de proceder lea y comprenda toda la secci6n de Seguridad Los distribuidores de Ariens le ofrecerAn cualquier servicio de reparaci6n piezas o ajustes que su unidad necesite para seguir funcionando con la m_xima eficiencia En el caso de necesitar una reparaci6n en el motor pngase en contacto con un distribuidor de Ariens o con un centro de mantenimiento de un fabricante de motor...

Page 57: ...presi6n Consulte ESPECIFICACIONES en la pagina 37 para obtener la presi6n correcta de los neumaticos y el estado de los neumaticos Par de apriete de los Revisar regularmente y apretar cuando sea necesario pernos de las ruedas Juego de la direcci6n Revisar regularmente y reparar cuando sea necesario Acumulaci6n de hierba Retirar despues de cada uso Inspeccionar las Comprobar el desgaste de las cuch...

Page 58: ...lcanzar el nivel adecuado NO Io Ilene en exceso 6 Introduzca y apriete la varilla medidora 7 Limpie el combustible que se haya derramado IMPORTANTE Utilice Onicamente el aceite especificado para su uso en el manual del motor Varilla de medici6n del aceite del motor k Figura 12 OM5035 Cambio del filtro del aceite Cambie el filtro de aceite del motor inicialmente despu6s de las primeras 8 horas de u...

Page 59: ...e de que todas las conexiones de liquido hidrSulico est6n apretadas y en buen estado antes de aplicar presi6n al sistema UN LJQUIDO EXTRANO INYECTADO EN EL CUERPO puede producir gangrena Debe ser extraido quirQrgicamente en un periodo de pocas horas por un m6dico que est6 familiarizado con tipo de lesi6n PRECAUCION El motor debe estar parado las palancas de control de la direcci6n en posici6n de e...

Page 60: ...s de purga hasta eliminar todo el aire atrapado en el sistema hidrSulico Cuando la bomba se mueve hacia delante y hacia atrSs a velocidad normal y el aceite del dep6sito permanece a un nivel constante la operaci6n de purga ha terminado IMPORTANTE Las ruedas traseras giran ahora bajo potencia No las toque ni haga contacto con elias Si no giran despu6s de 2 3 ciclos pare inmediatamente Puede que hay...

Page 61: ...tal iLlame a un m6dico inmediatamente iEn caso de contacto interno NO induzca el v6mito IMPORTANTE NO realice una carga rSpida Si la carga es demasiado r_pida la bateria puede resultar da_ada o destruida Utilice SOLO un cargador autom_tico dise_ado para su bateria Siga SIEMPRE la informaci6n suministrada por el fabricante que acompa_a a la bateria P6ngase en contacto con el fabricante de la bateri...

Page 62: ...sita algOn ajuste afloje la contratuerca contra la horquilla 3 y mientras se aplica una ligera presi6n hacia atrSs sobre la palanca de control en movimiento gire la cabeza del perno de ajuste 4 en el sentido apropiado hasta que se centre la palanca 6 Mueva hacia arras la palanca de control y su61tela Esta palanca de control debe volver a una posici6n donde pueda moverse hacia fuera y bloquearse en...

Page 63: ... 20 abajo Figura 19 OE3305 8incronizacibn de la altura de corte Figura 20 PRECAUCION Pare el motor coloque las palancas de control de la direcci6n en posici6n de estacionamiento y quite la Ilave antes de realizar alguna operaci6n de mantenimiento o una reparaci6n en esta unidad NOTA Verifique que la plataforma est6 nivelada antes de sincronizar la altura de corte por dial con la altura de las cuch...

Page 64: ...a se cerrar8 a 1 3 a 1 2 de regulaci6n Con el motor apagado apriete a mano la vSIvula para eliminar el polvo y los residuos En condiciones de operaci6n con mucho polvo puede que haya que abrir la vSIvula cada 2 a 3 horas Quite la tapa del depurador de aire y realice una inspecci6n general de todo el conjunto Si est_ especialmente sucio o si aparece bien visible la suciedad acumulada en el interior...

Page 65: ...ndientemente del periodo de servicio Si observa algOn deterioro de los tubos de combustible o de las bridas c_mbielos Compruebe regularmente el filtro de combustible Si est_ atascado con suciedad o contaminado con agua c_mbielo El filtro de combustible no puede ser desmontado Si se atasca c_mbielo por uno nuevo 1 Estacione la m_quina en un 8rea bien ventilada 2 Deje que se enfrie 3 Comprima la man...

Page 66: ...rle quedarse a un lado del neum_tico cuando se inflan No se coloque frente los neum_ticos al inflarlos No suelde nunca ni caliente un neum_tico El calor puede hacer que se expanda el aire del interior y explotar Las operaciones de soldado pueden tambi6n debilitar o deformar estructuralmente la rueda Inspeccione visualmente los neum_ticos antes de cada uso No haga funcionar la m_quina con los neum_...

Page 67: ...ulo de 30 NO afilar de acuerdo a este esquema 2 ZZZZZZZZZZZZZI I DESECHE si mide m_s de 1 27 cm 1 2 pulg Afilar de acuerdo a este esquema 1 1 Filo cortante 3 Erosi6n del extractor 2 Esquina cuadrada de aire 4 Extractor de aire Figura 27 OE3361 IMPORTANTE Cuando se afllen cuchillas se debe afilar la misma cantidad en cada lado Unas cuchillas desequilibradas provocarSn unas vibraciones excesivas y p...

Page 68: ...s residuos similares pueden Ilegar a la parte superior de la plataforma y entrar en las poleas rompiendo las correas o sac_ndolas de las poleas AsegQrese de que no haya residuos en la zona que se va a cortar y que las protecciones de las correas est6n montadas antes de cortar Para garantizar una larga duraci6n de las correas utilice siempre correas originales Ariens Extraccibn e instalacibn de la ...

Page 69: ...gaste ruptura o da_o Mantenga todas las tuercas pernos y tornillos apretados adecuadamente y asegQrese de que la unidad est_ en buenas condiciones de funcionamiento Almacene la unidad en un 8rea fresca seca y protegida A LARGO PLAZO Limpie la unidad a fondo con un jab6n suave y agua a baja presi6n y lubrique consulte Programa de mantenimiento en la p_gina 19 Retoque todas las superficies que prese...

Page 70: ...con 3 una rectificadora Cuchillas desafiladas 1 Cuchillas montadas al rev6s 2 RPM de las cuchillas demasiado lentas 3 Plataforma de corte no nivelada 4 5 Los neum_ticos del cortac6sped aplastan la hierba 6 Velocidad de avance demasiado rSpida 7 Excesiva acumulaci6n de hierba bajo la plataforma 1 Cuchillas desafiladas 2 Cuchillas montadas al rev6s 3 Condiciones demasiado hQmedas para cortar 4 Exces...

Page 71: ...ser ajustadas 4 V_lvula de derivaci6n hidrSulica abierta 5 Correa de la bomba rota o desgastada 6 La correa de la bomba se ha salido de la polea 1 Rejilla de admisi6n de aire obstruida 2 Aletas de refrigeraci6n atascadas 1 El operador no est_ sentado en el asiento 2 Sistema de seguridad defectuoso 3 Fallo del cojinete del eje 4 Cuchillas bloqueadas con suciedad 1 Nivel de aceite bajo 2 Aceite dilu...

Page 72: ...oto 1 Las palancas de control de la direcci6n necesitan ser ajustadas 2 Fallo de la bomba hidrSulica 3 Fallo del motor de las ruedas 4 V_lvula de derivaci6n abierta 1 Las palancas de control de la direcci6n necesitan ser ajustadas 1 Las palancas de control de la direcci6n necesitan ser ajustadas 2 Fallo de la bomba hidrSulica 3 Fallo del motor de las ruedas 4 Neum_ticos a una presi6n incorrecta 1 ...

Page 73: ...dad Descripcion de pieza 00181071 1 Filtro de aire Primario 00181072 1 Filtro de aire Secundario 23hp Kawasaki 00191199 1 Correa transmisi6n de la bomba hidrSulica 00180273 1 Cable del estrangulador 00181296 1 Cable del acelerador 00180231 1 Amortiguador control de la direcci6n 00181073 1 Filtro de aceite del motor 00181060 1 Filtro de combustible 00181251 1 Dep6sito del combustible y tap6n 001809...

Page 74: ...raseros pulg cm Presion de neumaticos delanteros psi kPa Presion de neumaticos traseros psi kPa Plataforma de corte Elevador de la plataforma de corte Anchura de corte pulg cm Altura de corte pulg cm Incrementos de la altura de corte pulg cm 991800 ProZoom 2352S Kawasaki FH680V 41 2 675 991802 ProZoom 1948S Kawasaki FH580V 35 7 585 3600 Aire 10 14 5 4 6 4 Cero Freno mecanico integrado en motores d...

Page 75: ...uiera que ocurra antes Despu6s de estos dos a_os o 1000 horas de uso se cambiar_n sin cargo alguno las piezas necesarias para reparar cualquier defecto de material o de mano de obra del chasis principal no asi la mano de obra durante todo el tiempo que el comprador original sea el propietario del producto Garantia limitada de tres a_os sobre los ejes de la plataforma de corte Los ejes de la plataf...

Page 76: ...um_ticos en productos comerciales para c6sped y jardin de marca Ariens y Gravely Cualquier defecto que sea resultado del uso indebido alteraci6n montaje incorrecto negligencia o accidente que requiera reparacidn no est_ cubierto por esta garantia Esta garantia s61o se aplica a productos adquiridos en Estados Unidos incluyendo Puerto Rico y Canad Para el resto de paises p6ngase en contacto con el p...

Page 77: ... Street Brittion WI 54110 1072 920 756 2141 Fax 920 756 2407 www ariens com WARNING The engine exhaust from this product contains chemicals known to the State of California to cause cancer birth defects or other reproductive harm ...

Reviews: