background image


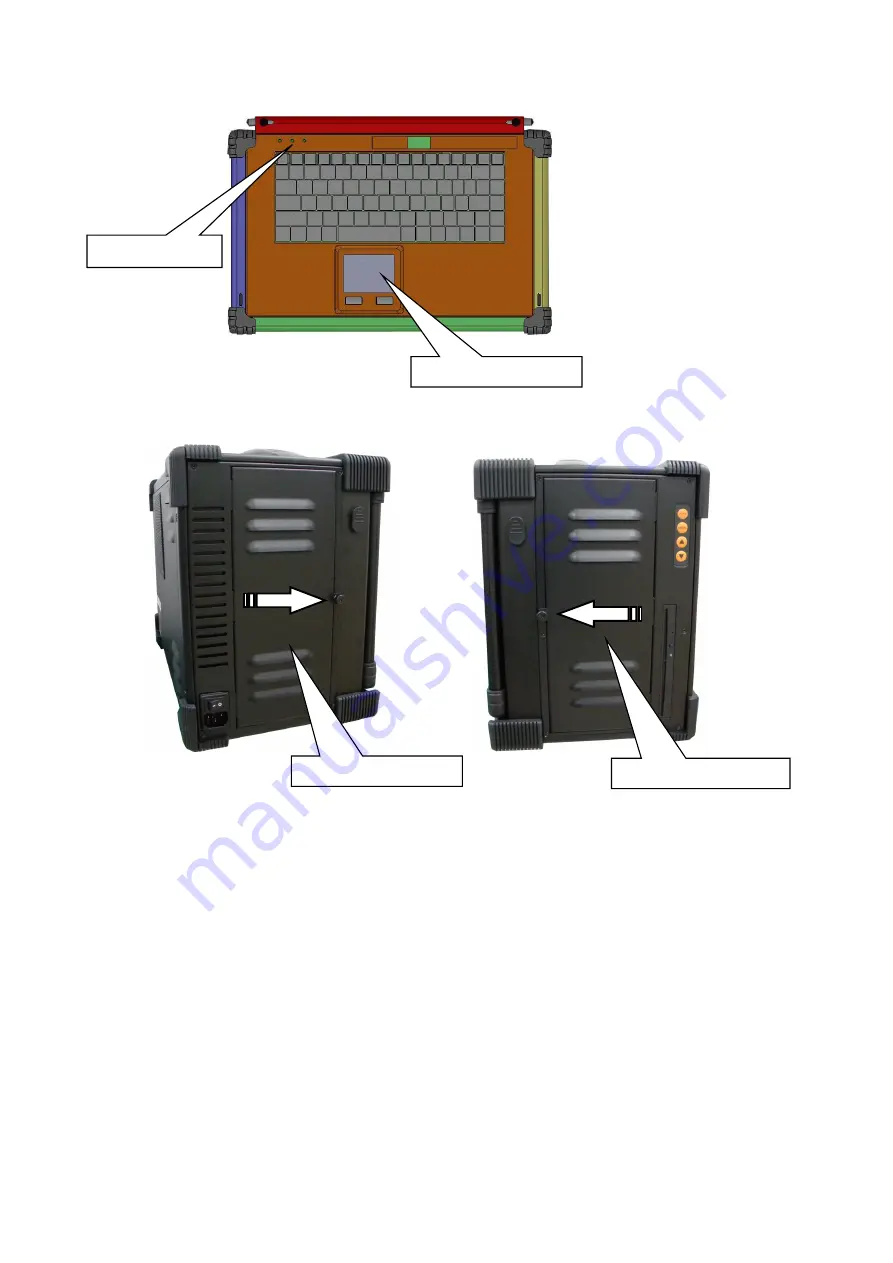
10. Keyboard and touchpad surface act as input for the system. 


11. Close the left side and right side dust cover to protect the ARX605 system. 


Keyboard LED 

To Button 

Left side dust cover 

Right side dust cover

Summary of Contents for ARX 605

Page 1: ...ARX 605 User Reference Manual ...

Page 2: ...ve bay One slim DVD ROM KB MS Integrated keyboard and touchpad RJ 45 connector Operating Life of Keys 8 million cycles Keyboard Layout CH FR GR KR RU SP UK US Power Supply 1U 400W 100 240VAC Power supply Auto switch Construction Rugged Aluminum Construction with shock absorbing rubber corners Dimension 422Wx 285Hx 227D mm Weight 12 kgs Carrying Case Padded carrying case with wheels Environmental F...

Page 3: ...605 Portable Computer Chassis 1 2 Carrying Case with wheels 1 3 User s Manual 1 4 Power Cord 1 5 VGA to VGA cable 180mm 1 6 DVI D to DVI D cable 180mm 1 7 USB to USB cable 180mm 1 8 Anti Static Bag 1 9 Standard Accessory Kits Carrying Case with Wheels ...

Page 4: ... Carrying case to manage portable PC with ease The ARX605 is a 5 slot 6U Compact PCI portable computer chassis It supports one system slot and 4 Compact PCI Peripheral slots The ARX605 provides 15 high brightness TFT LCD display with touch screen allows users to fully enjoy the beauty of true colors and easy to control and integrates foldable 87 keys multi languages keyboard and touchpad It is a p...

Page 5: ...eyboard 2 You have the option of leaving the keyboard attached to the chassis or they can be release independently from the chassis by pushing the two levers inward to release the lock 3 Connect the RJ 45 keyboard touchpad cable to the front bottom right corner of the chassis Make sure the pin direction is correct when inserting 2 0 Operation Press to release Lift up Lift up ...

Page 6: ...iewing comfort 5 Access the available 1 system slot for 6U CompactPCI controller and 4 peripheral slots on the right side of the chassis 6 There are USB DVI D and VGA connectors on the right side of the system slot 2 feet 6U CompactPCI controller slot 4 peripheral slots USB connector DVI D connector VGA connector ...

Page 7: ...DVI D port VGA to VGA cable 8 Connect the power cable into the power supply unit 9 Press the power switch located on the front panel of the chassis to power up the unit There have indicator LED lights for Power and LCD OSD and DVD ROM in the right side Press Once to Power On Power LED light LCD OSD manual Insert Power Cord DVD ROM ...

Page 8: ...Keyboard and touchpad surface act as input for the system 11 Close the left side and right side dust cover to protect the ARX605 system Keyboard LED Touchpad Button Left side dust cover Right side dust cover ...

Page 9: ...System Fails to power up 1 Check you power connection first 2 Check the main power switch is in the ON positions I If cold switch is available 3 Press the power button located on the machine 3 No display LCD 1 Check all the proper power up procedure has been taken 2 Hook up an external LCD to the VGA port to check if video is present 3 If video is present on external LCD check the internal LCD cab...

Reviews: