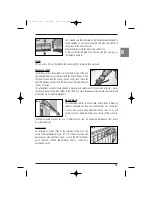
This allows you to steam iron a few garments, even when the boi-
ler tank is switched off.
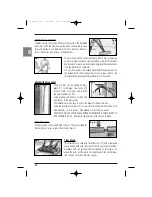
To remove the flexible pipe, press the two side tabs and pull, as
illustrated in figure U.
CAUTION!
Before putting the iron away after use, leave it to cool down com-
pletely.
REFILLING THE BOILER WHILE THE IRON IS IN USE
When the water is finished, by pressing the push button (22) or (33) or (34), the steam jet function will
be disengaged. The pressure gauge (27) shows the amount of steam inside the boiler tank.
If during use the steam gauge arrow shows the symbol, it means that the water in the boiler has been
used up.
To refill the boiler, proceed as follows:
a) switch off the appliance by operating switch (5)
b) press button (22) to expel any residual steam and button (34) using iron;
c) remove the plug from the mains socket;
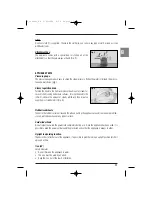
d) slightly unscrew the safety cap (2) and wait a few seconds until the hissing noise created by residual
steam stops before unscrewing it completely;
WAIT SOME MINUTES BEFORE REFILLING THE BOILER WITH WATER.
e)
Refill with water, adding it slowly at first to avoid puffs of steam
; we recommend waiting
at least 3 minutes after unplugging the appliance from the mains before pouring more water into the
boiler tank;
f) screw the safety cap on again tightly;
g) plug the power supply cable in again;
h) press the ON/OFF switch (5).
CLEANING AND MAINTENANCE
Always unplug the appliance before performing any cleaning or servicing operation. Before storing or
cleaning the appliance, allow it to cool down. To keep the appliance in full working order for many years,
remember to rinse out the boiler inside once a month in order to remove the limescale deposits. Do not
use vinegar or other decalcifiers.
AFTER USE
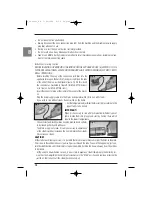
After you have finished cleaning or ironing, switch off the boiler tank and discharge all remaining steam
using the push button (22) or (33) or (34). When emptying out any water left in the boiler tank after use,
remember that this water remains very hot for a long period of time.
19
GB
Fig. U
2_interno_GB 3-06-2004 8:58 Pagina 19
Summary of Contents for 4210
Page 13: ...11 GB INSTRUCTIONS FOR USE 2_interno_GB 3 06 2004 8 58 Pagina 11 ...
Page 23: ...21 D GEBRAUCHSANLEITUNG 3_interno_D 3 06 2004 18 25 Pagina 21 ...
Page 33: ...31 F MODE D EMPLOI 4_interno_F 3 06 2004 9 03 Pagina 31 ...
Page 43: ...41 NL GEBRUIKSAANWIJZINGEN 5_interno_NL 3 06 2004 9 05 Pagina 41 ...
Page 53: ...51 E INSTRUCCIONES DE USO 6_interno_E 3 06 2004 9 07 Pagina 51 ...
Page 63: ...61 P INSTRUÇÕES DE UTILIZAÇÃO 7_interno_P 3 06 2004 9 09 Pagina 61 ...
Page 73: ...71 GR 8_interno_GR 3 06 2004 9 29 Pagina 71 ...
Page 83: ...81 KULLANMA KILAVUZU TR 9_interno_TR 3 06 2004 18 29 Pagina 81 ...
Page 84: ...82 TR 9_interno_TR 3 06 2004 18 29 Pagina 82 ...
Page 85: ...83 TR 9_interno_TR 3 06 2004 18 29 Pagina 83 ...
Page 86: ...84 A TR B 9_interno_TR 3 06 2004 18 29 Pagina 84 ...
Page 87: ...85 B TR C D E F 9_interno_TR 3 06 2004 18 29 Pagina 85 ...
Page 88: ...86 L1 L2 TR G H I M L N 9_interno_TR 3 06 2004 18 29 Pagina 86 ...
Page 89: ...87 G1 G1 TR O P Q 9_interno_TR 3 06 2004 18 29 Pagina 87 ...
Page 90: ...88 TR R S T 35 9_interno_TR 3 06 2004 18 29 Pagina 88 ...
Page 91: ...89 TR U 9_interno_TR 3 06 2004 18 29 Pagina 89 ...
Page 92: ...90 TR V Z 9_interno_TR 3 06 2004 18 29 Pagina 90 ...
Page 93: ...91 RUS 10_interno_RU 3 06 2004 18 31 Pagina 91 ...
Page 94: ...92 RUS 10_interno_RU 3 06 2004 18 31 Pagina 92 ...
Page 95: ...93 RUS 10_interno_RU 3 06 2004 18 31 Pagina 93 ...
Page 96: ...94 A RUS B 10_interno_RU 3 06 2004 18 31 Pagina 94 ...
Page 97: ...95 B RUS C D E F 10_interno_RU 3 06 2004 18 31 Pagina 95 ...
Page 98: ...96 L1 L2 RUS G H I M L N 10_interno_RU 3 06 2004 18 31 Pagina 96 ...
Page 99: ...97 G1 G1 RUS O P Q 10_interno_RU 3 06 2004 18 31 Pagina 97 ...
Page 100: ...98 RUS R S T 35 10_interno_RU 3 06 2004 18 31 Pagina 98 ...
Page 101: ...99 RUS U 10_interno_RU 3 06 2004 18 31 Pagina 99 ...
Page 102: ...100 RUS V Z 10_interno_RU 3 06 2004 18 31 Pagina 100 ...


