background image


E.2.2

  Installing a Power Supply

You must make space for installing the power supply by removing an existing one (

Removing a Power

Supply

).

1. Remove the replacement power supply from its packaging.
2. Slide the new power supply into the empty slot.
3. Slide the new power supply into the switch until the power supply is fully seated and the release

lever snaps into place (

Removing a Power Supply

).

4. Connect the power cord to the power supply.
5. Verify the LED(s) on the power supply.

Note:  The Power Supply status LED should be a steady green for normal operation.

6. Verify the new power supply operation by issuing the  

show environment power

 command.

switch#show environment power

The output of the command lists the power supplies in operation and includes the one you replaced.

E.3

 Fan Modules

Fan module requirements when hot swapping the modules.

Note:  Hot swap fans within 30 seconds to prevent the switch from overheating. Ensure that the
module you are replacing matches those already installed in the switch.

E.3.1

 Removing a Fan Module

The following steps are required when removing or replacing fans from a switch.

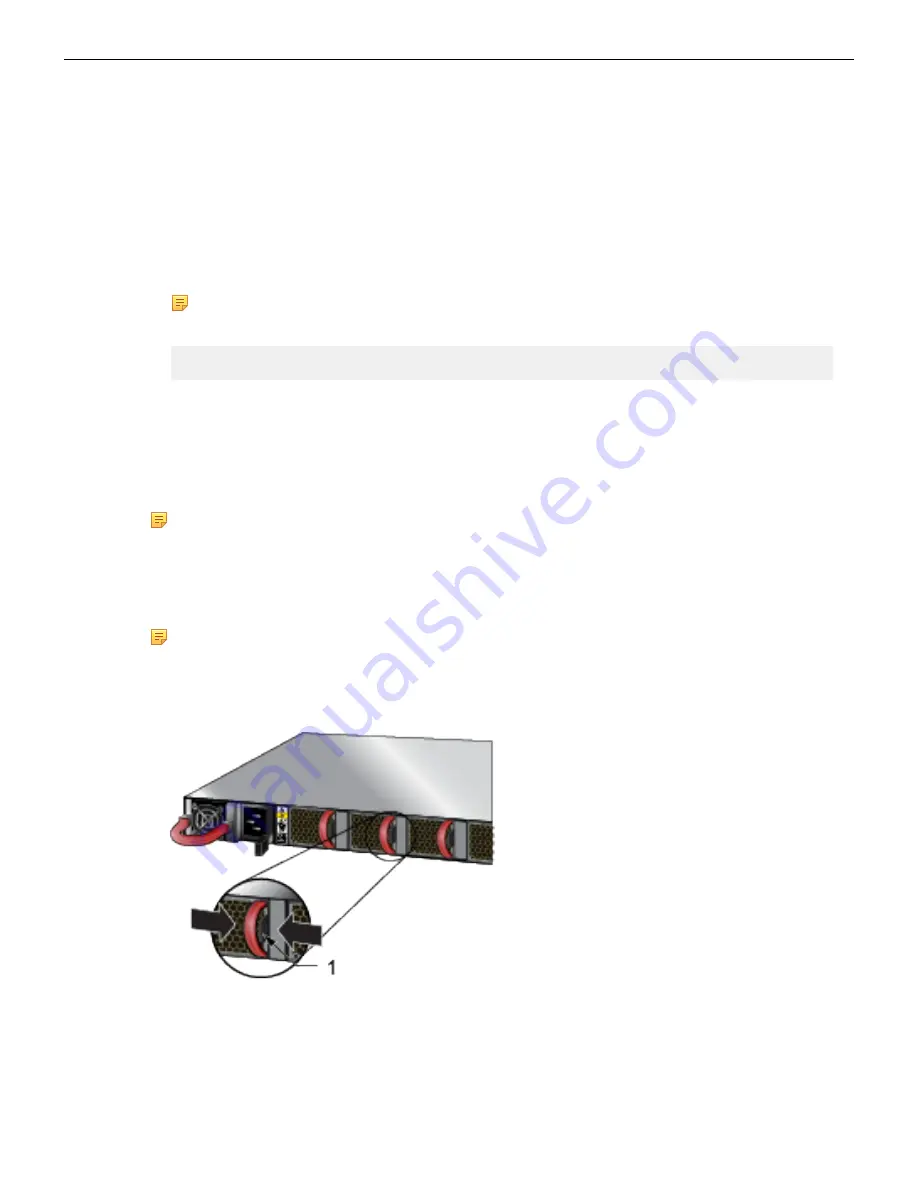
Note:  Only a representative fan module is shown in 

Figure 54: Removing Fan Module 

. For the

location of the fan modules on your switch, refer to 

Rear Panel

.

1. Ground yourself with an ESD wrist strap.
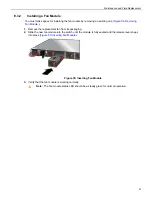
2. Push the fan module release lever and slide the fan module out of the switch (

Figure 54: Removing

Fan Module 

).

Figure 54: Removing Fan Module

1

Release lever

46

Summary of Contents for 7050 Series

Page 1: ......

Page 2: ......

Page 3: ...1 3 2 1 Attaching Mounting Brackets to the Four Post Chassis 12 3 2 2 Assembling the Rails onto the Equipment Rack 12 3 2 3 Attaching the Switch to the Rack 14 Chapter 4 Cabling the Switch 17 4 1 Grounding the Switch 17 4 2 Grounding Adapter Assembly DCS 7050SX3 48YC8 18 4 3 Connecting Power Cables 18 4 3 1 AC Power Supplies 19 4 3 2 DC Power Supplies 20 4 3 3 Connecting the DC Power Supply 21 4 4...

Page 4: ...ear Panel 43 Appendix E Maintenance and Field Replacement 45 E 1 Considerations 45 E 2 Power Supplies 45 E 2 1 Removing a Power Supply 45 E 2 2 Installing a Power Supply 46 E 3 Fan Modules 46 E 3 1 Removing a Fan Module 46 E 3 2 Installing a Fan Module 47 Appendix F Regulatory Model Numbers 49 Appendix G Taiwan RoHS Information 51 iv ...

Page 5: ...y accessories that may be packaged in the same box as the main unit Inspect the packing list and confirm that you received all listed items Compare the packing list with your purchase order Parts List provides a list of components included with the switch 1 3 Installation Process The following tasks are required to install and use the switch 1 Select and prepare the installation site Site Selectio...

Page 6: ... par l organisme compétent doivent être utilisées dans ce produit Important Ultimate disposal of this product should be handled in accordance with all national laws and regulations Aucune pièce réparable par l utilisateur à l intérieur Confiez toute réparation à un technicien qualifié 1 4 Safety Information Refer to the Arista Networks document Safety Information and Translated Safety Warnings ava...

Page 7: ... kg 20 1 lbs DCS 7050CX3 32S 48 3 x 4 4 x 40 6 cm 19 x 1 75 x 16 inches 8 8 kg 19 4 lbs DCS 7050SX3 48YC12 48 3 x 4 4 x 44 4 cm 19 x 1 75 x 17 5 inches 9 2 kg 20 3 lbs DCS 7050SX3 48YC8 48 3 x 4 4 x 46 8 cm 19 x 1 75 x 18 43 inches 1 9 5 kg 21 0 lbs DCS 7050CX3M 32S 48 3 x 4 4 x 55 9 cm 19 x 1 75 x 22 0 inches 12 0 kg 26 5 lbs DCS 7050TX3 48C8 48 3 x 4 4 x 46 7 cm 19 x 1 75 x 18 4 inches 9 4 kg 20...

Page 8: ...R 500AC PWR 500 DC DCS 7050TX 64 315 W 387 W PWR 500AC PWR 500 DC DCS 7050SX 64 140 W 220 W PWR 500AC PWR 500 DC DCS 7050TX 72 349 W 440 W PWR 500AC PWR 500 DC DCS 7050SX 72 144 W 276 W PWR 500AC PWR 500 DC DCS 7050TX 72Q 340 W 430 W PWR 500AC PWR 500 DC DCS 7050SX 72Q 144 W 261 W PWR 500AC PWR 500 DC DCS 7050TX 96 355 W 455 W PWR 500AC PWR 500 DC DCS 7050SX2 72Q 127 W 251 W PWR 500AC PWR 500 DC D...

Page 9: ...s indicate that they are air exit modules Verify that each module has the same airflow direction Base the switch orientation on the airflow direction of the modules to assure the air inlet is always oriented toward the cool aisle Air Exit modules orient the rear panel toward the hot aisle Air Inlet modules orient the rear panel toward the cool aisle If the airflow direction is not compatible with ...

Page 10: ...nnot fall onto the equipment and foreign objects are not drawn into the ventilation holes Verify these guidelines are met Clearance areas to the front and rear panels allow for unrestricted cabling All front and rear panel indicators can be easily read Power cords can reach from the power outlet to the connector on the rear panel Important All power connections must be removed to de energize the u...

Page 11: ... to avoid ESD damage when installing or servicing the switch Assemble or disassemble equipment only in a static free work area Use a conductive work surface such as an anti static mat to dissipate static charge Wear a conductive wrist strap to dissipate static charge accumulation Minimize handling of assemblies and components Keep replacement parts in their original static free packaging Remove al...

Page 12: ...8 ...

Page 13: ... to the chassis then attach the brackets to the rack posts Two post accessory kits include the following two post mounting parts 2 three hole mounting brackets Each chassis side has attachment pins that align with bracket holes Pin orientation is symmetric and equidistant supporting bracket placements where the flange is flush with the front switch panel flush with the rear panel or not flush with...

Page 14: ...ition 2 Place the bracket flush on the chassis with attachment pins protruding through key openings 3 Slide the bracket toward the front flange until the bracket clip locks with an audible click To remove the mounting bracket from the chassis lift the front edge of the mounting bracket clip with a flathead screwdriver and slide the bracket away from the front flange opposite from the installation ...

Page 15: ...hment pins that align with bracket holes Pin orientation is symmetric and equidistant supporting bracket placements where the flange is flush with the front switch panel flush with the rear panel or not flush with either panel Each bracket hole includes a key opening for placing the bracket flush with the chassis and then locking it into place Important Attachment pins must engage at least five of...

Page 16: ...lip locks with an audible click To remove the mounting bracket from the chassis lift the front edge of the mounting bracket clip with a flathead screwdriver and slide the bracket away from the front flange opposite from the installation direction 3 2 2 Assembling the Rails onto the Equipment Rack Rail rods and rail slides assemble into two identical rails Each rail connects a front post to a rear ...

Page 17: ... Figure 10 Assembling the Rails 1 Rail slide 4 Rail assembled 2 Rail rod 3 Rack plugs 2 Attach rail to the right rear rack post by inserting rod end rack plugs into post slots Attaching the Rails Detail A The slide assembly must be inside the right posts relative to the left rack posts If the rack plugs were previously removed use bolts to attach the rail to the rack 3 Attach the slide end of the ...

Page 18: ...1 Lift the switch into the rack and insert the mounting brackets into the slide rails Figure 12 Inserting the Switch onto the Rails 2 Slide the switch on the rails toward the rear posts until the mounting bracket flanges are flush with the rail flanges attached to the rack posts 3 Attach the bracket flanges to the rack post using the quick release thumb screws supplied with the brackets Figure 13 ...

Page 19: ...Rack Mounting the Switch Figure 13 Attaching the Switch to the Rack Posts After completing the four post rack mount proceed to Cabling the Switch 15 ...

Page 20: ...16 ...

Page 21: ...ght next to PS2 that warns about 1 min Figure 16 Earth Grounding Adapter for DCS 7050SX3 48YC8 displays the location of the grounding assembly on the rear panel for DCS 7050SX3 48YC8 Important Grounding wires and grounding lugs M4 x 0 7 are not supplied Wire size should meet local and national installation requirements Commercially available 6 AWG wire is recommended for installations in the U S À...

Page 22: ...uts 10 32 Serrated Flange stainless steel 1x Grounding lug Copper 2 hole 6 AWG straight barrel 2 Insert the grounding adapter through the holes in the grounding bracket 3 Insert the ground lug on to the grounding adapter studs and fasten using the hex nuts to form the grounding assembly 4 With the chassis on its top on a flat surface attach the grounding assembly to the chassis using the flat head...

Page 23: ...nd wires from the power supplies Important This equipment must be grounded Never defeat the ground conductor Cet équipement doit être mis à la terre Ne jamais modifier le conducteur de terre Important This unit requires overcurrent protection Cet appareil requiert une protection contre les surintensités 4 3 1 AC Power Supplies The following AC power supplies are supported PWR 500AC PWR 511 AC PWR ...

Page 24: ... for the PSUs 4 3 2 DC Power Supplies The following DC power supplies are supported Figure 20 PWR 500 DC DC Power Supplies displays PWR 500 DC DC power supply PWR 500 DC PWR 511 DC PWR 1011 DC RED Note Handle color indicates airflow direction for all PSUs 1 Power supply status LED 3 Battery Return 2 48V 4 Protective Earth Figure 20 PWR 500 DC DC Power Supplies Figure 21 PWR 1011 DC DC Power Suppli...

Page 25: ...national requirements and electrical codes Use only copper wire Le calibre du fil doit être conforme aux exigences locales et nationales et les codes électriques Utiliser du fil de cuivre Important Apply ground connection to the switch first during installation and remove last when removing power Appliquer connexion à la terre à l interrupteur premier lors de l installation et de supprimer la dern...

Page 26: ...ervicing the circuits Turn off the power line circuits or remove the fuses Assurez vous de pouvoir retirer des circuits en courant continu avant d effectuer toute action d installation Localiser les disjoncteurs ou fusibles sur les lignes électriques DC entretien des circuits Mettez hors tension le circuit ligne ou retirer les fusibles Important Wire size must comply with local and national requir...

Page 27: ... RJ 45 to DB 9 Connections RJ 45 DB 9 RJ 45 DB 9 RTS 1 8 CTS GND 5 5 GND DTR 2 6 DSR RXD 6 3 TXD TXD 3 2 RXD DSR 7 4 DTR GND 4 5 GND CTS 8 7 RTS Note RJ 45 to DB 9 connections For models with a console management port on the rear panel RJ 45 pin 1 RTS is connected to RJ 45 pin 8 CTS RJ 45 pin 2 DTR and RJ 45 pin 7 DSR are not electrically connected to any signal Figure 22 Console Management and US...

Page 28: ...No flow control 1 stop bit No parity bits 8 data bits Ethernet Management Port Connect to 10 100 1000 management network with RJ 45 Ethernet cable USB Port The USB port may be used for software or configuration updates CAUTION Excessive bending can damage interface cables especially optical cables Flexion excessive peut endommager les câbles d interface notamment des câbles optiques 24 ...

Page 29: ... Management Cables As the switch boots without a startup config file it displays the following through the console The device is in Zero Touch Provisioning mode and is attempting to download the startup config from a remote system The device will not be fully functional until either a valid startup config is downloaded from a remote system or Zero Touch Provisioning is cancelled To cancel Zero Tou...

Page 30: ...Save the configuration by typing write memory or copy running config startup config localhost copy running config startup config When the management port IP address is configured use this command to access the switch from a host using the address configured in Step 9 ssh admin 192 0 2 8 Refer to the Arista Networks User Manual for complete switch configuration information 26 ...

Page 31: ...atus A 1 1 Switch Indicators The front panel LEDs are labeled either as in Figure 23 System Status Indicators or as in Figure 24 System Status Indicators Check your device for the specific method utilized Figure 23 System Status Indicators 1 System status LED 3 Power supply 1 status LED 2 Fan status LED 4 Power supply 2 status LED Figure 24 System Status Indicators 1 System status LED 3 Power supp...

Page 32: ... It is also amber when a PSU is completely removed or has a stuck fan rotor Fan Status LED Red Two or more fans any combination of fan modules or PSU fans are disconnected or malfunctioning The switch will automatically execute a graceful shutdown shortly Green PSU is functioning and fully operational AC is present Aux output is ON and Main output is ON PSU 1 2 Status LED Red PSU has been removed ...

Page 33: ...ule status LEDs are on the fan modules as displayed in Figure 26 Fan Status LED Figure 26 Fan Status LED 1 Fan module status LED Note Handle or bezel color indicates airflow direction Table 9 Fan Status LED States Rear provides status conditions that correspond to fan status LED states Table 9 Fan Status LED States Rear LED State Status Off The fan module is not detected If it is inserted it may n...

Page 34: ...WR 500AC F PWR 500AC R PWR 511 AC RED PWR 511 AC Blue Input power present Normal operation Green Green Input power present Power Supply fault Yellow Amber Orange Yellow No Input power Supply installed in chassis Off Off Input power present Supply not installed in chassis Green Green The DC Power Supply Status LEDs are on the power supply modules as displayed for a representative PSU in Figure 28 D...

Page 35: ...Blue Input power present Normal operation Green Green Input power present Power Supply fault Blinking Yellow Blinking Yellow No Input power Supply installed in chassis Off Off Input power present Supply not installed in chassis Blinking Yellow Blinking Yellow Note You can narrow down the error condition by logging in to the switch to view the specific device state Refer to the Arista User Manual s...

Page 36: ...32 ...

Page 37: ...switch accessory kit B 1 Rack Mount Parts This section discusses the parts and accessories required for the two post and four post installation methods B 1 1 Two Post Rack Mount Parts Figure 29 Two Post Rack Mount Parts 1 Two post rack mount parts B 1 2 Four Post Rack Mount Parts Figure 30 Four Post Rack Mount Parts 1 Rail slide 2 Rail rod 3 Rack plugs detail 4 Rail assembled 33 ...

Page 38: ... 45 Patch Panel Cable 1 RJ 45 to DB9 Adapter Cable Warning All provided power cables are for use only with Arista products B 3 Ground Extender Kit Optional This section describes the optional ground extender kit for NEBS compliance SKU Description KIT GND EXT 1RU 1 Ground extender kit for NEBS compliance 1 Available only for certain devices 34 ...

Page 39: ...on have ports that are grouped together to provide flexibility in configuring Ethernet speeds for the individual members of the group The default configuration supports the maximum possible Ethernet speed and or other lower allowable speeds by the individual members of the group Care must be taken when inserting optics for lower speed connectivity as further configuration may be required for the p...

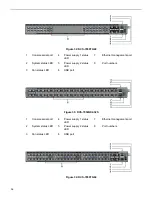
Page 40: ...stem status LED 5 Power supply 2 status LED 8 Port numbers 3 Fan status LED 6 USB port Figure 33 DCS 7050QX2 32S 1 Console serial port 4 Power supply 1 status LED 7 Ethernet management port 2 System status LED 5 Power supply 2 status LED 8 Port numbers 3 Fan status LED 6 USB port Figure 34 DCS 7050TX 64 36 ...

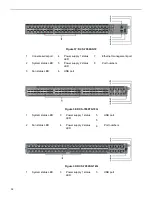
Page 41: ...gure 35 DCS 7050SX 64 1 Console serial port 4 Power supply 1 status LED 7 Ethernet management port 2 System status LED 5 Power supply 2 status LED 8 Port numbers 3 Fan status LED 6 USB port Figure 36 DCS 7050TX 72 1 Console serial port 4 Power supply 1 status LED 7 Ethernet management port 2 System status LED 5 Power supply 2 status LED 8 Port numbers 3 Fan status LED 6 USB port 37 ...

Page 42: ...tatus LED 5 Power supply 2 status LED 8 Port numbers 3 Fan status LED 6 USB port Figure 38 DCS 7050TX 72Q 1 System status LED 3 Power supply 1 status LED 5 5 USB port 2 Fan status LED 4 Power supply 2 status LED 6 Port numbers Figure 39 DCS 7050SX 72Q 1 System status LED 3 Power supply 1 status LED 5 USB port 38 ...

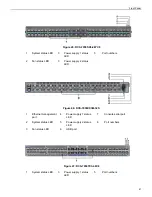
Page 43: ... 4 Power supply 1 status LED 7 Ethernet management port 2 System status LED 5 Power supply 2 status LED 8 Port numbers 3 Fan status LED 6 USB port Figure 41 DCS 7050SX2 72Q 1 System status LED 3 Power supply 1 status LED 5 USB port 2 Fan status LED 4 Power supply 2 status LED 56 Port numbers Figure 42 DCS 7050SX 96 39 ...

Page 44: ...USB port Figure 43 DCS 7050CX3 32S 1 Ethernet management port 4 Power supply 1 status LED 7 Console serial port 2 System status LED 5 Power supply 2 status LED 8 Port numbers 3 Fan status LED 6 USB port Figure 44 DCS 7050SX3 48YC12 1 System status LED 3 Power supply 1 status LED 5 Port numbers 2 Fan status LED 4 Power supply 2 status LED 6 Port speed group 40 ...

Page 45: ...ED 3 Power supply 2 status LED Figure 46 DCS 7050CX3M 32S 1 Ethernet management port 4 Power supply 1 status LED 7 Console serial port 2 System status LED 5 Power supply 2 status LED 8 Port numbers 3 Fan status LED 6 USB port Figure 47 DCS 7050TX3 48C8 1 System status LED 3 Power supply 1 status LED 5 Port numbers 41 ...

Page 46: ...2 Fan status LED 4 Power supply 2 status LED Figure 48 DCS 7050SX3 48C8 1 System status LED 3 Power supply 1 status LED 5 Port numbers 2 Fan status LED 4 Power supply 2 status LED 42 ...

Page 47: ...nt 1 Power supply module 1 5 Fan module 4 9 Fan module 3 status LED 2 Fan module 1 6 Power supply module 2 10 Fan module 2 status LED 3 Fan module 2 7 PSU module 2 status LED 11 Fan module 1 status LED 4 Fan module 3 8 Fan module 4 status LED 12 PSU module 1 status LED Figure 50 Rear Panel for Models with Management Ports in the Rear 1 Power supply module 1 6 Fan module 3 11 Fan module 3 status LE...

Page 48: ...zel and handle color indicate airflow direction Figure 52 Rear Panel for Models with Management Ports in the Rear and three Dual fan Modules 1 Power supply module 1 5 Fan module 1 status LED 9 Fan module 3 status LED 2 Power supply module 1 status LED 6 Fan module 2 release 10 Power supply module 2 3 Management ports 7 Fan module 2 status LED 11 Power supply module 2 status LED 4 Fan module 1 rele...

Page 49: ...roduct documentation Note Descriptions for the removal and replacement of power supplies and fans are for a representative power supply or fan Locations of status indicator LEDs may differ Refer to the front and rear panel illustrations of your device to locate the appropriate LED E 2 Power Supplies The following steps are required when removing and replacing power supplies from a switch Note Only...

Page 50: ...er command switch show environment power The output of the command lists the power supplies in operation and includes the one you replaced E 3 Fan Modules Fan module requirements when hot swapping the modules Note Hot swap fans within 30 seconds to prevent the switch from overheating Ensure that the module you are replacing matches those already installed in the switch E 3 1 Removing a Fan Module ...

Page 51: ...an Module 1 Remove the replacement fan from its packaging 2 Slide the new fan module into the switch until the module is fully seated and the release lever snaps into place Figure 55 Inserting Fan Module Figure 55 Inserting Fan Module 3 Verify that the fan module is working normally Note The fan module status LED should be a steady green for normal operation 47 ...

Page 52: ...48 ...

Page 53: ... for the switches described in this document Table 12 Regulatory Model Numbers and Product Numbers Regulatory Model Number RMN Product Number s AN1501 DCS 7050SX 72Q DCS 7050SX2 72Q AN1502 AN1704 DCS 7050SX3 48YC12 AN1705 DCS 7050CX3 32S AN1710 DCS 7050SX3 48YC8 DCS 7050SX3 48C8 AN1729 DCS 7050CX3M 32S AN1727 DCS 7050TX3 48C8 49 ...

Page 54: ...50 ...

Page 55: ...endix G Taiwan RoHS Information This appendix provides Taiwan RoHS information for switches covered by this guide For Taiwan BSMI RoHS Table go to https www arista com assets data pdf AristaBSMIRoHS pdf 51 ...

Page 56: ...52 ...

Reviews: