Chapter 3: Rack Mounting the Switch
Four-Post Rack Mount
Quick Start Guide: 720XP Series 2 RU Cognitive Campus Switches
11
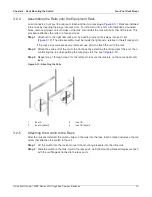
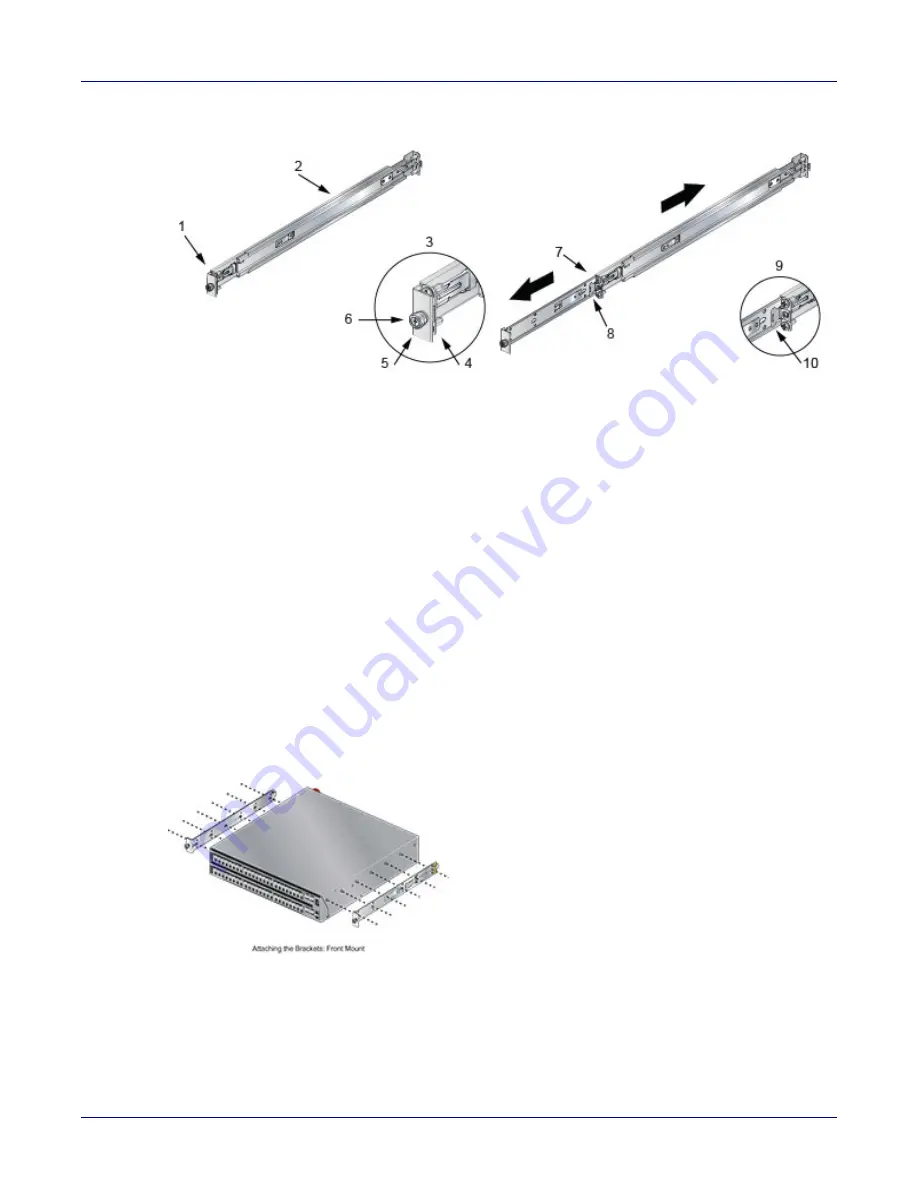
Figure 3-8: Extracting the Bracket-Rail Assembly
Step 2
While pressing the locking clip on the bracket (
), resume pulling the bracket from
the rail until the separation is complete.
Step 3
Repeat the procedure for the other assembly.
3.2.2
Attaching Mounting Brackets to the Chassis
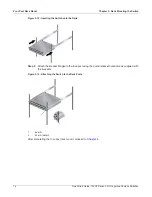
displays the front bracket alignment for mounting the switch into a four-post rack.
This procedure attaches mounting brackets to the switch chassis as depicted by
.
Step 1
Align the mounting brackets with the attachment pins to obtain the desired mounting position.
Step 2
Place the bracket flush on the chassis with attachment pins protruding through key-openings.
Step 3
Slide the bracket toward the front flange until the bracket clip locks with an audible click.
Figure 3-9: Front Bracket Alignment
To remove the mounting bracket from the chassis, lift the front edge of the mounting bracket clip with a
flathead screwdriver and slide the bracket away from the front flange (opposite from the installation
direction).
1
Inset A
5
Bracket Flange
9
Inset B (detail)
2
Rail (Grip here)
6
Thumb Screw
10
Locking Clip
3
Inset A (detail)
7
Inset B
4
Rail Flange
8
Locking Clip


