Chapter 3: Rack Mounting the Switch
Four-Post Rack Mount
Quick Start Guide: 720XP Series 2 RU Cognitive Campus Switches
13
3.2.4
Assembling the Rails onto the Equipment Rack
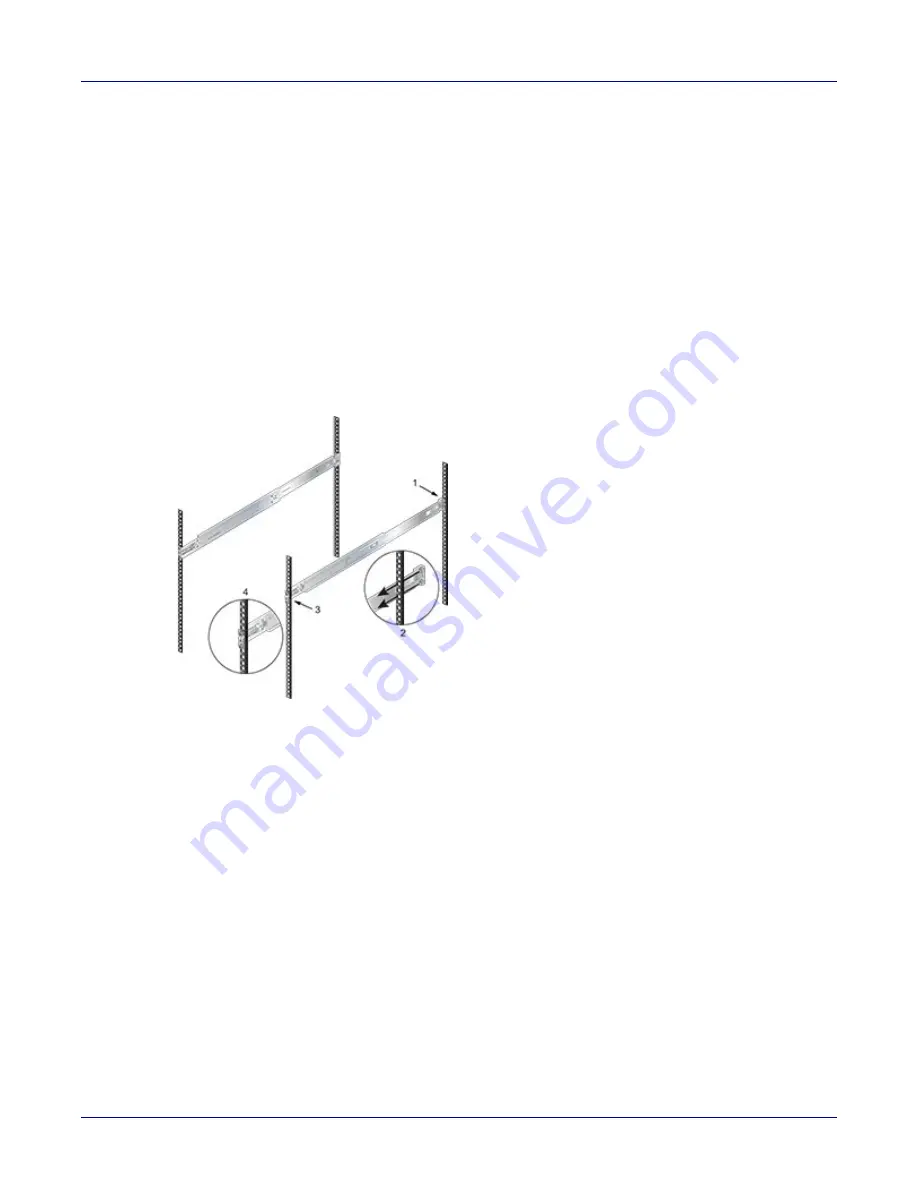
A rail connects a front post to a rear post. Each end has two rack plugs (
into a rack by inserting the plugs into rack slots. To install rails into posts with threaded or rounded
holes, remove all plugs on both sides of the rails, then install the rails with bolts that fit the rack. This
procedure attaches the rails to a four-post rack:
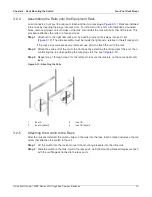
Step 1
Attach rail to the right rear rack post by inserting rod-end rack plugs into post slots
(
). The slide assembly must be inside the right posts, relative to the left rack posts.
If the rack plugs were previously removed, use bolts to attach the rail to the rack.
Step 2
Attach the slide end of the rail to the front post by extending the rail end past the post, then
contracting the rail while guiding the rack plugs into the post (
).
Step 3
Repeat step 1 through step 2 for the left posts. Ensure the rails are on the same horizontal
level.
Figure 3-12: Attaching the Rails
3.2.5
Attaching the Switch to the Rack
After the rails are installed, the switch slides on the rails into the rack. Each bracket includes a thumb
screw that attaches the switch to the rail.
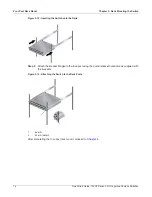
Step 1
Lift the switch into the rack and insert the mounting brackets into the slide rails.
Step 2
Slide the switch on the rails, toward the rear posts, until the mounting bracket flanges are flush
with the rail flanges attached to the rack posts.
1
Inset A
3
Inset B
2
Inset A (detail)
4
Inset B (detail)


